Q: We need a way to convert images to pdf files. Can this be done using Limagito File Mover.
A: Yes this is possible using our Image as Destination option (with recent versions of Limagito File Mover, v2025.2.16.0 and up)
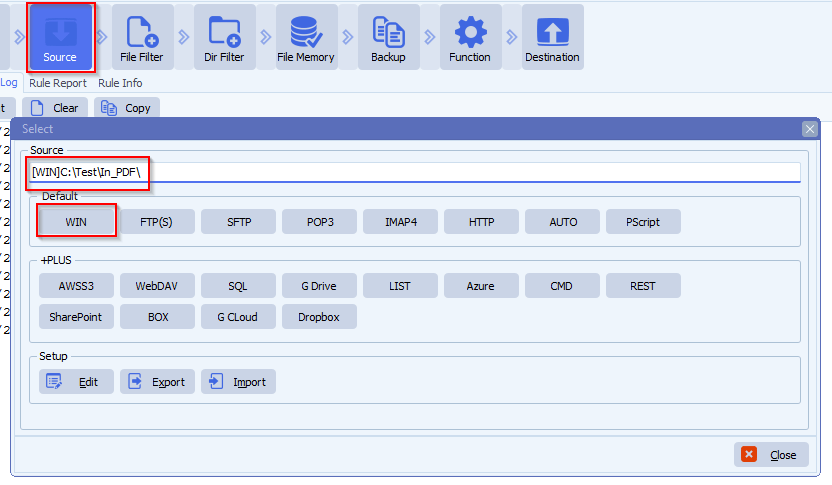
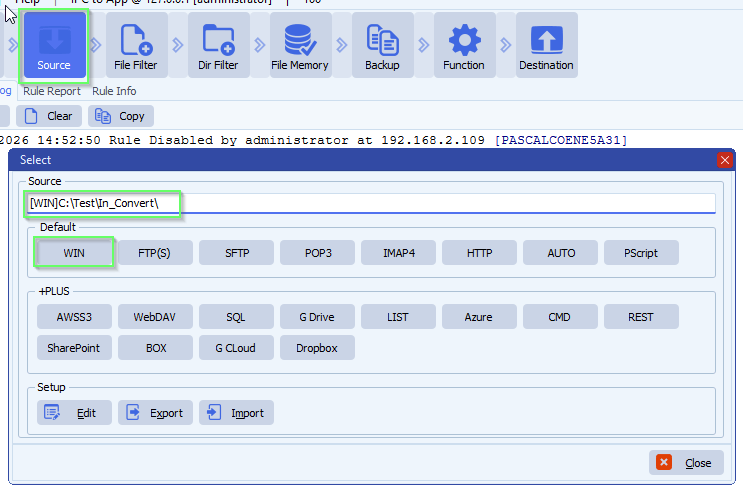
- In our example we used a Windows Folder as Source. In this folder we’ll be able to drop almost any kind of image file type and it will be converted to pdf.
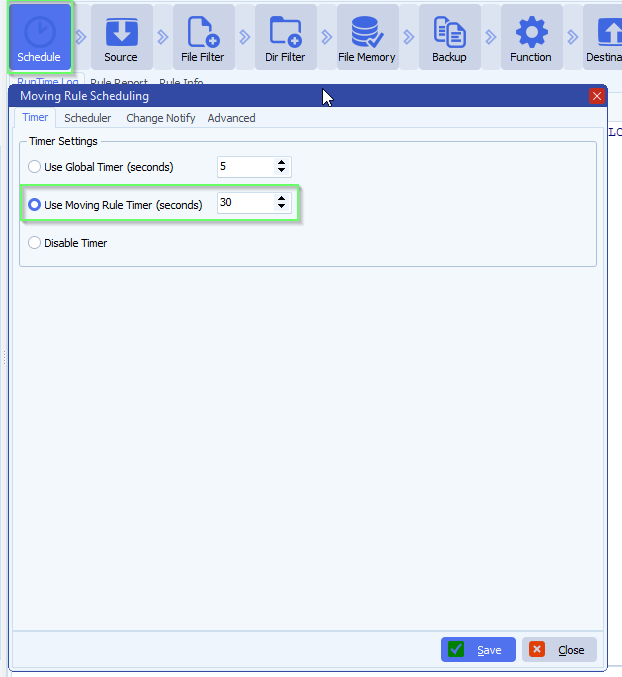
- We’ve set a timer to scan this folder every 30 seconds:
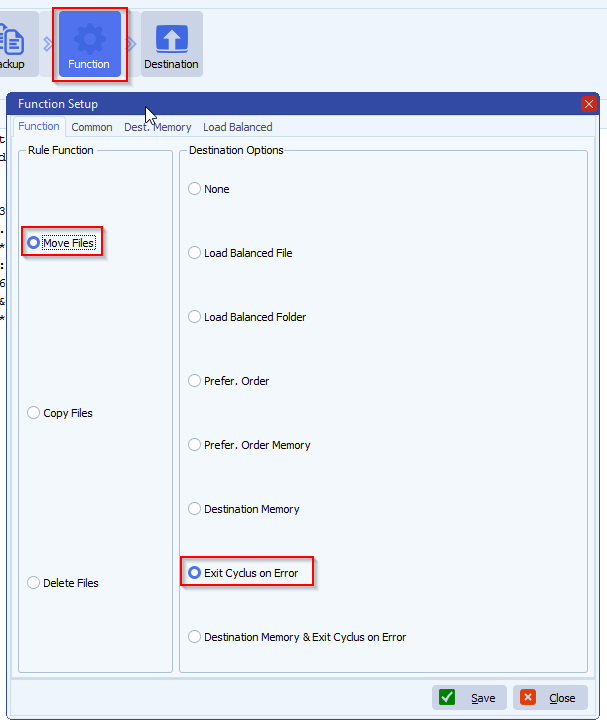
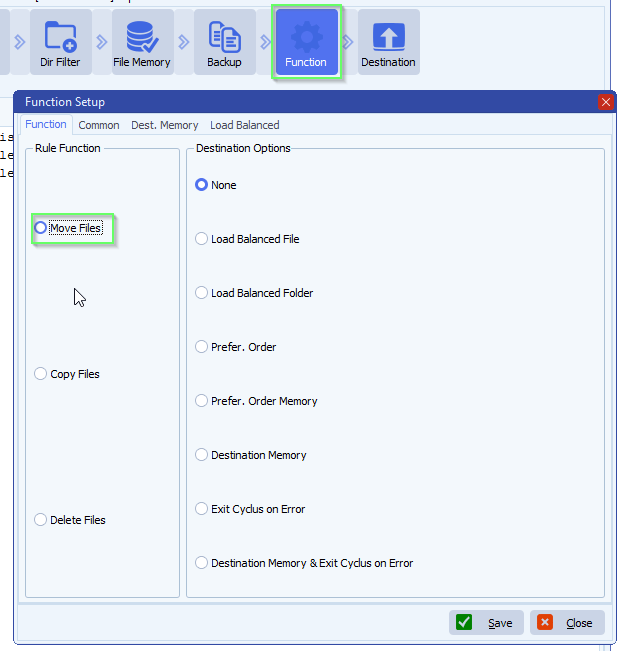
- Function is set to Move, so after a successful conversion the source file will be deleted. If you want to keep the source files, leave the function to ‘Copy Files’ and enable our ‘File Memory’ option to prevent us converting the same source file over and over again.
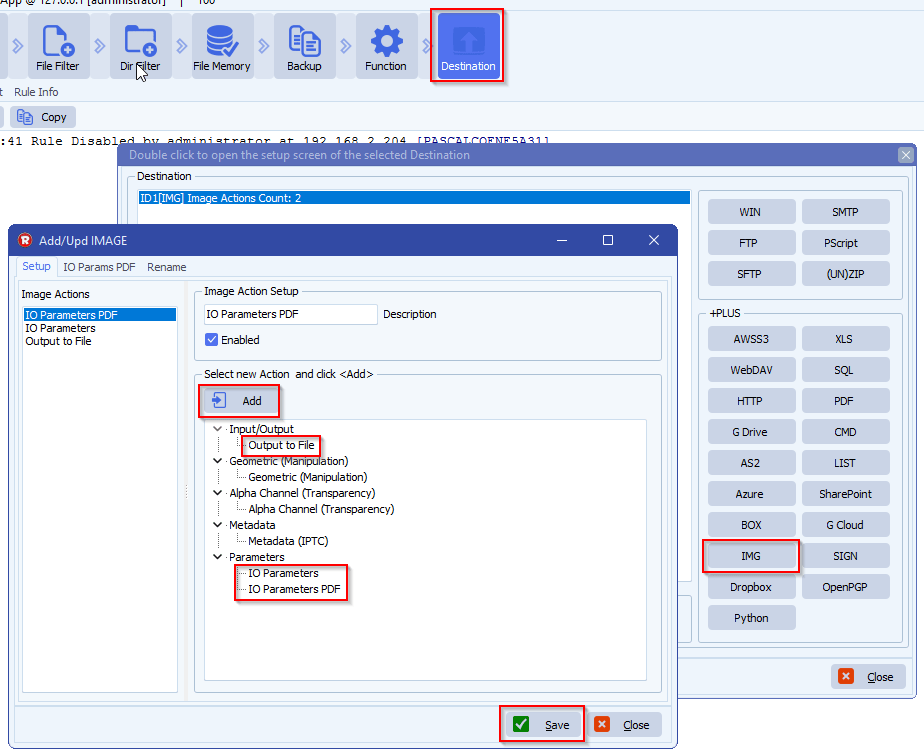
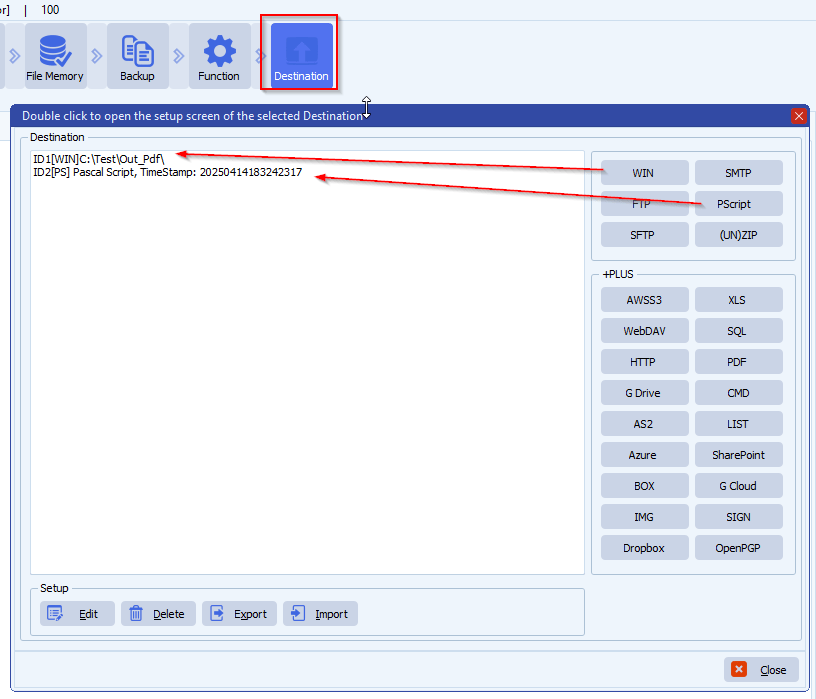
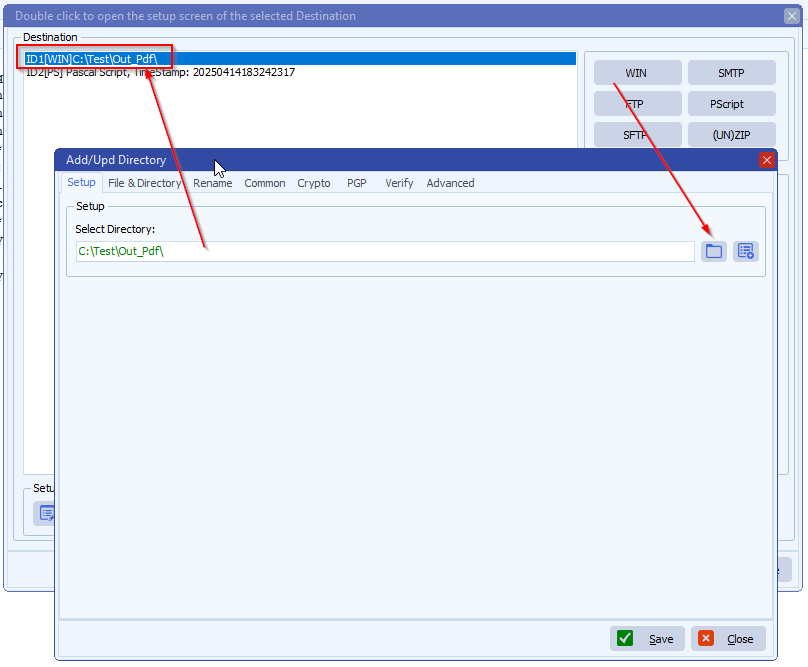
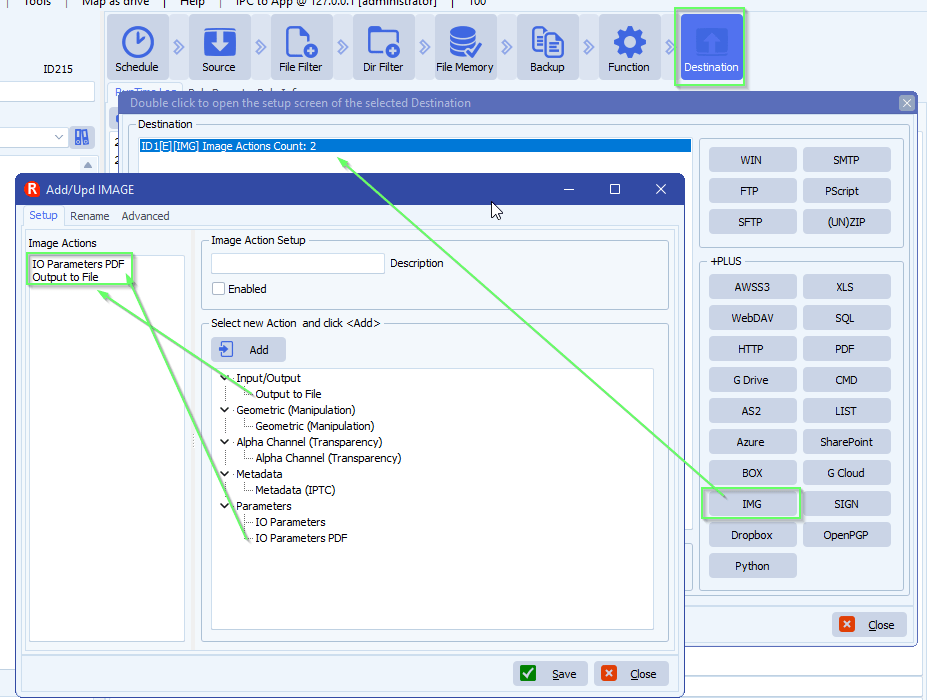
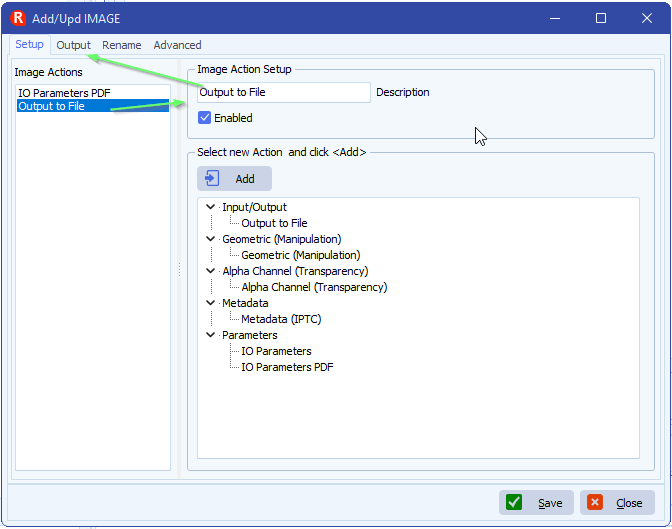
- As Destination we added our [IMG] option
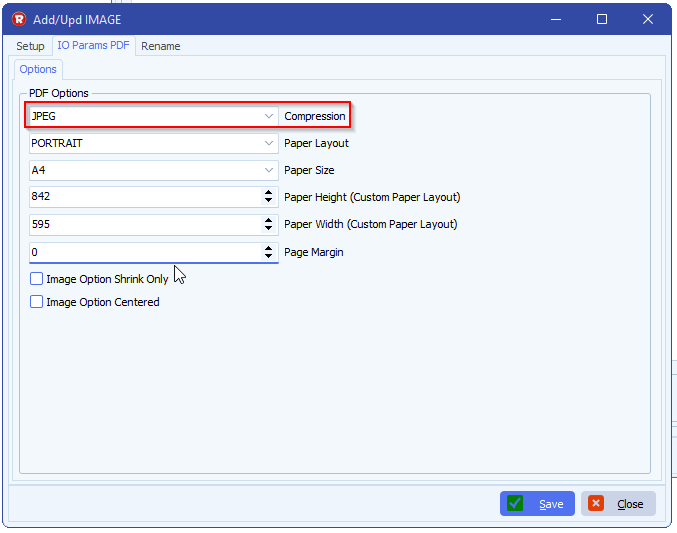
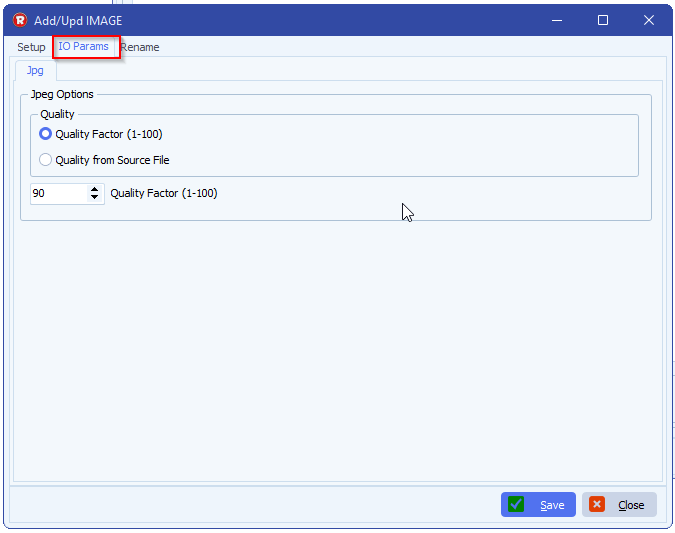
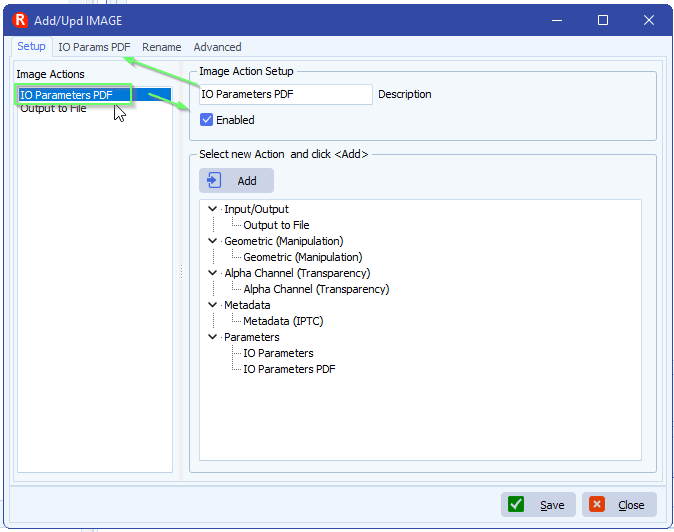
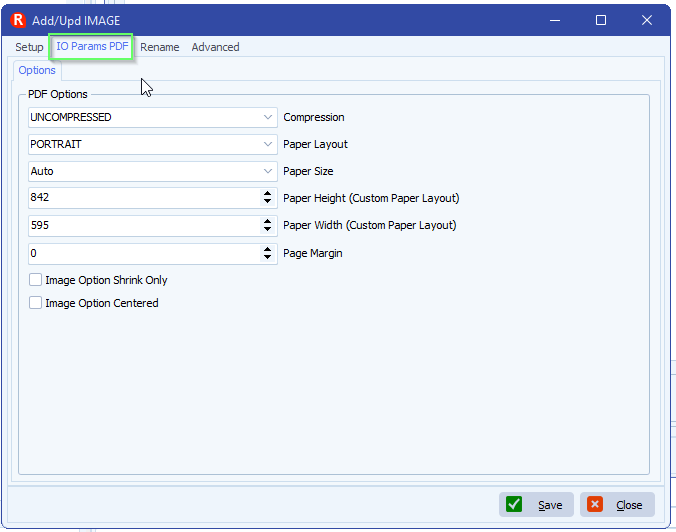
- IO Parameters PDF setup:
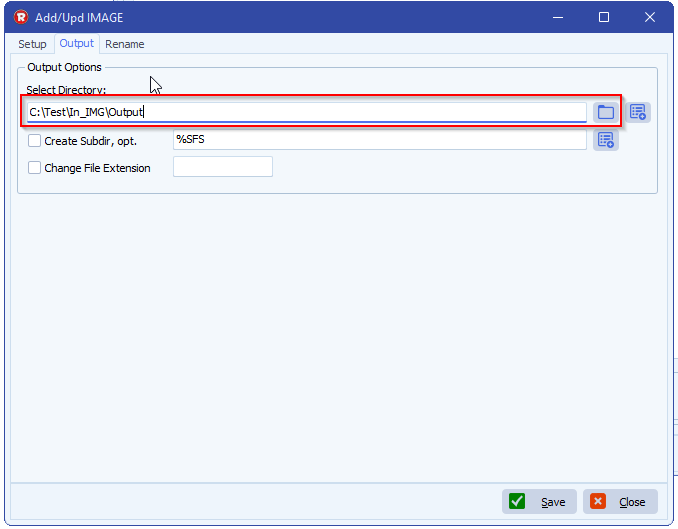
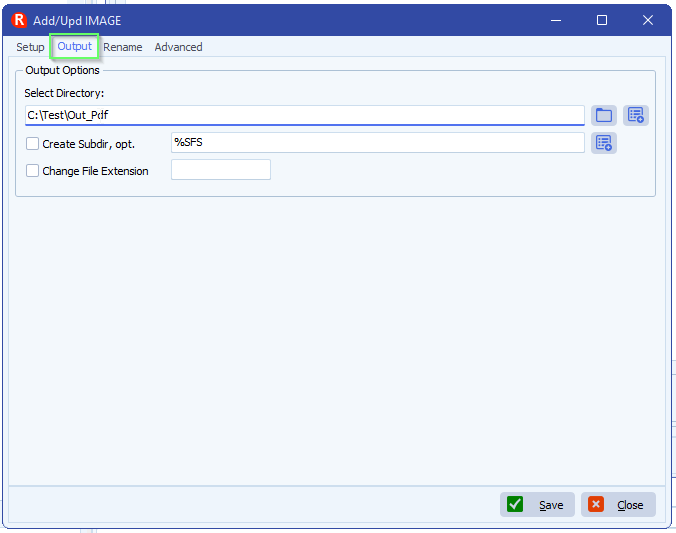
- Output to File setup:
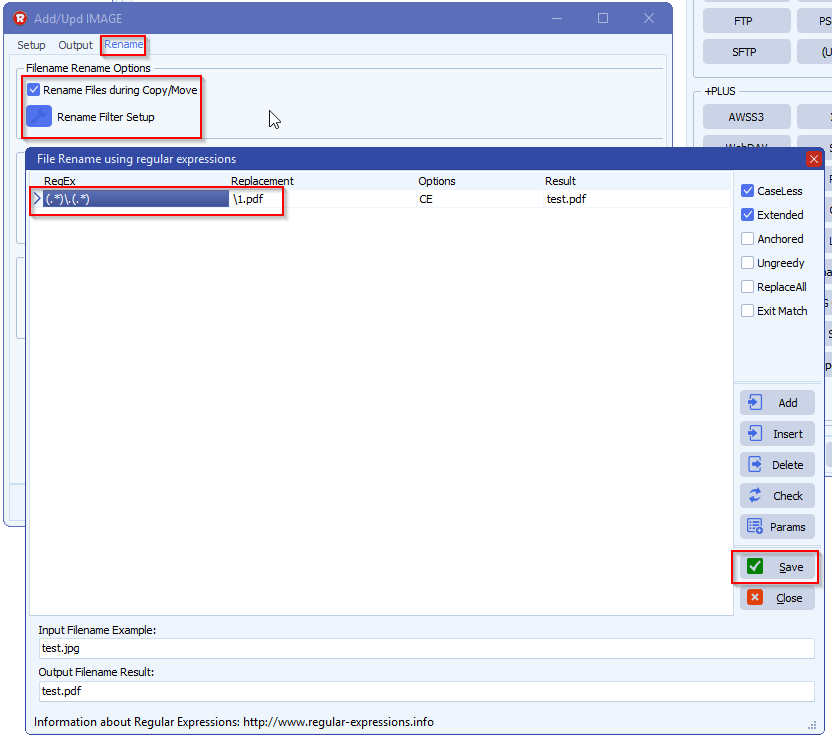
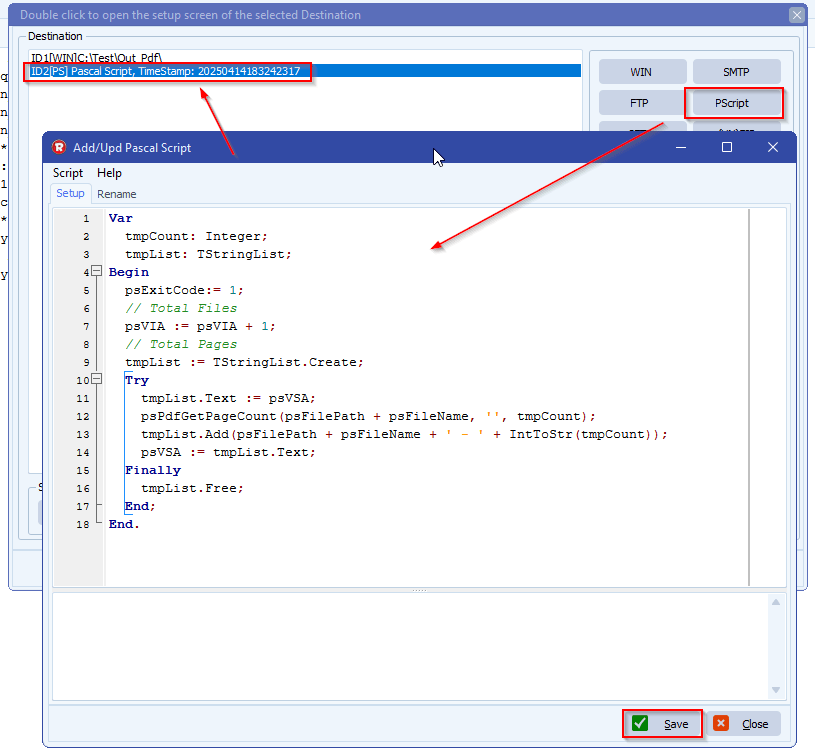
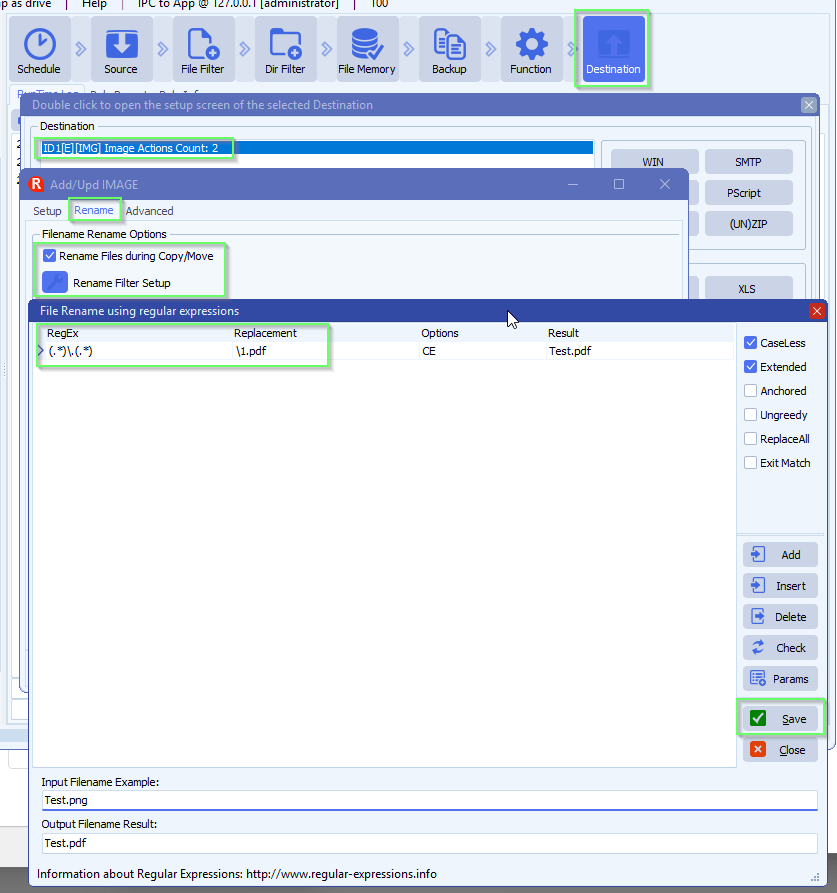
- The most import setup item here is the IMG Destination renaming setup. The renaming determines the conversion type. In our example we are going to rename all source image files to .pdf and this will trigger the internal conversion mechanism. So if you would rename for example to .png instead, then all source images file will be converted to png files.
- RegEx: (.*)\.(.*)
- Replacement: \1.pdf
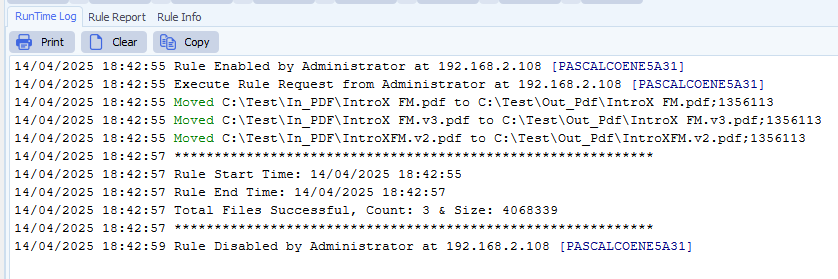
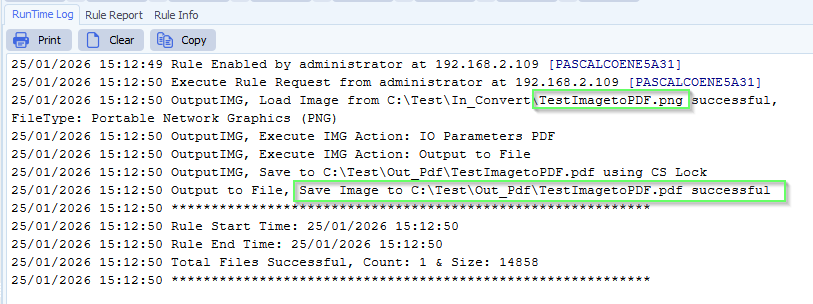
- RunTime Log Result:
If you need any help about this ‘convert images to pdf’ question, please let us know.
Best Regards,
Limagito Team
#pdf #managedfiletransfer #filetransfer #filemanagement