First you’ll need to register an AD app with your AD Tenant. It will assign you the necessary information you need for the OAuth2 setup.
Some links and screenshots to get you started:
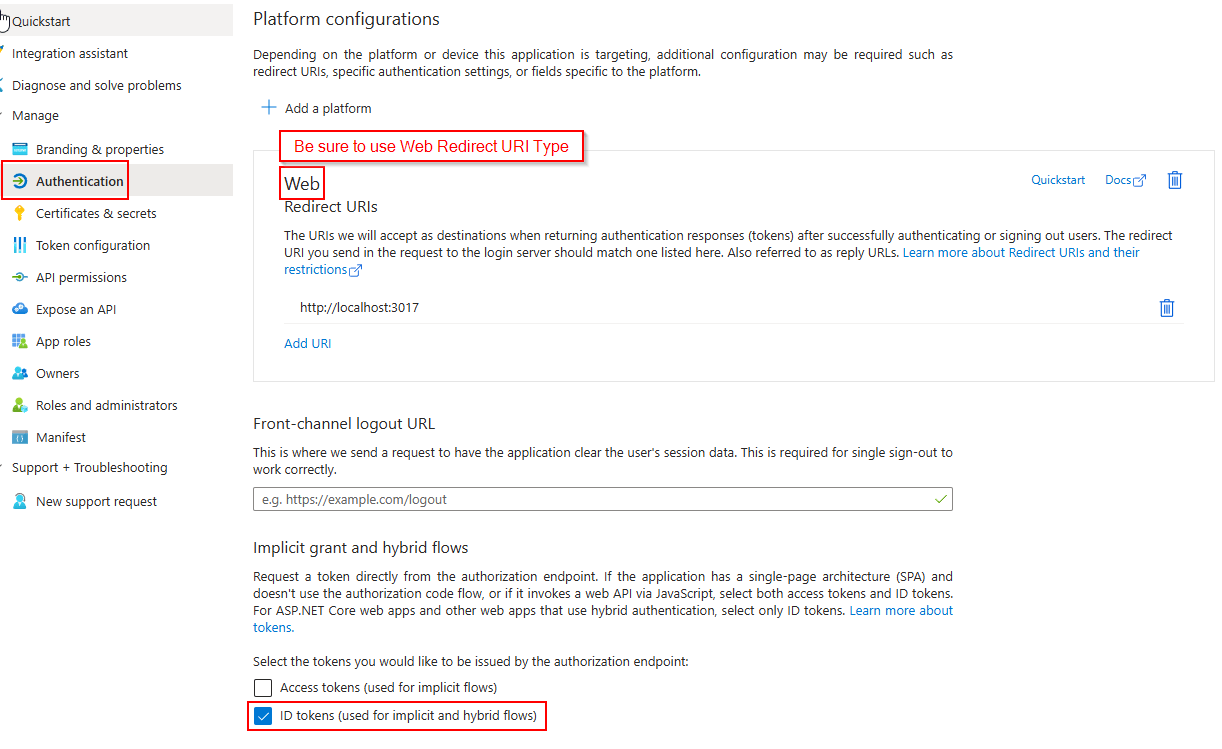
- Authentication Setup:
- Feedback customer: the redirect url should be set for the app, and ID_token must be enabled. Use ‘Web’ as Redirect URI Type.
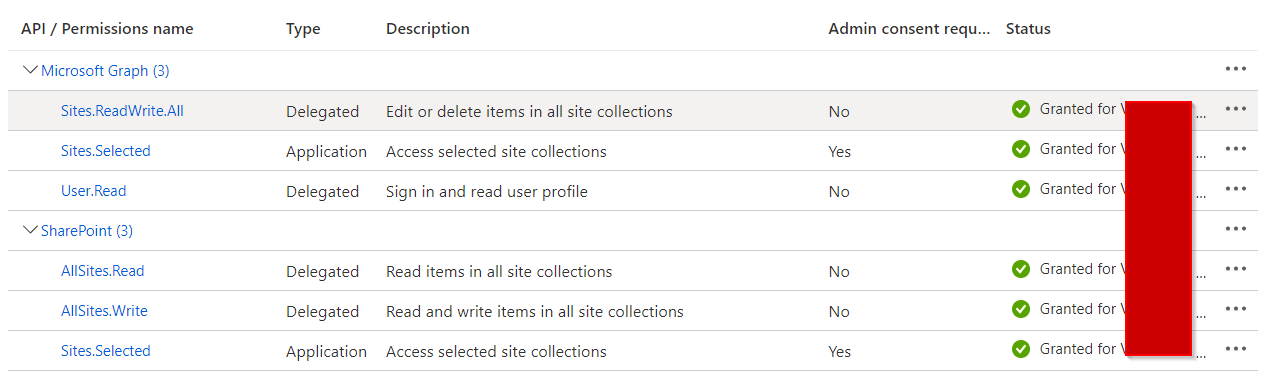
- API Permissions Setup:
- Feedback customer: This required the following settings in Azure. Maybe only the delegated permissions under Graph are enough, didn’t play too much.
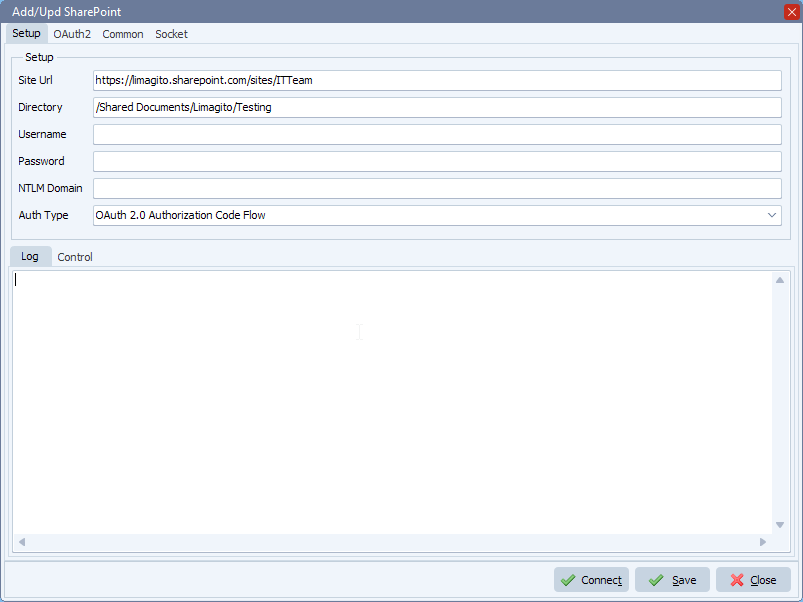
We added some screenshots of a possible setup in our File Mover:
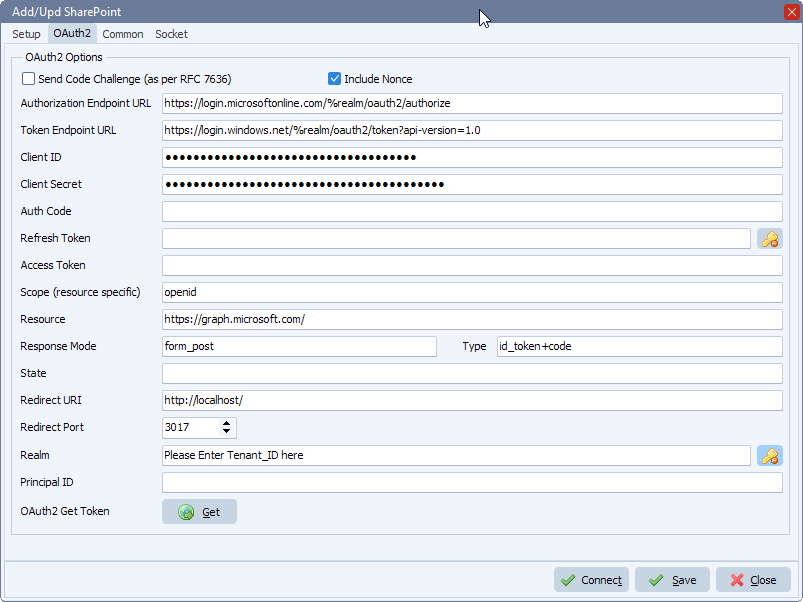
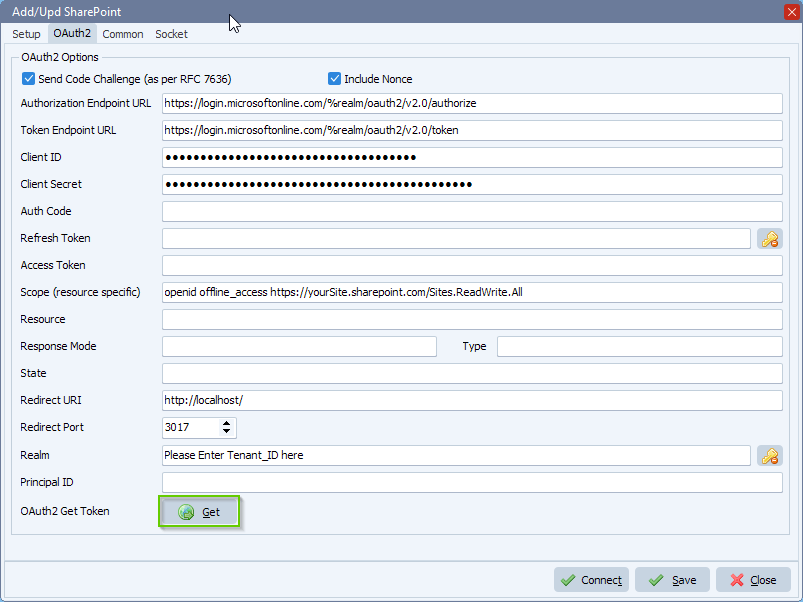
- Please set Auth Type in our SharePoint setup to: ‘OAuth 2.0 Authorization Code Flow’
- OAuth2 Setup:
- Enable ‘Code Challenge’
- Enable ‘Include Nonce’
- Set ‘Authorization Endpoint URL’
- https://login.microsoftonline.com/%realm/oauth2/v2.0/authorize
- %realm will be replaced by the Realm value (= Tenant or Tenant_ID). You can also enter the full URL including the Tenant.
- Set ‘Token Endpoint URL’
- https://login.microsoftonline.com/%realm/oauth2/v2.0/token
- %realm will be replaced by the Realm value (= Tenant or Tenant_ID). You can also enter the full URL including the Tenant.
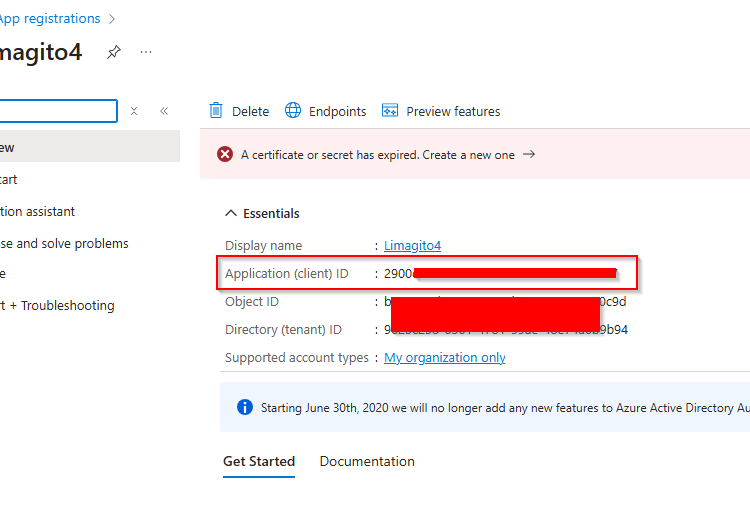
- Enter your Client ID and Client Secret (please check the article howto create them)
- Azure > App Registrations > Select the App you created > Use ‘Application (client) ID’ as Client ID in Limagito SharePoint OAuth2 setup
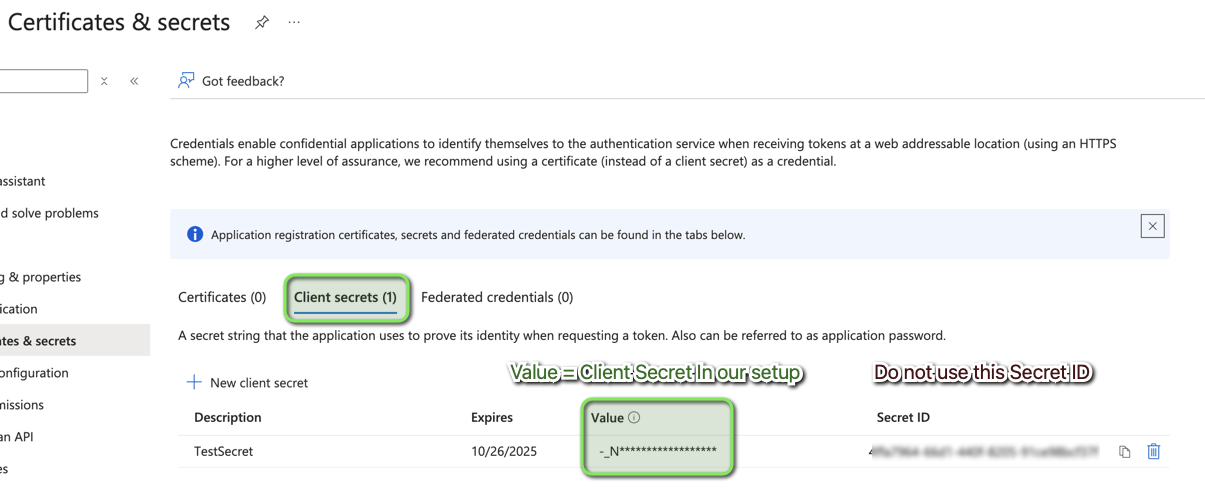
- Azure > Cerificates & Secrets > Client secrets > Use ‘Value’ field as Client Secret in Limagito SharePoint OAuth2 setup
- Set ‘Scope’ to: openid offline_access https://yourSite.sharepoint.com/Sites.ReadWrite.All
- Replace the YourSite part with the <Tenant> name you are using.
- Don’t forget to add “Sites.ReadWrite.All” to the Permissions in your Azure setup.
- Permissions Type must be Delegated.
- FYI: Delegated permissions, also called scopes, allow the application to act on behalf of the signed-in user.
- An alternative could be: openid offline_access https://yourSite.sharepoint.com/.default
- Leave Resource empty
- Leave Response Mode empty to omit the default response_mode “query” param.
- Leave Response Type empty, this way the default value “code” will be used.
- The Redirect URI should be http://localhost/ (and not https://localhost/)
- Be sure to add the redirect URI in Azure too, combined with the Redirect Port in the example it would be: http://localhost:3017
- Check if you selected “Web” as Redirect URI Type in Azure (do not use mobile & desktop or SPA)
- When using %realm in the ‘Authorization or Token Endpoint URL’
- Please set ‘Realm’ to your Tenant of Tenant_ID
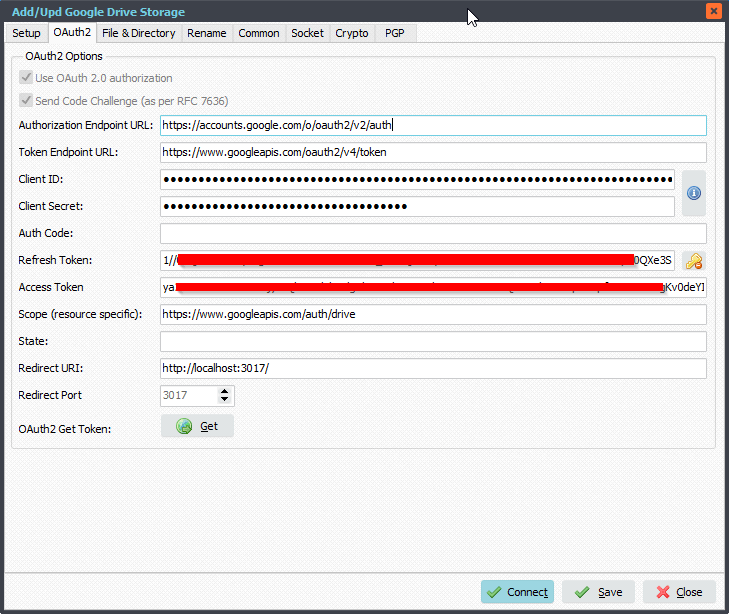
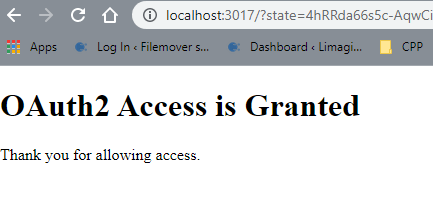
After the setup, please click on the <Get> button. If you get a firewall popup, you’ll need to accept this otherwise we will not be able to capture the Tokens.
Follow the steps in the browser and it should fill the Refresh and Access Token afterwards. Do not forget to click <Save>.
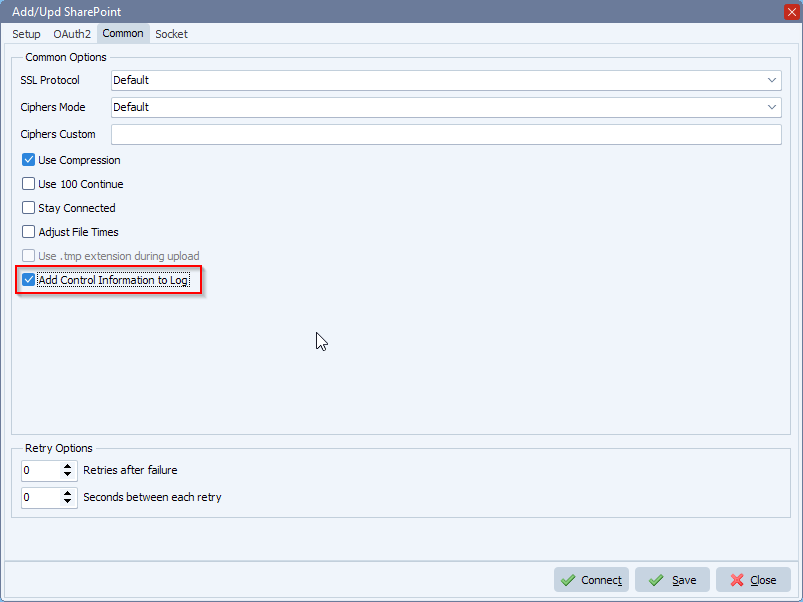
If you want extra debug information during the test, please enable ‘Add Control Information to Log’
> Some information about why we use http://localhost/ as redirect URI:
In the case of a desktop application like our Limagito Remote Tool, you don’t have the capability to receive a redirect on a web server. Our tool will create a temporary background thread for the single purpose of receiving the redirect. Thus the local temporary web browser that interactively gets permission from the account owner is always communicating with your application on the same local machine. There is no communication across the Internet for the redirect, and therefore no HTTPS is needed. In fact, you cannot really use HTTPS because what server certificate would you use? You’d run into all sorts of trust issues with the browser not being happy with some self-signed “localhost” certificate. There’s just no point in opening that can of worms because it’s not even necessary.
#sharepoint #managedfiletransfer #filetransfer #filemanagement
If you need any help with this ‘how-to-access-sharepoint-rest-api-using-oauth’ option, please let us know.
Best Regards,
Limagito Team