• 20 Nov

    Limagito File Mover as image converter to many different formats

    Image converter to many different formats using Limagito File Mover Version v2023.0.11.20.

    Do you know that our File Mover tool is able to convert a loaded image file to another format. The setup of such an automated task is really easy.

    1. Search for an image file using one of our Source options
    2. Add IMG (Image) as Destination
    3. Add Output Action within this IMG Destination
    4. Enable ‘Change File Extension’ and add the format file extension you need. For example: .png
    5. Done

    Some file types we currently support as export: Jpeg, Jpeg2000, PNG, TIFF, BMP, WBMP, PS, PDF, PCX, DCX, TGA, PXM, ICO, HDP, GIF, DICOM, …

    Regarding IMG (Image) as destination, we are always open to new ideas so please let us know.

    On our roadmap currently we have:

    • Parameters (Compression, Quality, ..)
    • EXIF Metadata

    Some screenshots to get you started:

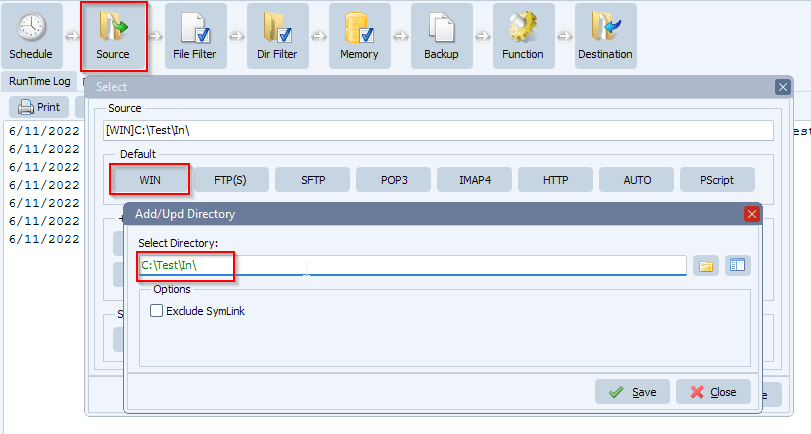
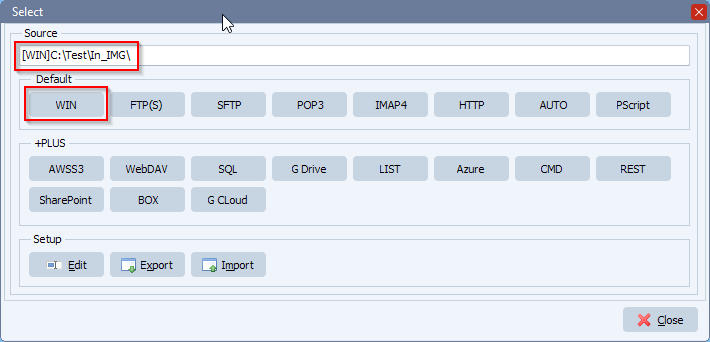
    • Please add WIN as source to scan a Windows folder for images (can be any other Source too):

    Limagito File Mover source setup

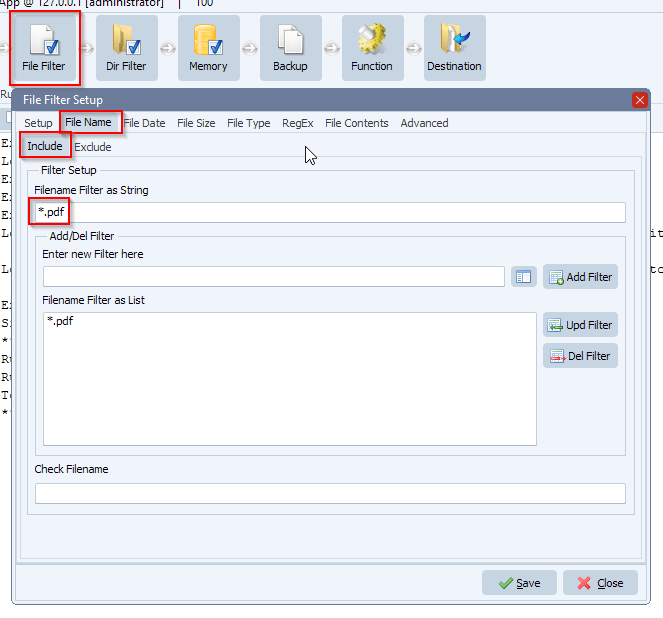
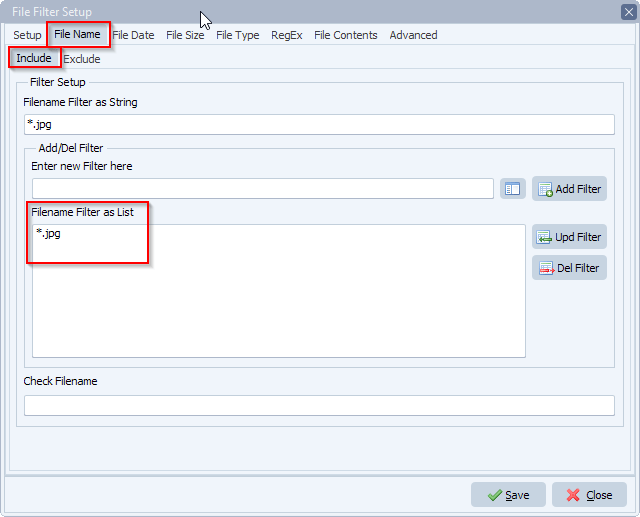
    • In this example we only want to convert .jpg files, so add a File Name Include filter:

    Limagito File Mover Filename Filter

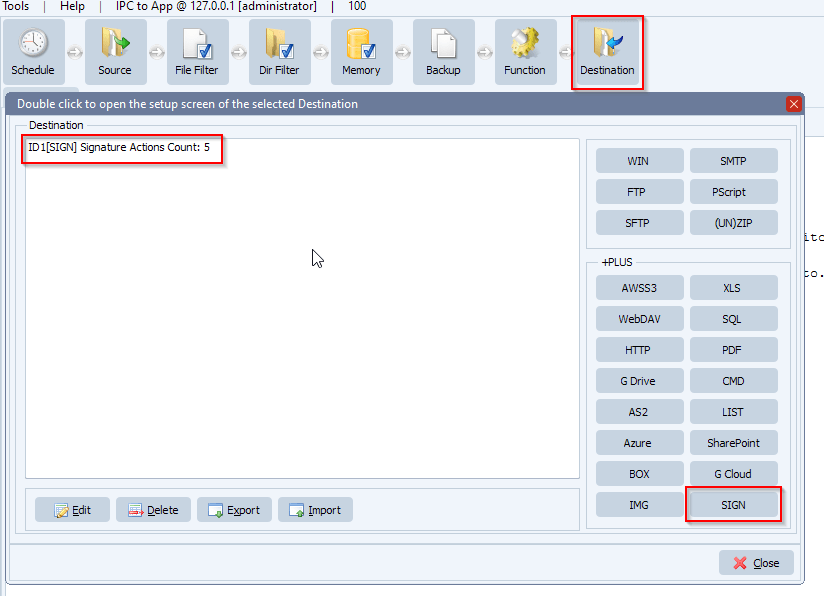
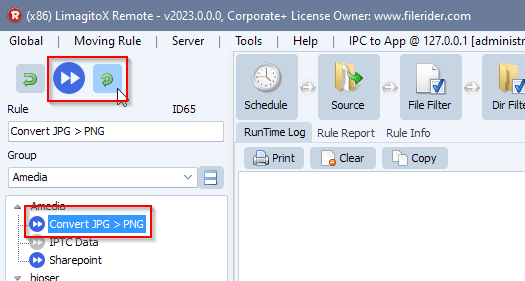
    • Add ‘IMG’ (Image) as Destination:

    Limagito File Mover Image as destination

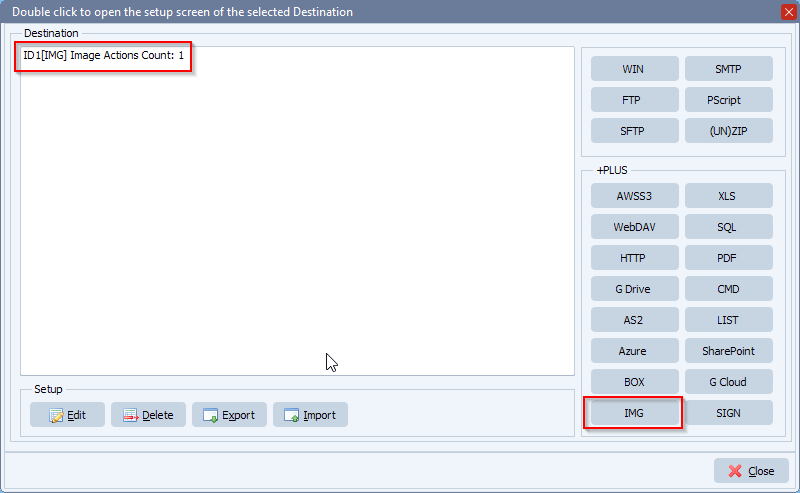
    • In this destination:
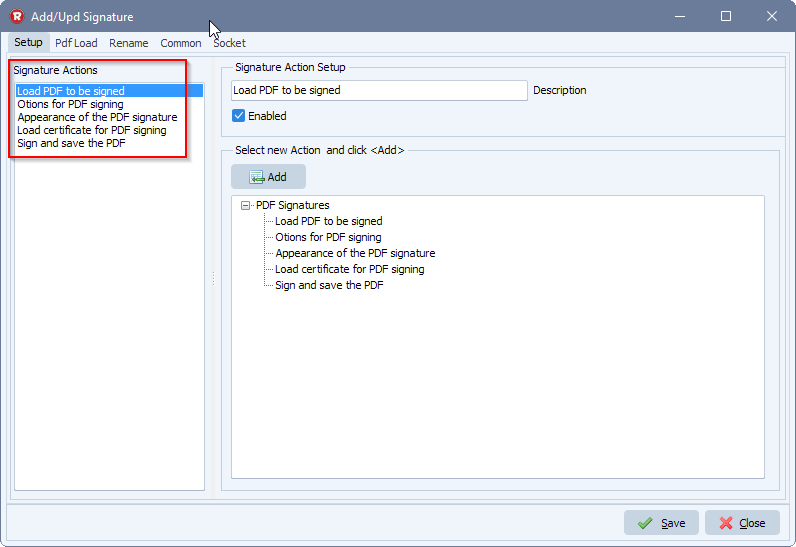
      • Select ‘Output to File’ as new Action and click the <Add> button
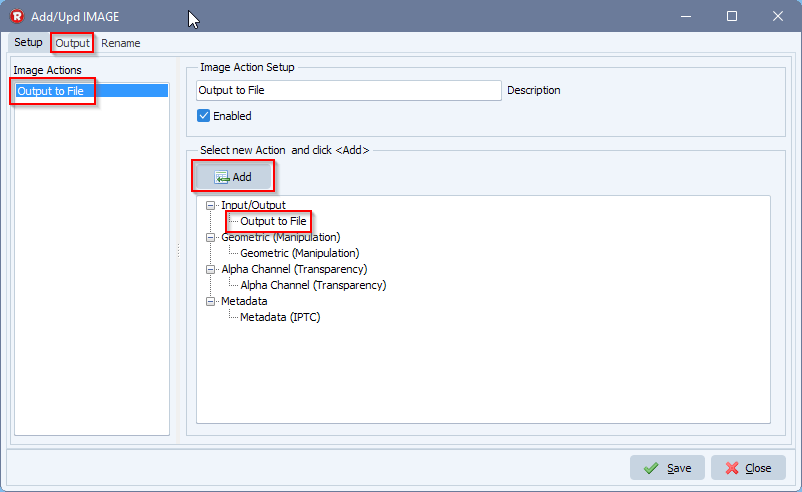
      • In the Image Actions listbox (on the left) select the newly added ‘Output to File’ action
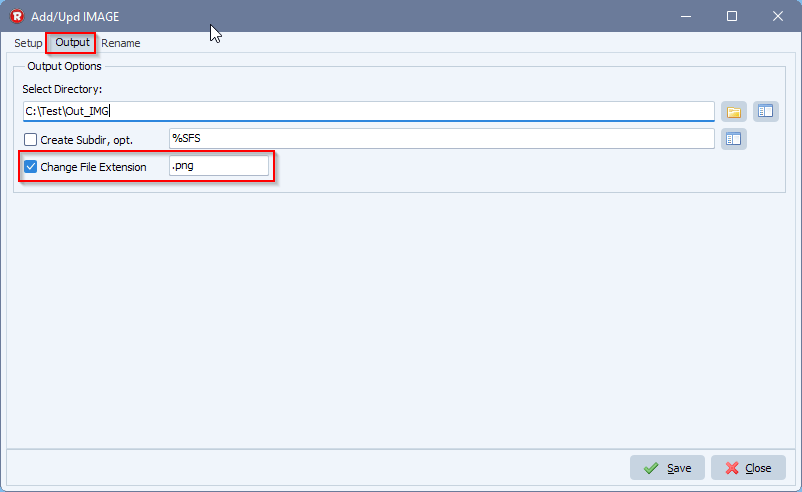
      • An extra tab ‘Output’ will appear in the top menu, select this tab

    Image converter setup

    • Enable ‘Change File Extension’ and add the format extension you want to convert to ( .png, .bmp, .tiff, …):

    Image conversion setup

    • Enable the Rule and wait on the scan event or trigger manually:
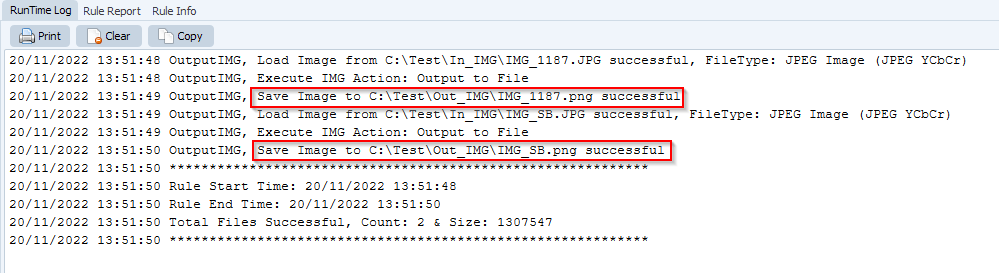
    Limagito File Mover manual trigger

    • RunTime Log Result:

    Limagito File Mover RunTime Log

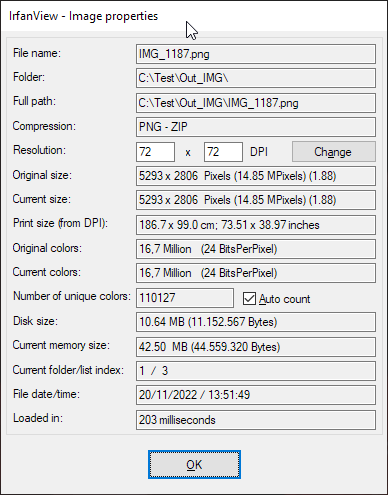
    • Image properties of the converted image:

    Image properties

    #FileTransfer #image #imageconverter

    If you need any info about this new ‘image converter’ option, please let us know.

    Best regards,

    Limagito Team

    By Limagito-Team Image ,
  • 07 Nov

    POP, IMAP and SMPT with OAuth2 (Microsoft Office 365 services)

    POP, IMAP and SMPT with OAuth2 (Microsoft Office 365 services)

    Microsoft is disabling basic authentication for Microsoft Office 365 services on October 2022.

    1. The simplest solution that will not require any major changes to your setup is to have your Outlook/Exchange users turn on 2-step verification in their accounts and then generate application-specific passwords.  Otherwise, you will have to update your settings to use OAuth2 when connected to Outlook/Exchange. In this case the username stays the samen but you’ll get a new application-specific password.
    2. The second solution is using OAuth2 as described in the following example: link

    #FileTransfer

    Best Regards,

    Limagito Team


    By Limagito-Team 365 IMAP4
  • 06 Nov

    Sign a PDF using SmartCard or HSM

    Sign a PDF using SmartCard or HSM (Hardware Security Module) added in Limagito File Mover v2023.0.11.6

    In this example we are going to a sign a PDF using a Smartcard or HSM (hardware security module).

    • As source we are going to use a Windows folder [WIN]:

    Limagito file mover Windows folder as source

    • Be sure to only allow .pdf files. Please set the Include Filename Filter:

    Limagito file mover file filter setup

    • Add ‘SIGN’ as Destination

    Limagito file mover sign pdf as destination

    • Setup ‘SIGN’ as Destination. The default setup has 5 ‘actions’:

    Limagito file mover sign pdf setup

    • Select the first Action ‘Load PDF to be signed’ and an extra tab will appear in the top menu bar. Select this ‘Pdf Load’ tab.

    The default setup here is %SFP%SFN which translates to Source File Path and Source File Name. In most cases you don’t need to change this.

    • Back to the ‘Setup’ tab and select ‘Options for PDF signing’ in the Action list and next ‘Pdf Options’ Tab.
    1. Enable ‘Set Signing Certifcate V2 attribute’ (is enabled by default)
    2. Enable ‘Set Signing Time attribute’ (is enabled by default)

    Sign pdf options setup

    • Back to the ‘Setup’ tab and select ‘Appearance of the PDF signature’ in the Action list and ‘Pdf Signature’ Tab.

    We used the ‘Custom-JPG’ to add a custom logo at the left side of the signature. We also have a couple of built-in graphics available.

    Sign pdf signature appearance setup

    • Back to the ‘Setup’ tab and select ‘Load certificate for PDF signing’ in the Action list and ‘Pdf Certificate’ Tab.

    We are going to use a Smartcard or HSM (hardware security module) so we keep the ‘Certificate File’ field empty.

    1. Enable ‘Use load from Smartcard’
    2. Set the Smartcard CSP option
      • Load the certificate on the smartcard currently in the reader (or on the USB token).
      • Leave this field empty to allow us to automatically choose the CSP (Cryptographi Service Provider).
    3. Set the Smartcard PIN (password)

    Sign pdf smartcard certificate

    • Back to the ‘Setup’ tab and select ‘Sign and save the PDF’ in the Action list and ‘Pdf Signing’ Tab.

    Limagito file mover sign and save pdf

    • Next we enabled the Rule and triggered it manually:

    Limagito file mover enable and trigger rule

    • Result of the RunTime Log:

    sign and save pdf setup

    • Signed PDF result:

    digitally signed pdf using smartcard example

    #FileTransfer #pdf #smartcard #hsm

    If you need any info about this new ‘Sign a PDF using SmartCard or HSM’ option, please let us know.

    Best regards,

    Limagito Team

    By Limagito-Team PDF , , ,
1 2
SEARCH