certificate

  • 01 Nov

    How to create a certificate using powershell

    How to create a certificate using powershell

    In a previous blog article we used a self signed certificate to authenticate against Azure. We used PowerShell to achieve this.

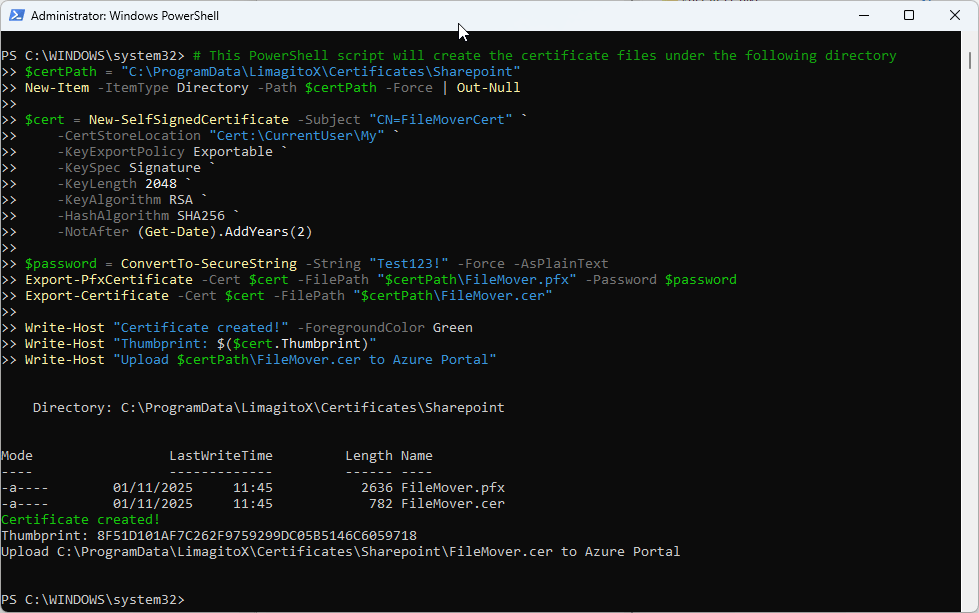
    We used the following PowerShell script:

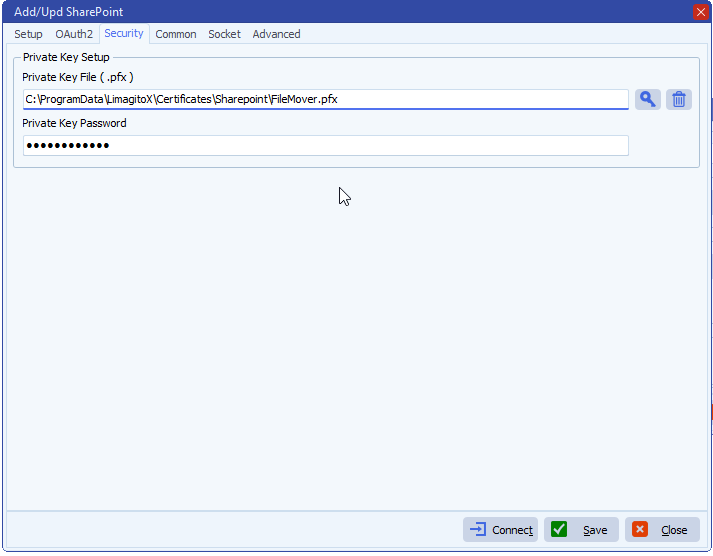
    • We used “C:\ProgramData\LimagitoX\Certificates\Sharepoint” as output path for the certificate files
    • We used  Test123!  as password
    • Our certificate is valid for two years > -NotAfter (Get-Date).AddYears(2)


    # This PowerShell script will create the certificate files under the following directory
    $certPath = "C:\ProgramData\LimagitoX\Certificates\Sharepoint"
    New-Item -ItemType Directory -Path $certPath -Force | Out-Null
     
    $cert = New-SelfSignedCertificate -Subject "CN=FileMoverCert" `
        -CertStoreLocation "Cert:\CurrentUser\My" `
        -KeyExportPolicy Exportable `
        -KeySpec Signature `
        -KeyLength 2048 `
        -KeyAlgorithm RSA `
        -HashAlgorithm SHA256 `
        -NotAfter (Get-Date).AddYears(2)
     
    $password = ConvertTo-SecureString -String "Test123!" -Force -AsPlainText
    Export-PfxCertificate -Cert $cert -FilePath "$certPath\FileMover.pfx" -Password $password
    Export-Certificate -Cert $cert -FilePath "$certPath\FileMover.cer"
     
    Write-Host "Certificate created!" -ForegroundColor Green
    Write-Host "Thumbprint: $($cert.Thumbprint)"
    Write-Host "Upload $certPath\FileMover.cer to Azure Portal"

    Open PowerShell as Administrator (Run as Admin ..) and paste the script + <Enter>
    limagito file mover create a certificate

    If you need any help about this ‘create a certificate’ article, please let us know.

    Best Regards,

    Limagito Team

    #certificate #managedfiletransfer #filetransfer #filemanagement

  • 30 Oct

    Sharepoint Authentication using Client ID and Certificate

    ..using Client ID and Certificate

    Although we recommend our OAuth 2.0 authorization code flow , we received a request from a customer who wanted to use the Client ID and Client Secret to authenticate. We had this already available as Auth Type ‘Online Authentication using Client Credentials without User Dialog’. It appeared this option was outdated, so we updated that part of our code. Later we found out that for newly created SharePoint Sites, this ‘Client ID and Client Secret’ authentication no longer worked. It was replaced by ‘Client ID and Certificate’ authentication, so we added this option as well.

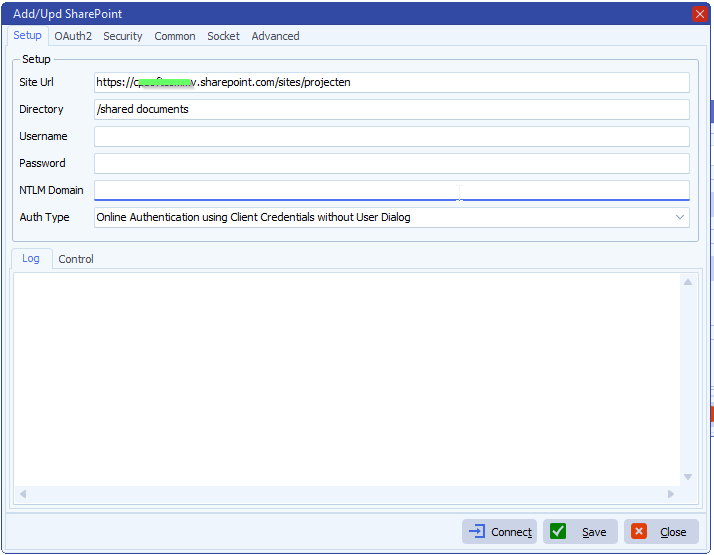
    Limagito FileMover Setup

    • Setup
      • Set Site Url and Directory
      • Select ‘Online Authentication using Client Credentials without User Dialog’ as Auth Type

    limagito filemover sharepoint setup

    • OAuth2
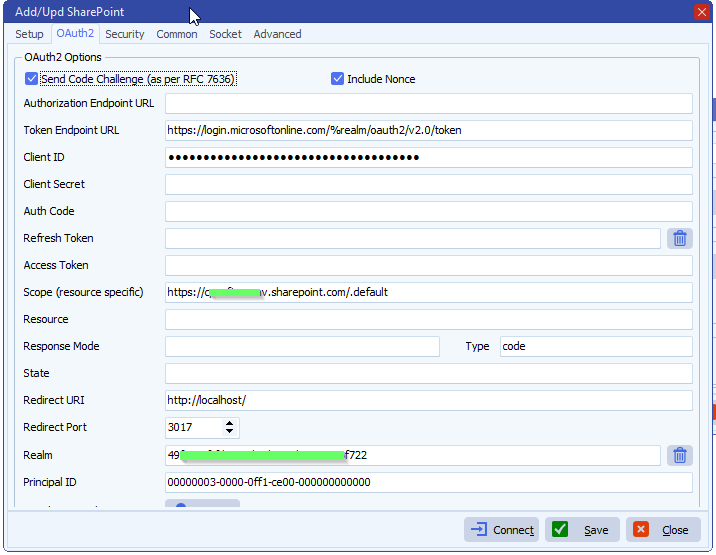
      • Set Token Endpoint URL to: https://login.microsoftonline.com/%realm/oauth2/v2.0/token
      • Set Scope to: https://yourSite.sharepoint.com/.default
      • Set Realm (= Directory Tenant ID)

    limagito file mover sharepoint Client ID and Certificate

    limagito filemover sharepoint Client ID and Certificate

    Azure Setup

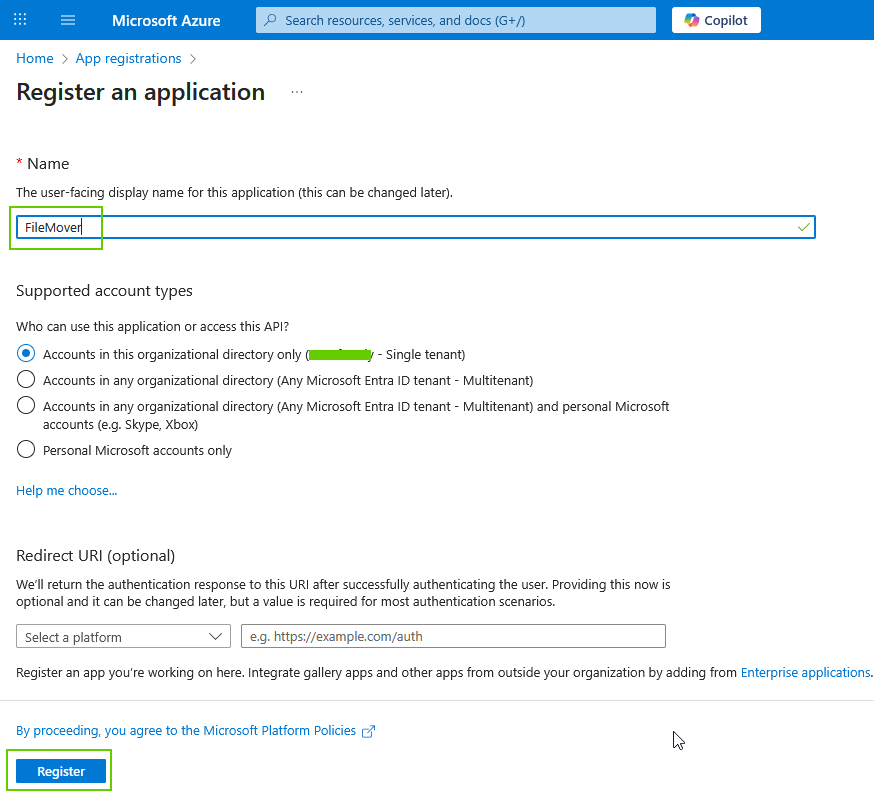
    • Register an application

    limagito filemover azure register an application

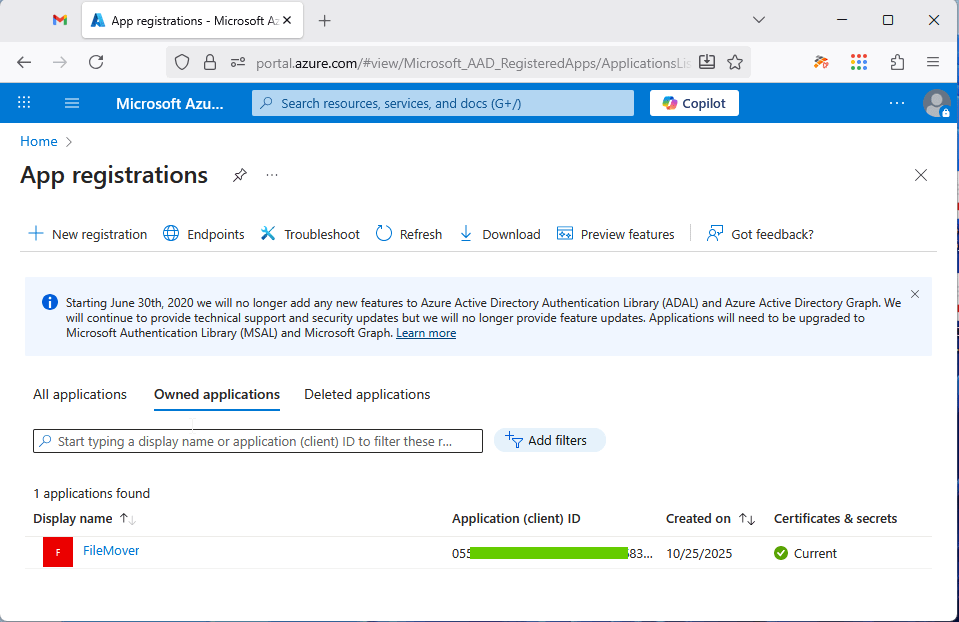
    limagito file mover azure app registrations

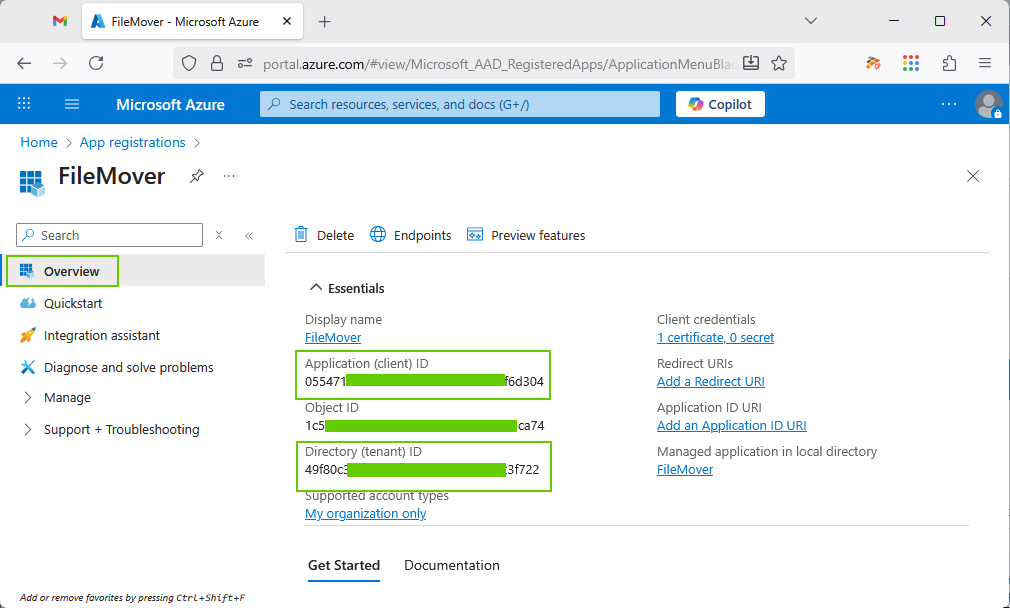
    • Overview
      • Application (client) ID is being used in the filemover OAuth2 setup
      • Directory (tenant) ID is being used in the filemover OAuth2 setup

    limagito filemover azure app registrations

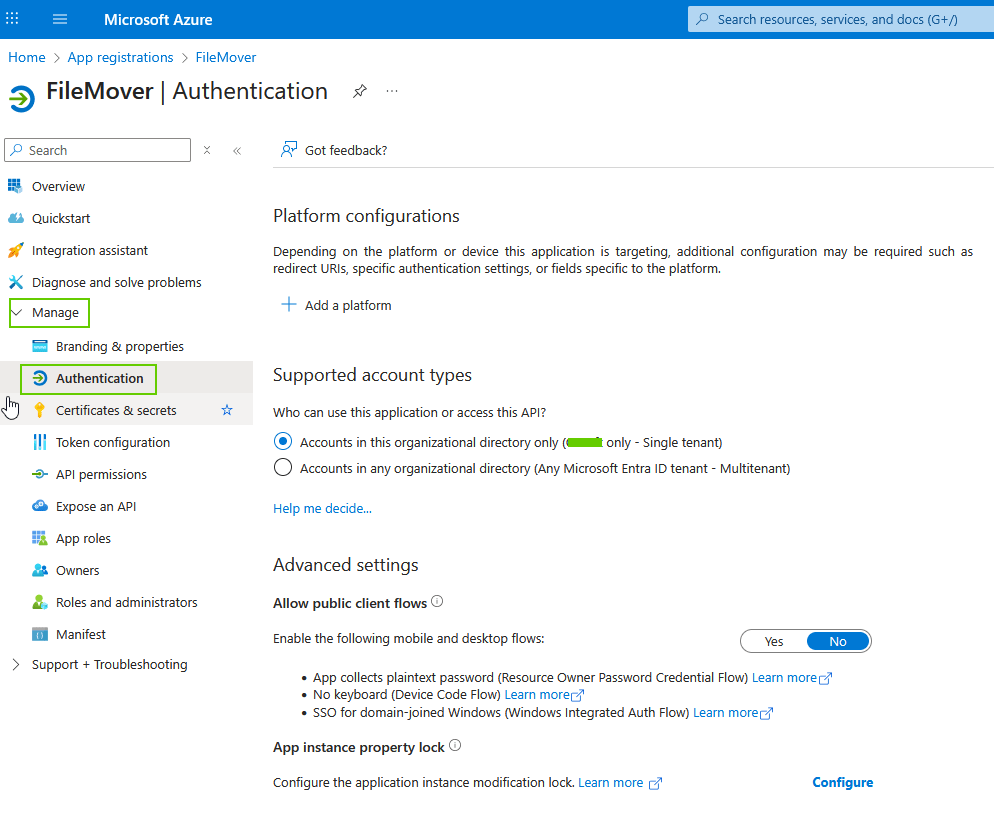
    • Authentication Setup

    limagito filemover authentication setup

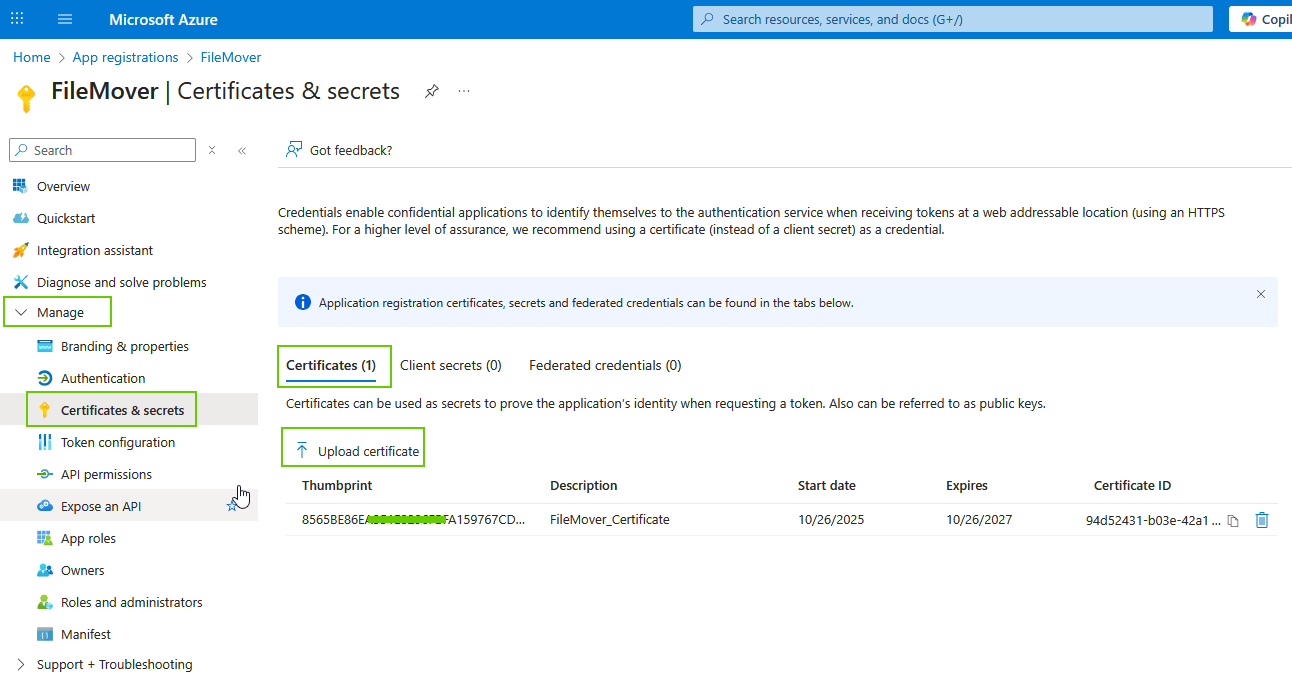
    • Certificates & secrets Setup
      • Upload the public part of your certificate here (.cer)

    limagito file mover certificate setup

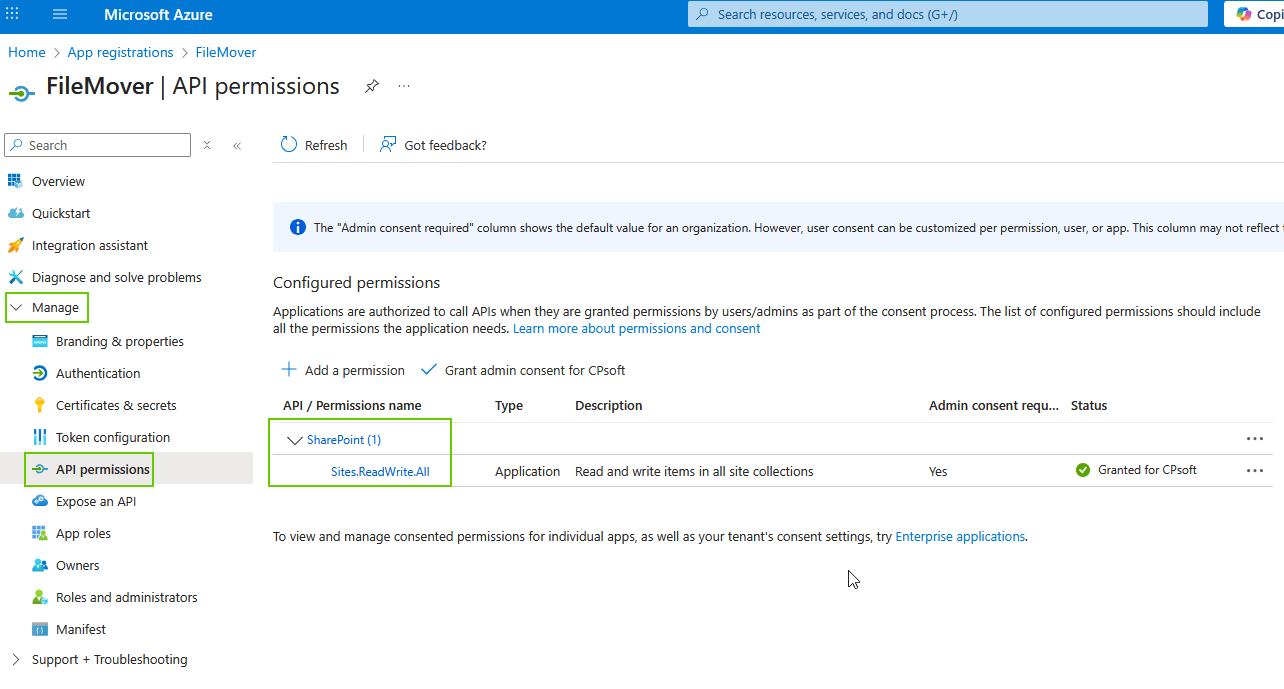
    • API permissions Setup
      • Add permission: SharePoint > Sites.ReadWrite.All

    limagito filemover api permissions setup

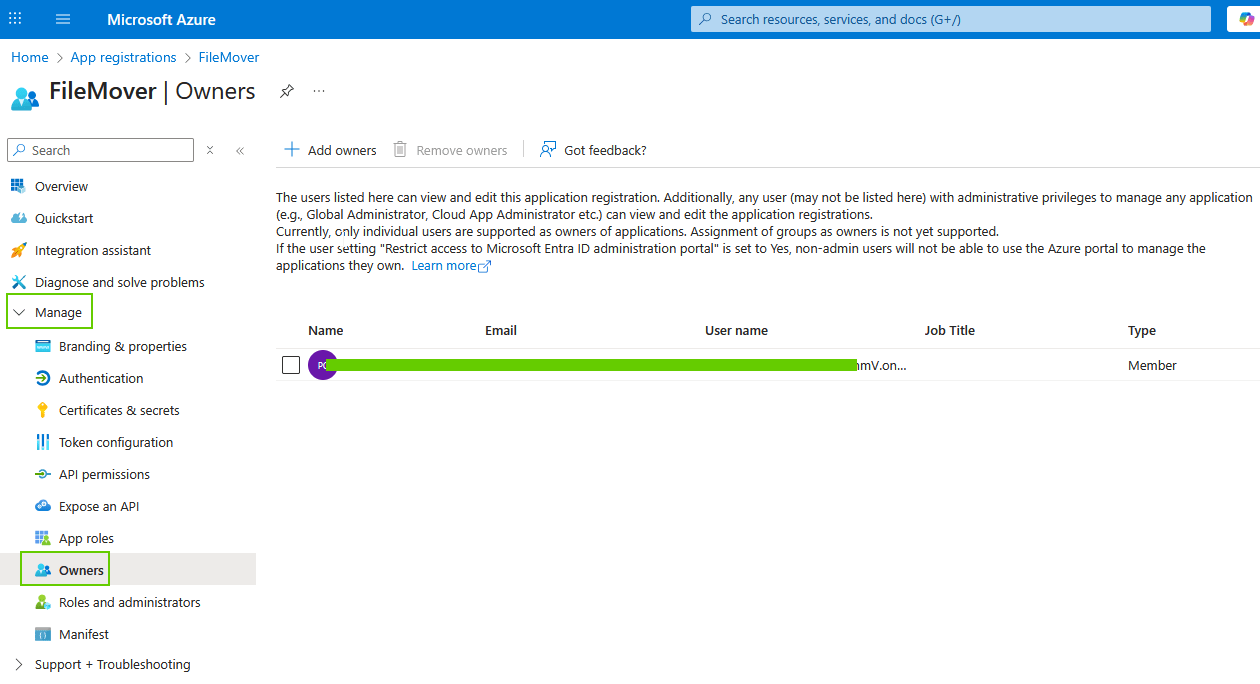
    • Owners Setup

    limagito filemover azure owners setup

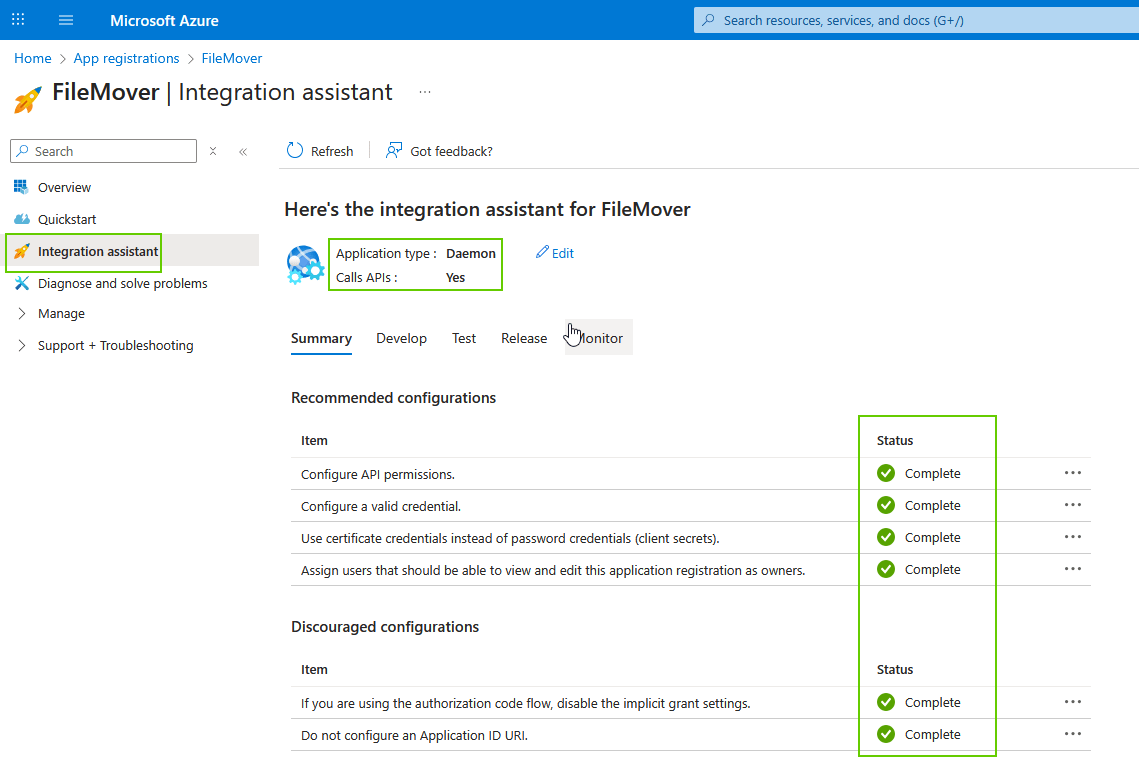
    • Optional, you could use the ‘Integration assistant’ to do a check. Select ‘Daemon’ as Application type and set ‘Calls APIs’ to Yes

    limagito filemover azure integration assistant

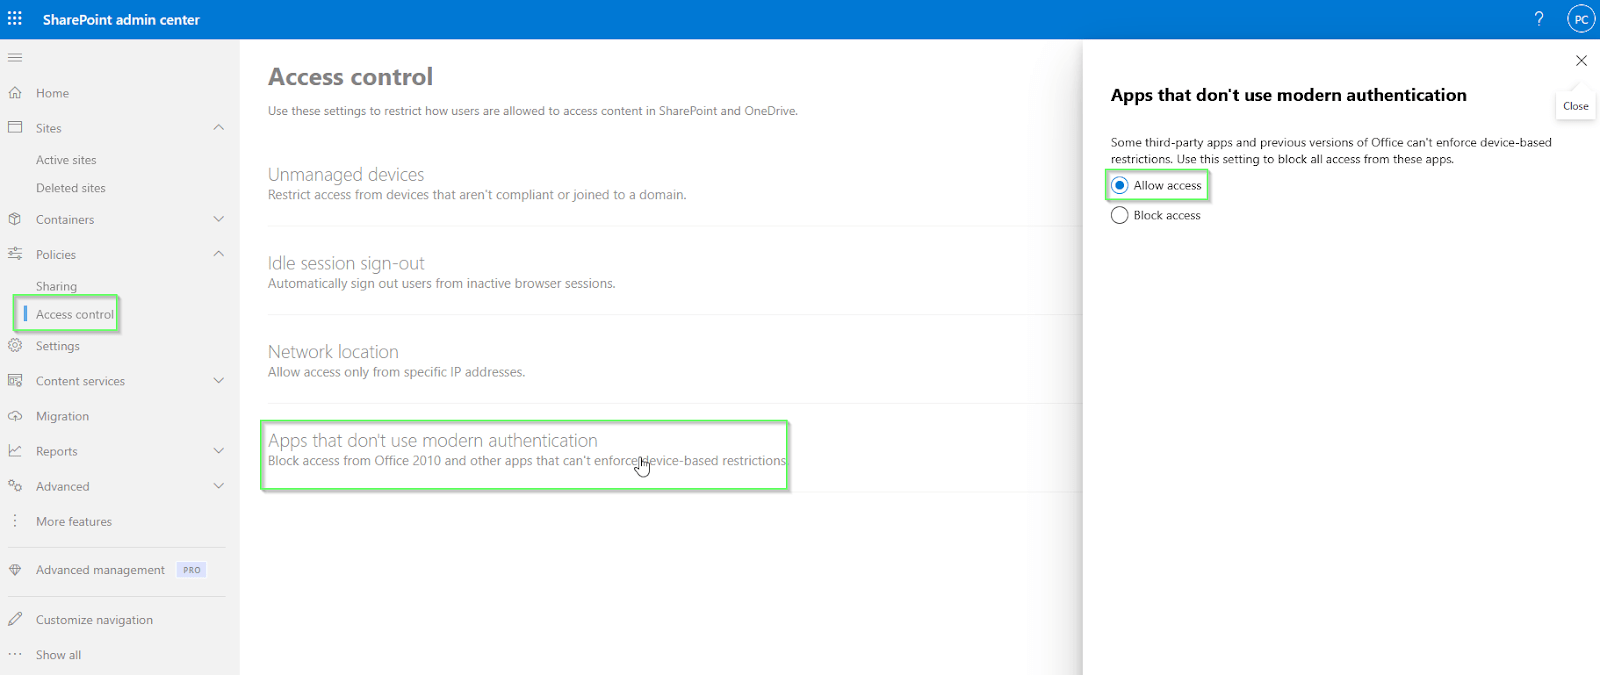
    • Access control check
      • Open your ‘SharePoin admin center’
        • Access control > Apps that don’t use modern authentication
          • Allow access

    limagito filemover sharepoint admin center


    If you need any help about this ‘Client ID and Certificate’ option, please let us know.

    Best Regards,

    Limagito Team

    #sharepoint #managedfiletransfer #filetransfer #filemanagement
    By Limagito-Team SharePoint ,
  • 21 Apr

    Generate Certificate Signing Request (CSR)

    Generate Key and Certificate Signing Request (CSR)

    In version v2024.4.21.0 we added an option to generate a CSR. This is possible using our free Lite+ version too.

    Generate Certificate Signing Request

    • After installation please open our Limagito File Mover Config Tool:

    limagito file mover config tool icon

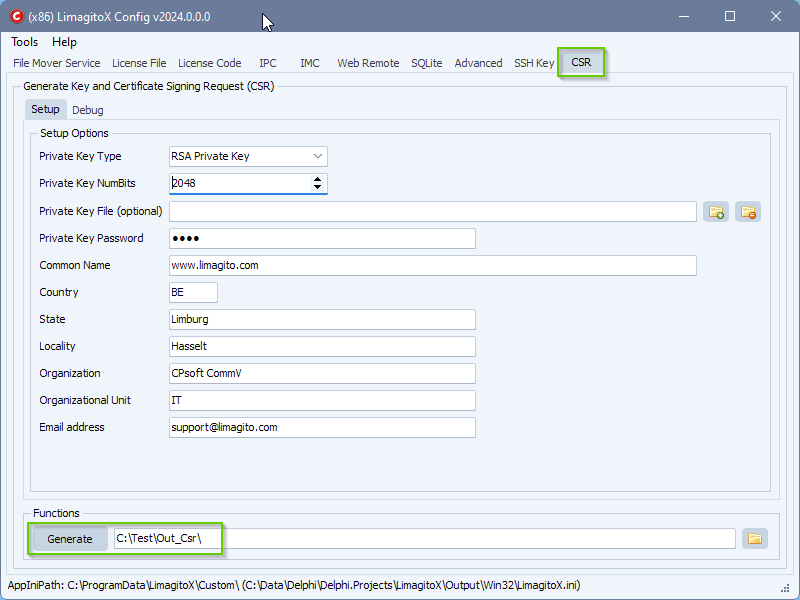
    • Switch to ‘CSR’ tab
      • The (pre-existing) private key file is optional. If you don’t have this file, we’ll create one for you.
      • Add the necessary details and click Generate
    • You could test the result here: link or link


    If you need any help with our new ‘Generate Key and Certificate Signing Request’ option, please let us know.

    Best Regards,

    Limagito Team

    #csr #managedfiletransfer #FileManagement #filetransfer

    By Limagito-Team SIGN , ,
1 2
SEARCH