Sign a PDF using SmartCard or HSM (Hardware Security Module) added in Limagito File Mover v2023.0.11.6
In this example we are going to a sign a PDF using a Smartcard or HSM (hardware security module).
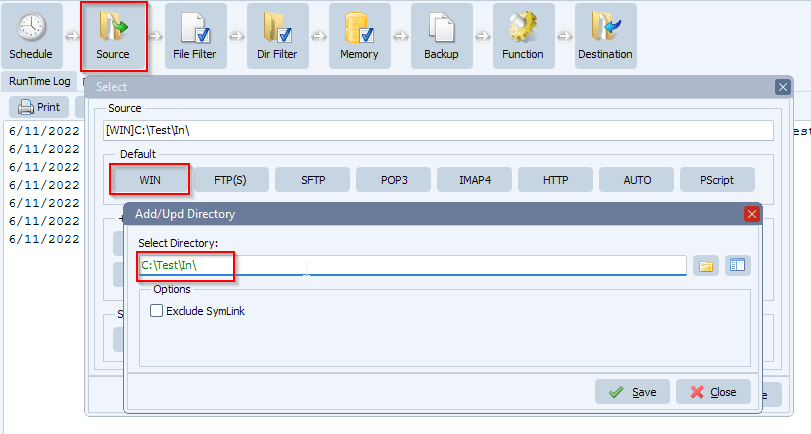
- As source we are going to use a Windows folder [WIN]:
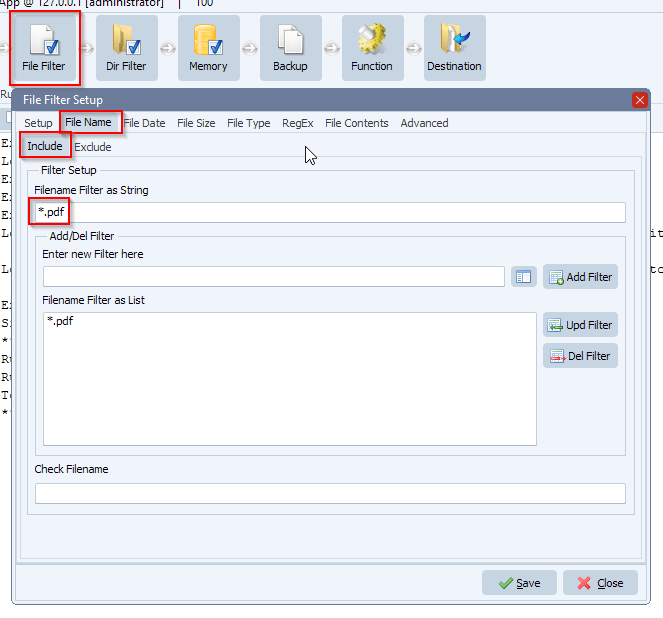
- Be sure to only allow .pdf files. Please set the Include Filename Filter:
- Add ‘SIGN’ as Destination
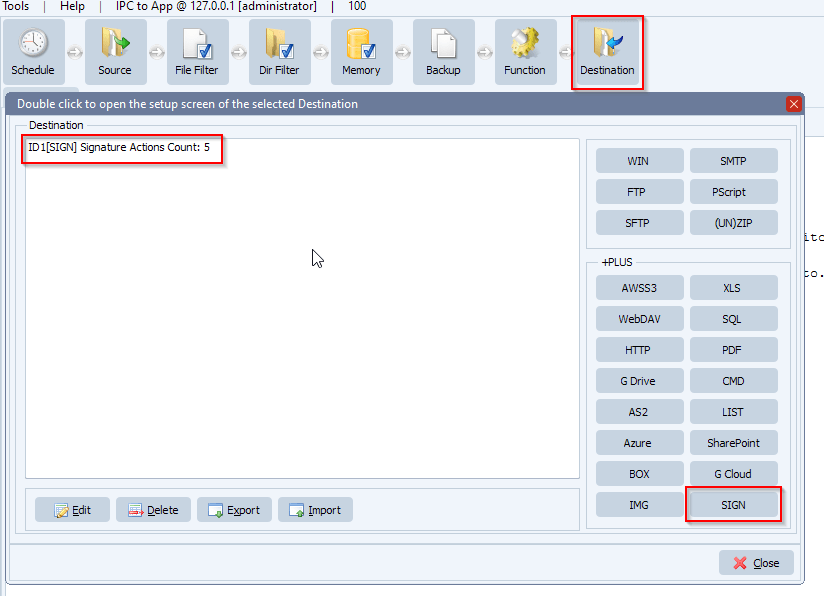
- Setup ‘SIGN’ as Destination. The default setup has 5 ‘actions’:
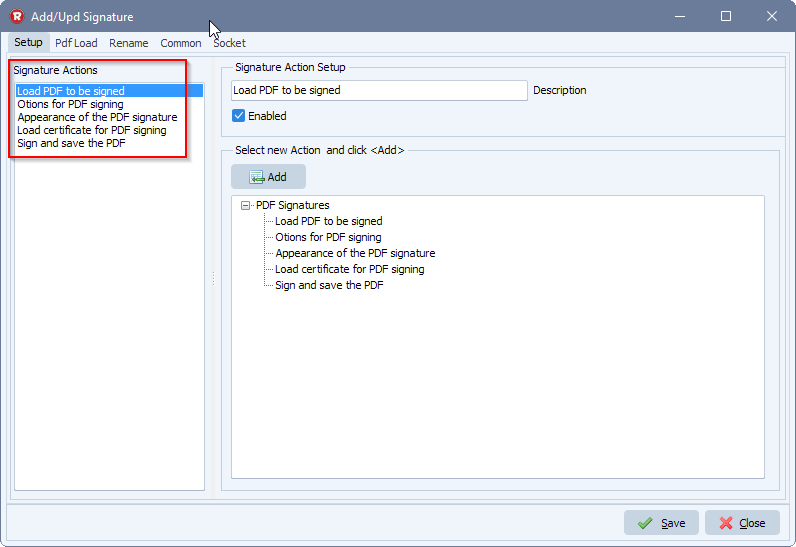
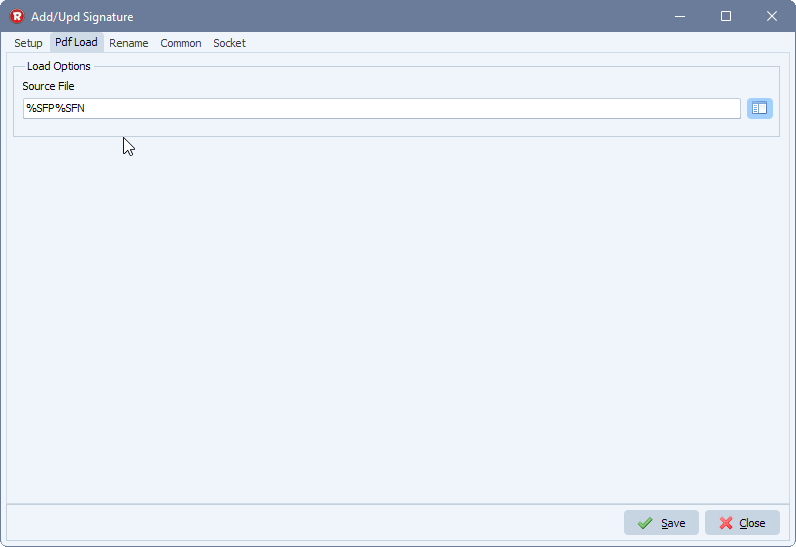
- Select the first Action ‘Load PDF to be signed’ and an extra tab will appear in the top menu bar. Select this ‘Pdf Load’ tab.
The default setup here is %SFP%SFN which translates to Source File Path and Source File Name. In most cases you don’t need to change this.
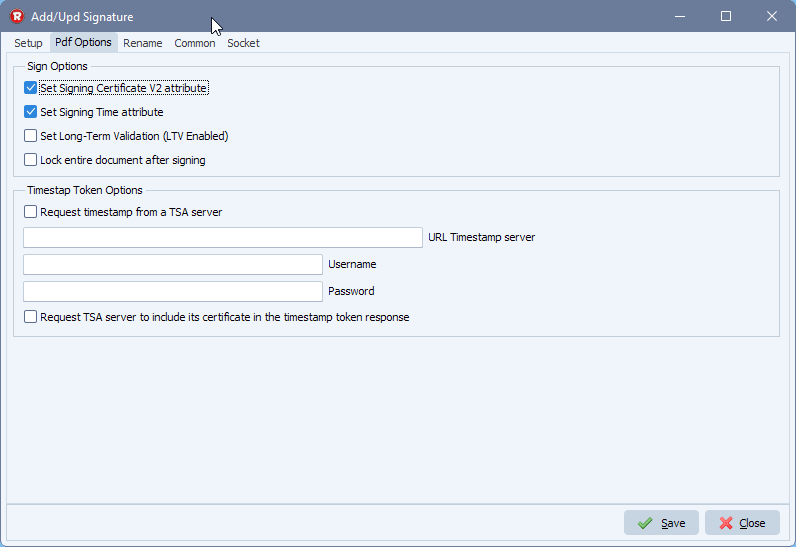
- Back to the ‘Setup’ tab and select ‘Options for PDF signing’ in the Action list and next ‘Pdf Options’ Tab.
- Enable ‘Set Signing Certifcate V2 attribute’ (is enabled by default)
- Enable ‘Set Signing Time attribute’ (is enabled by default)
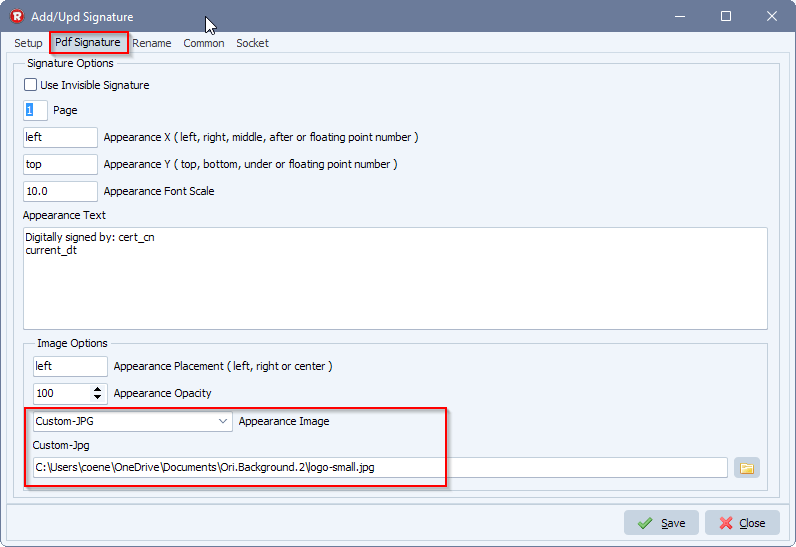
- Back to the ‘Setup’ tab and select ‘Appearance of the PDF signature’ in the Action list and ‘Pdf Signature’ Tab.
We used the ‘Custom-JPG’ to add a custom logo at the left side of the signature. We also have a couple of built-in graphics available.
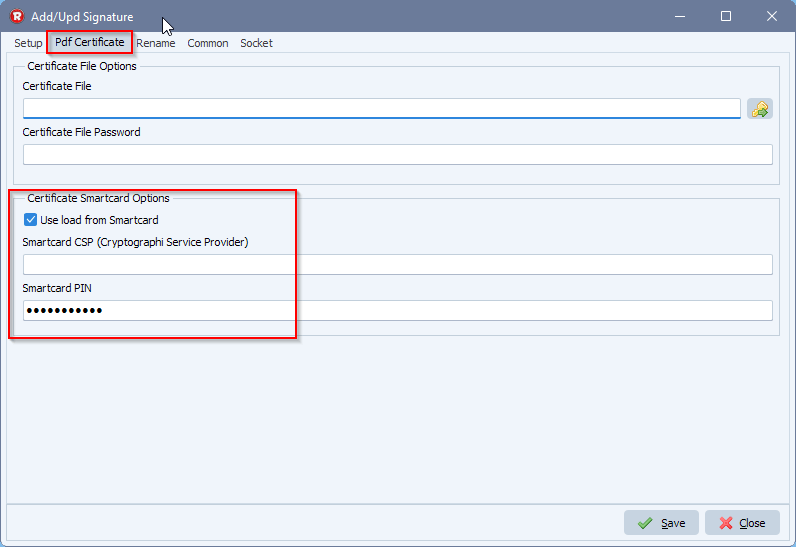
- Back to the ‘Setup’ tab and select ‘Load certificate for PDF signing’ in the Action list and ‘Pdf Certificate’ Tab.
We are going to use a Smartcard or HSM (hardware security module) so we keep the ‘Certificate File’ field empty.
- Enable ‘Use load from Smartcard’
- Set the Smartcard CSP option
- Load the certificate on the smartcard currently in the reader (or on the USB token).
- Leave this field empty to allow us to automatically choose the CSP (Cryptographi Service Provider).
- Set the Smartcard PIN (password)
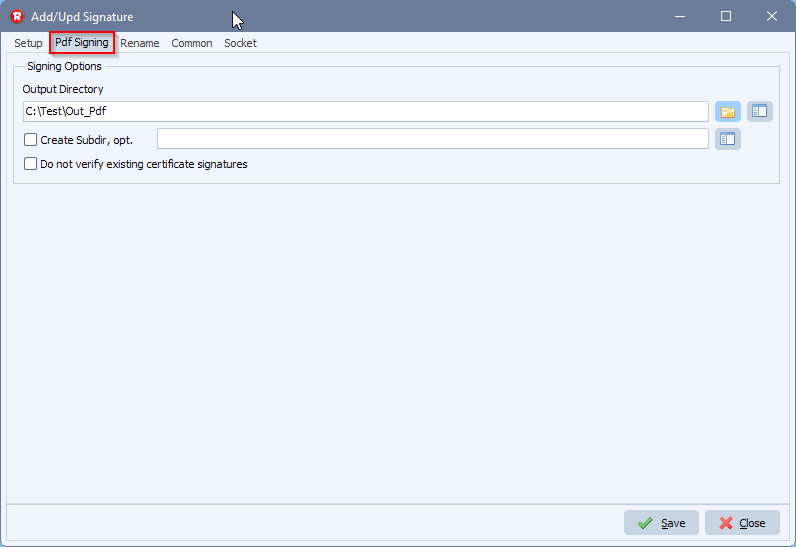
- Back to the ‘Setup’ tab and select ‘Sign and save the PDF’ in the Action list and ‘Pdf Signing’ Tab.
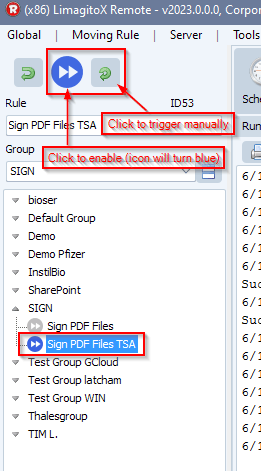
- Next we enabled the Rule and triggered it manually:
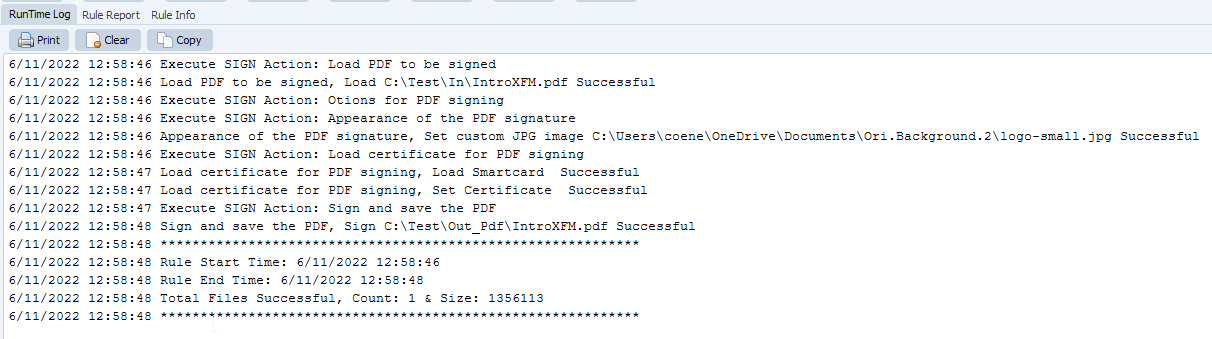
- Result of the RunTime Log:
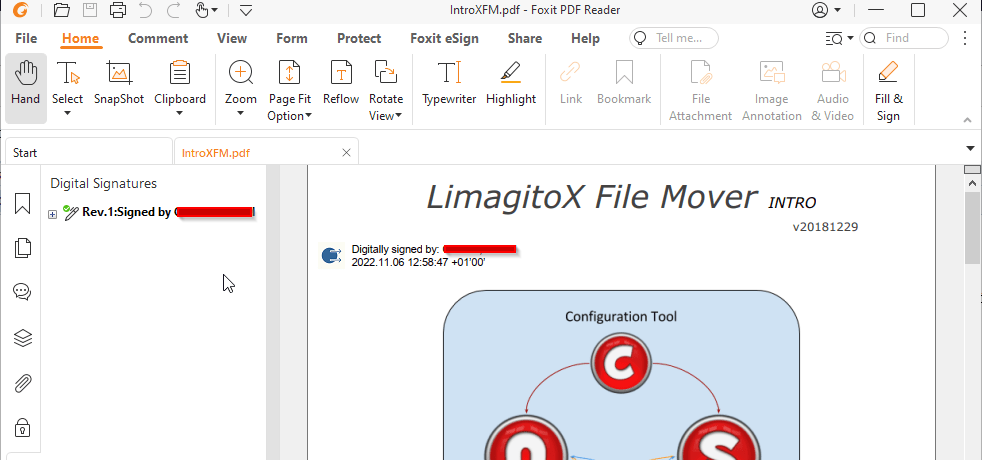
- Signed PDF result:
#FileTransfer #pdf #smartcard #hsm
If you need any info about this new ‘Sign a PDF using SmartCard or HSM’ option, please let us know.
Best regards,
Limagito Team