Q: Sending an email using Office 365 SMTP and OAuth2 authentication
“AZURE setup”
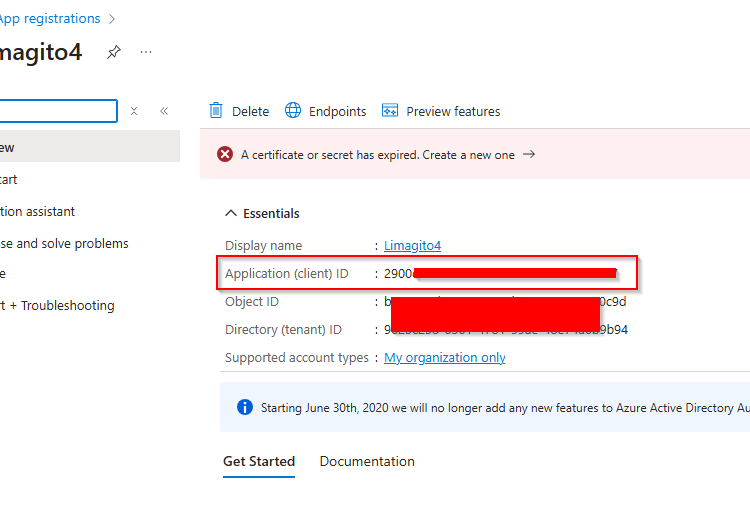
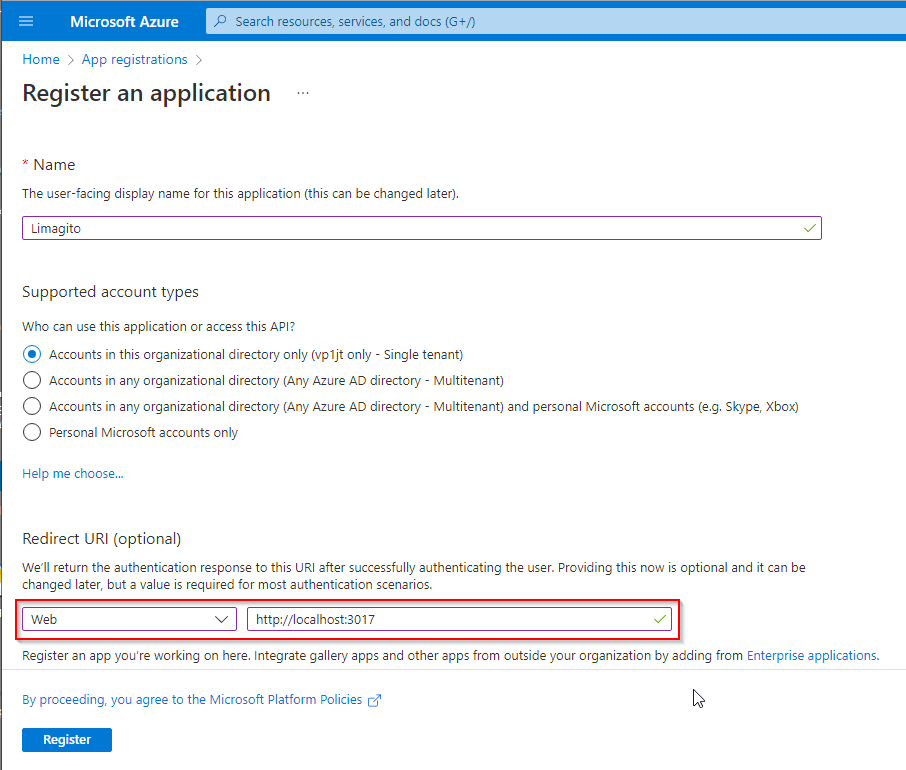
- Login to Azure portal. In “App registrations” create a “+ New registration”.
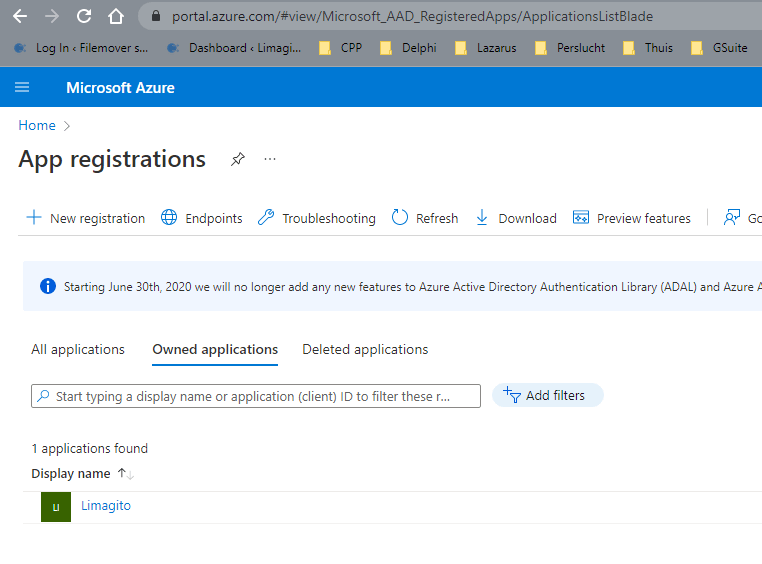
- Register the app with Redirect URI = “http://localhost:3017”.
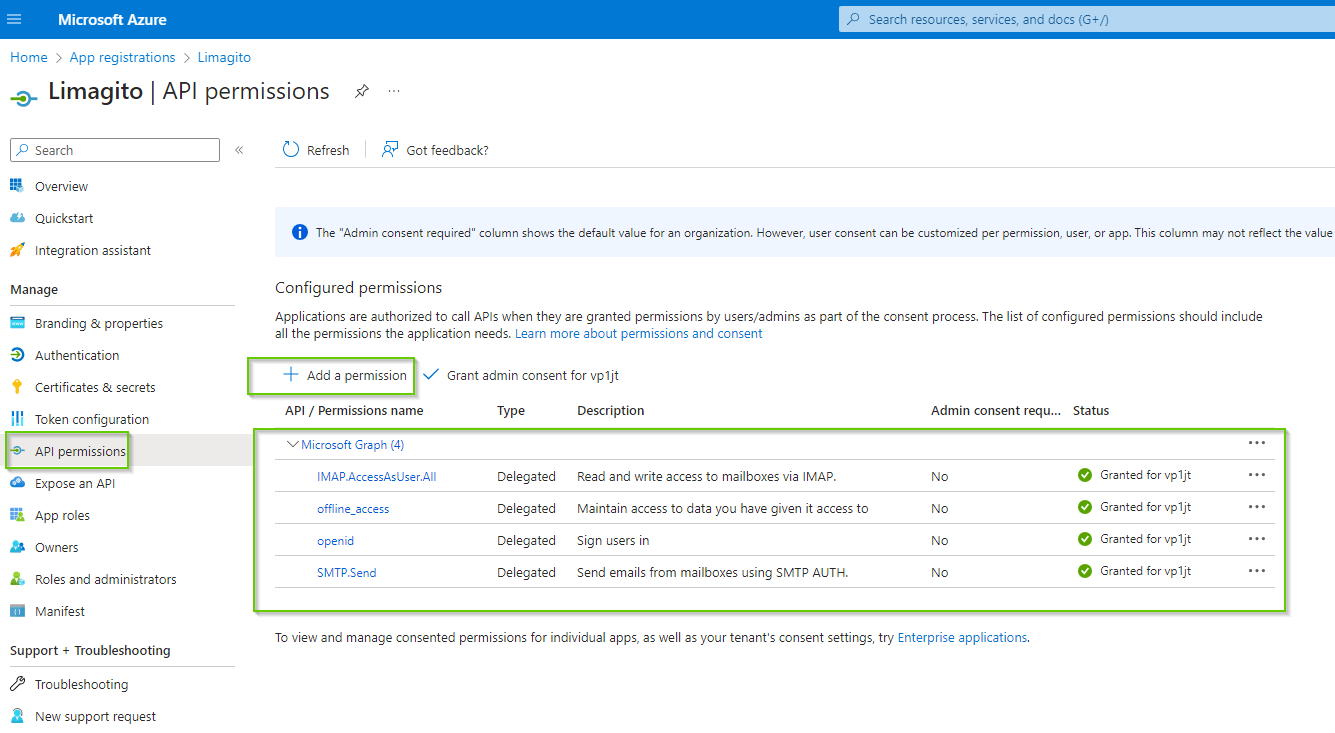
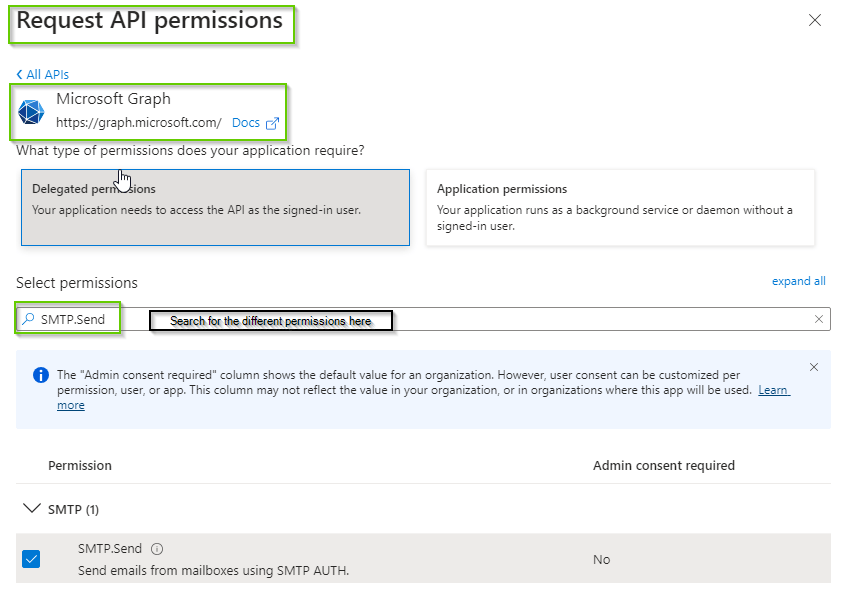
- Goto “API permissions” to add permissions. For this SMTP and OAuth2 authorization flow, we’ll add the following “Delegated permissions”:
- offline_access
- openid
- SMTP.Send
- IMAP.AccessAsUser.All is there because of a previous test (not needed for SMTP)
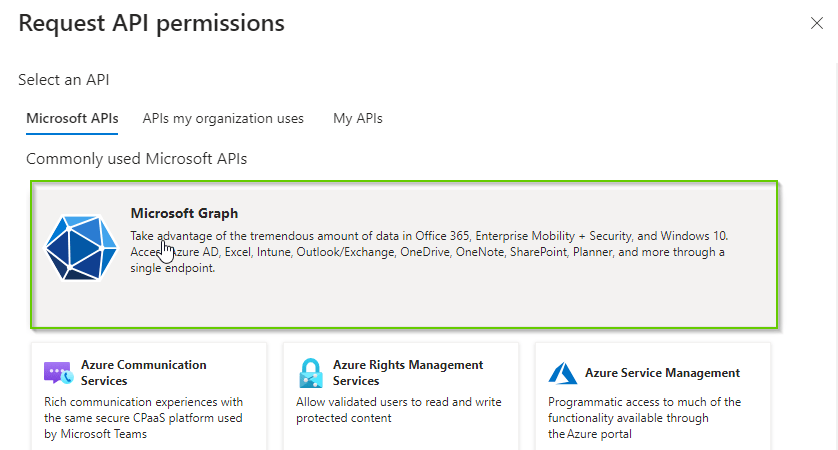
- To add a Delegated permission, click ‘+ Add a permission’ and select ‘Microsoft Graph’
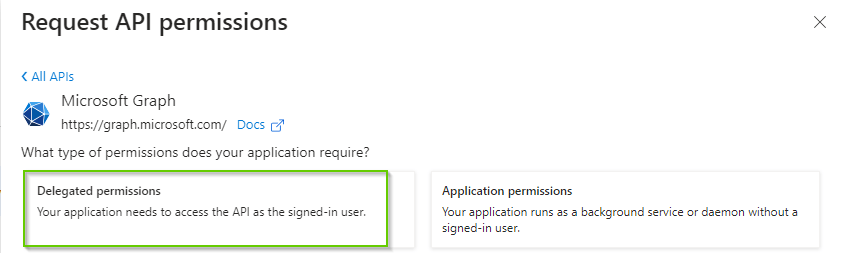
- Select ‘Delegated permissions’
- Search for the different permissions, select and click ‘Add Permissions’.
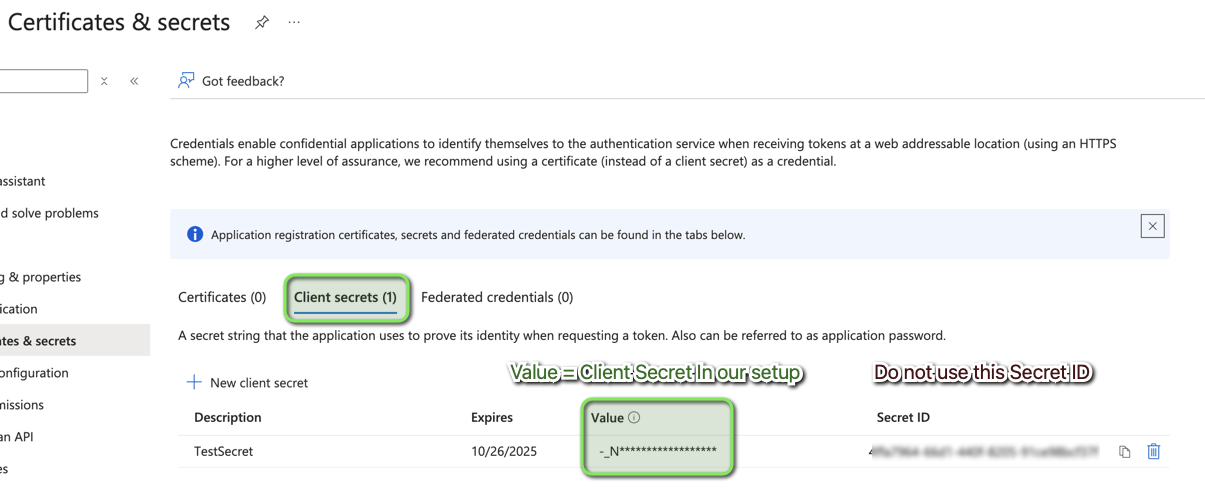
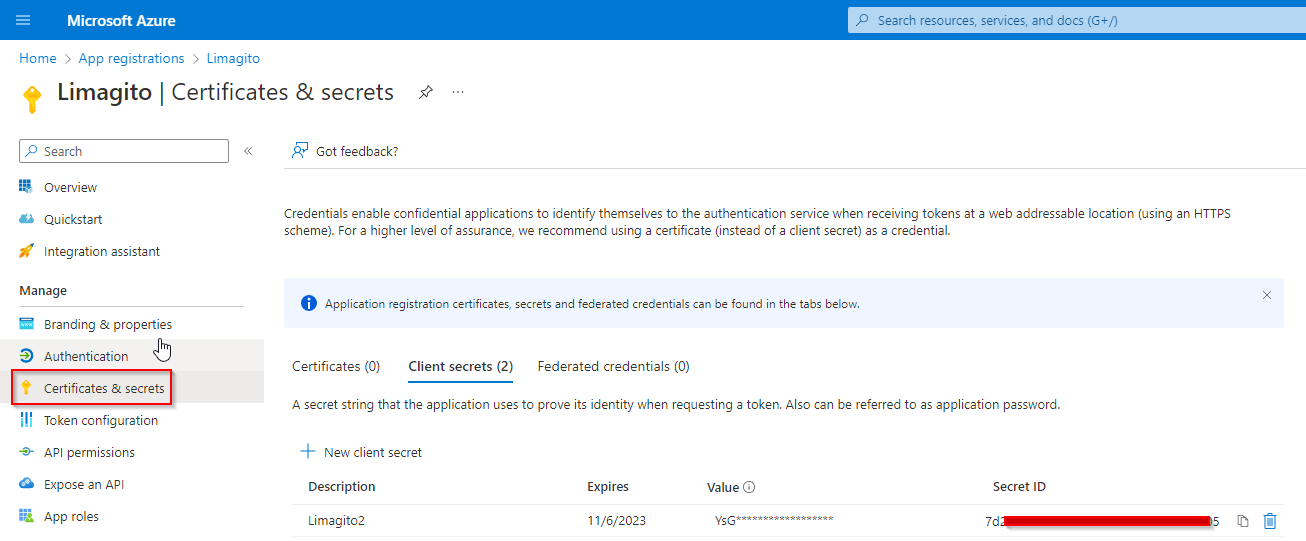
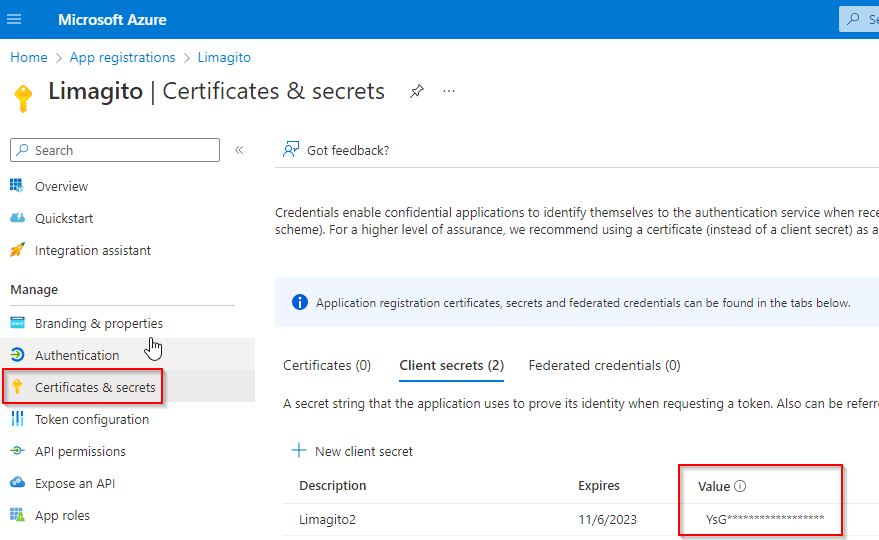
4) Go to “Certificates & secrets” and add a new client secret.
- Important, the ‘Value’ field is the Client Secret which we need later during the setup in Limagito File Mover. This Value is only fully visible just after creation!
- Do not use the Secret ID (common mistake).
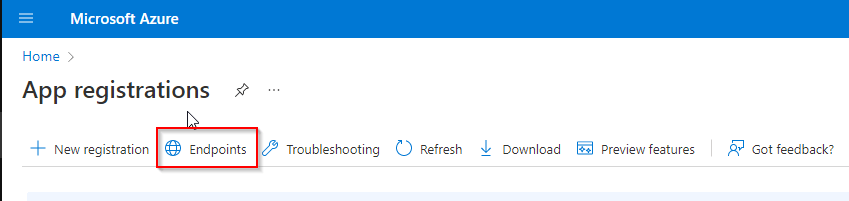
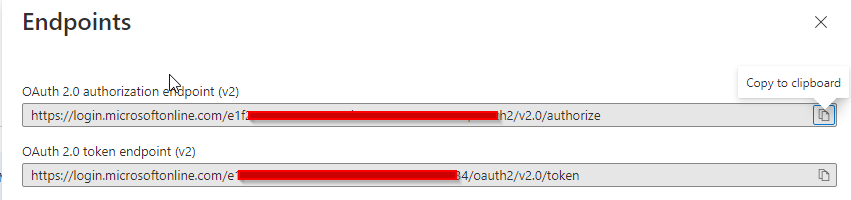
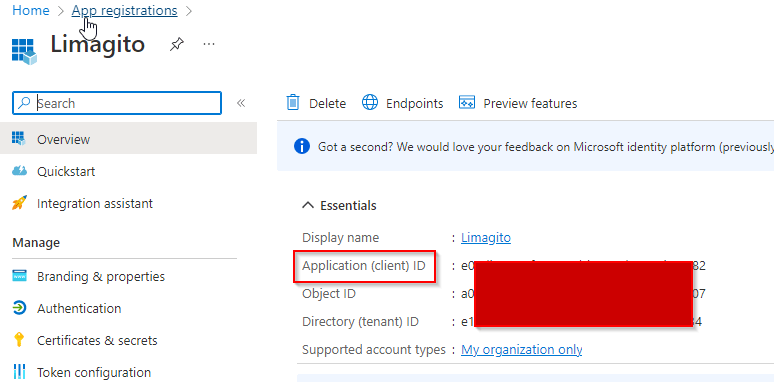
5) In “App registrations”, go to “Endpoints” (located to the right of the “+ New registration” link. Note your endpoints for “OAuth 2.0 authorization endpoint (v2)” and “OAuth 2.0 token endpoint (v2).
“Microsoft 365 admin center setup”
- Important, go to your Microsoft 365 admin center (this is NOT Azure).
- Go to your Active users.
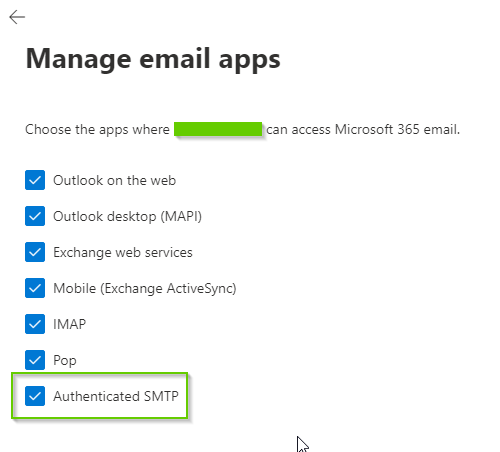
- Click on a user to find the “Manage email apps” link under the Mail Tab. See Microsoft 365 Manage Email Apps.
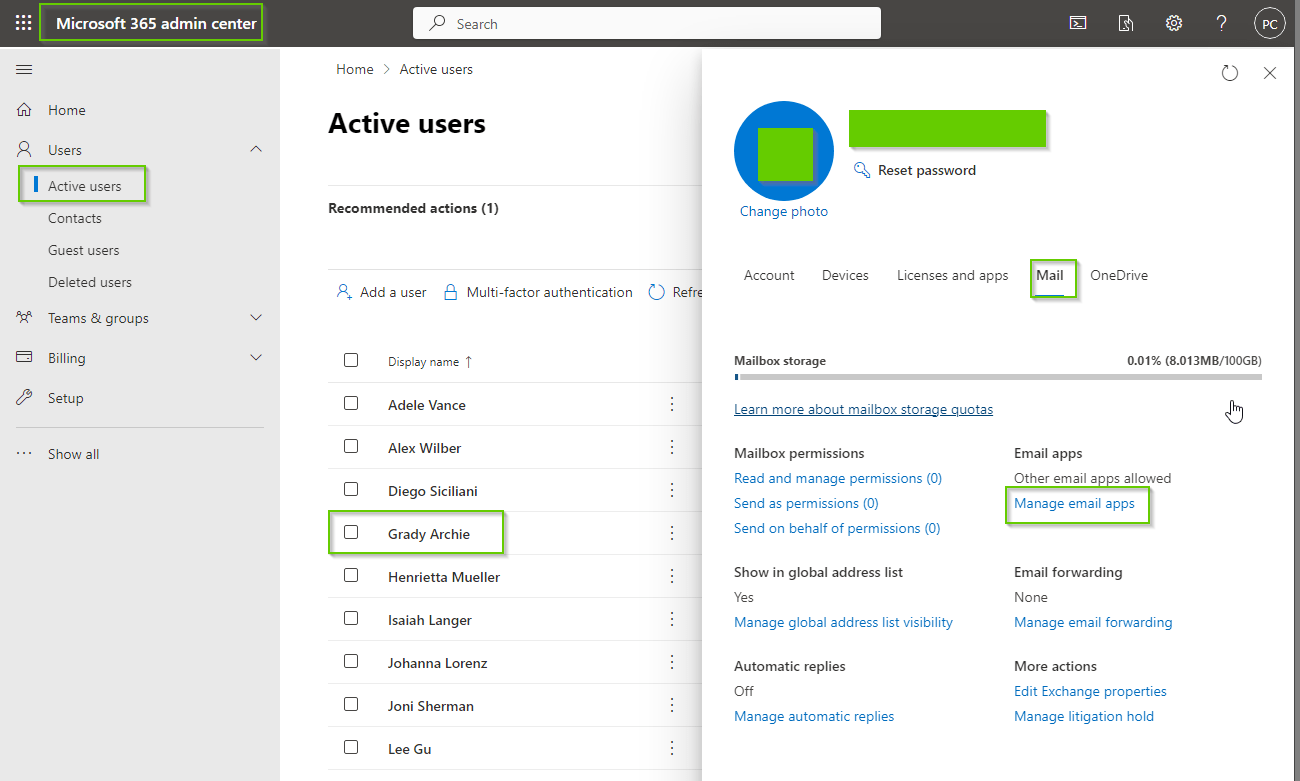
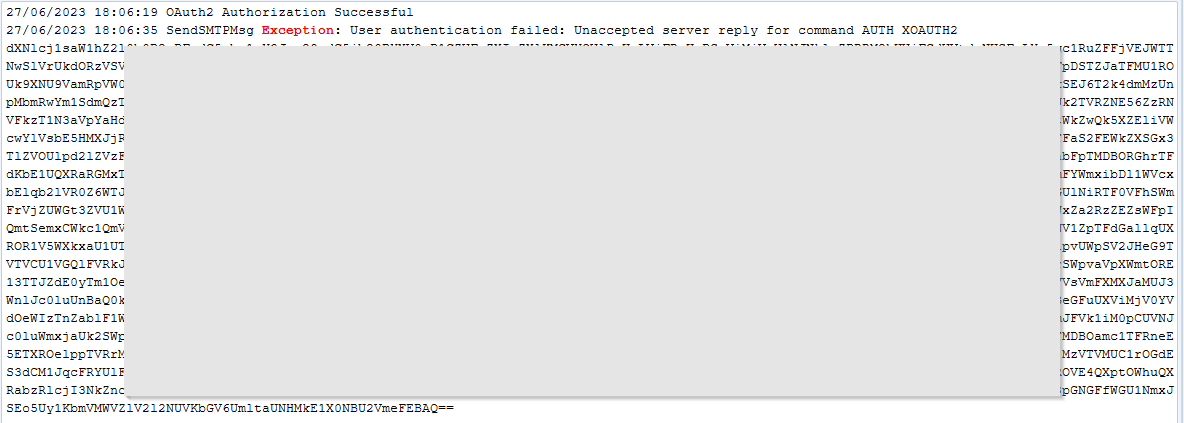
- Be sure ‘Authenticated SMTP’ is enabled
- When not enabled you’ll receive the following error message after trying to send an email using Limagito File Mover:
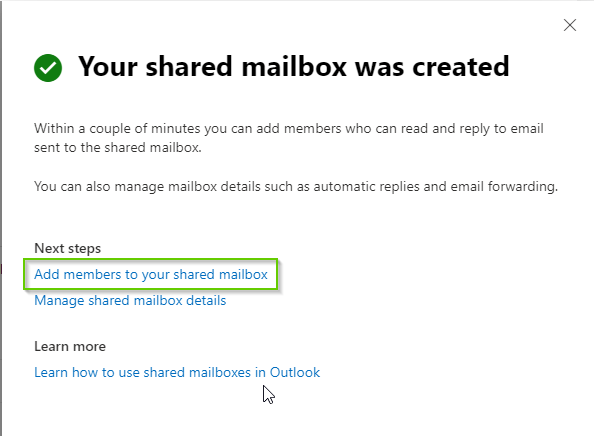
“Using a shared mailbox?”
In case you want to send emails using a shared mailbox:
- Open Microsoft 365 admin center setup
- Select ‘Teams & “groups”
- Click “+ Add a shared mailbox”
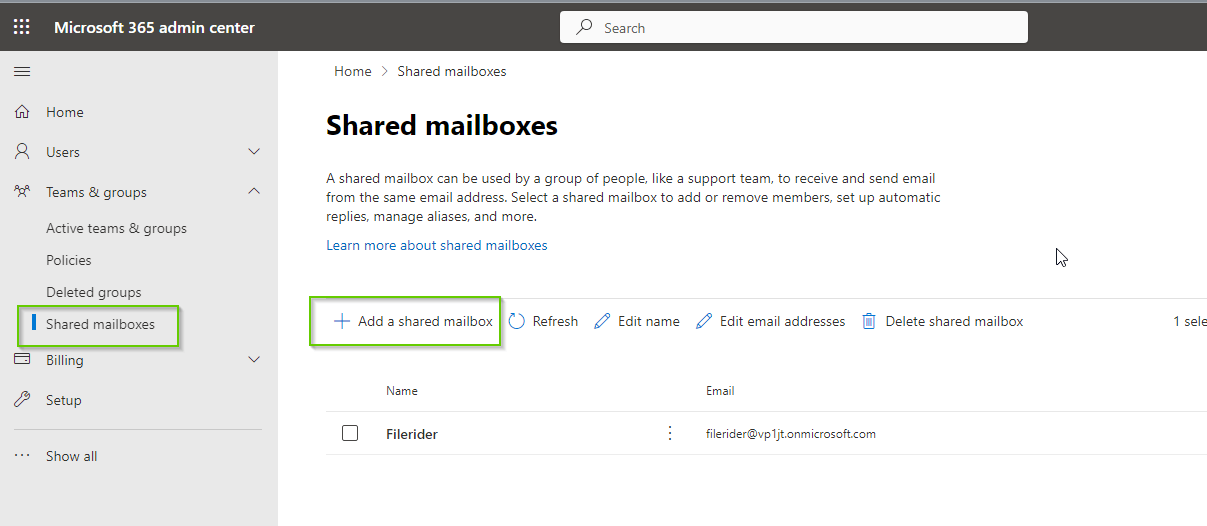
- Add a shared mailbox

- Click “Add members to your shared mailbox”
- Search for members and add. The account you used previously during the ‘App registration’ in Azure must be added as member.
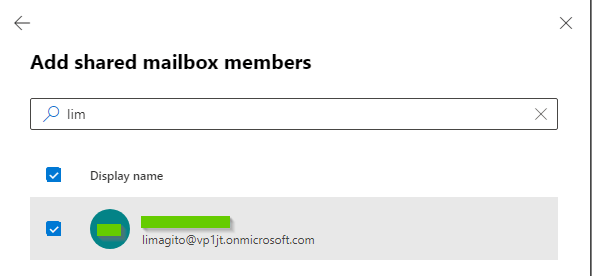
- If the shared mailbox member is not correct, you’ll receive the following error:

“Limagito File Mover setup”
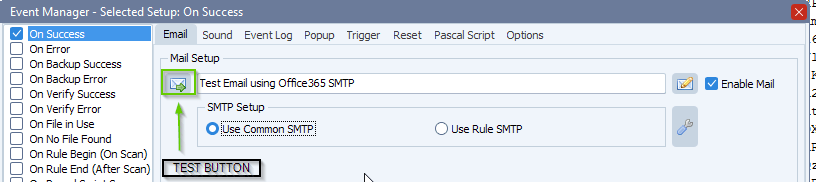
- We’ll be using the Office 365 SMTP to send emails from our ‘Rule Events’ option.
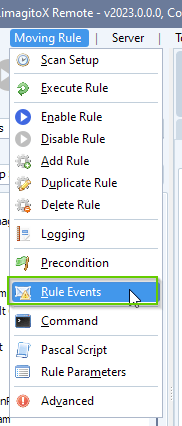
- We enabled the ‘On Success ‘ event and enabled ‘Enable Mail’:
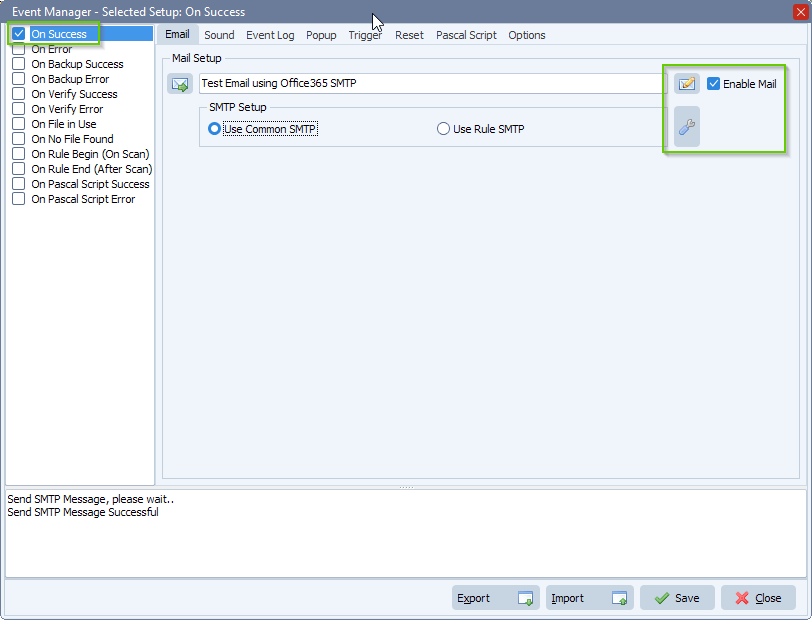
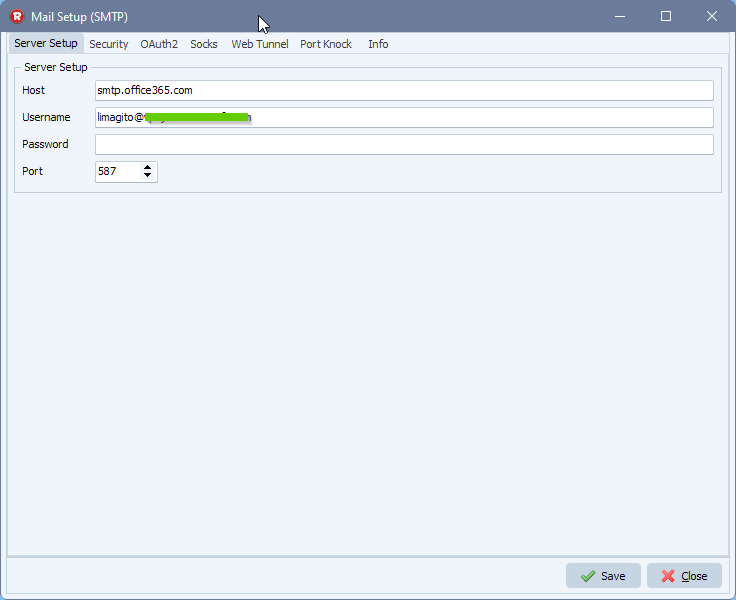
- Office 365 SMTP Server setup:
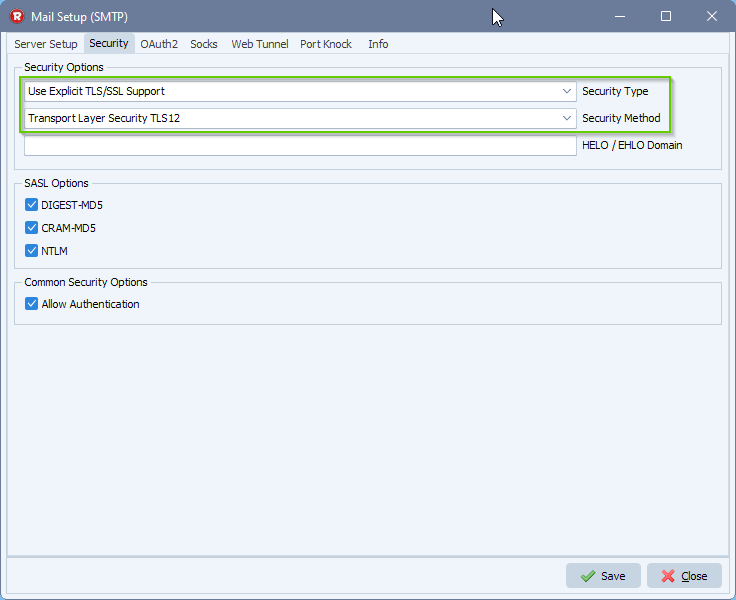
- Adjust the Security setup:
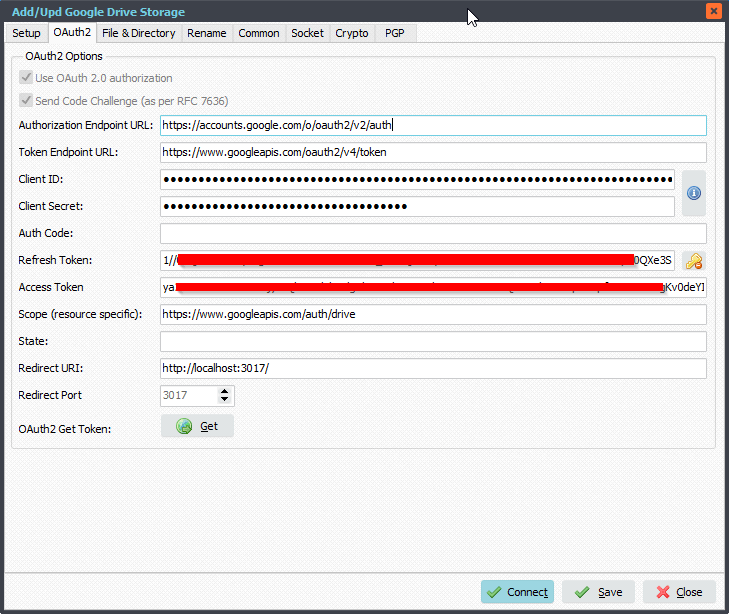
- Office 365 Auth2 setup:
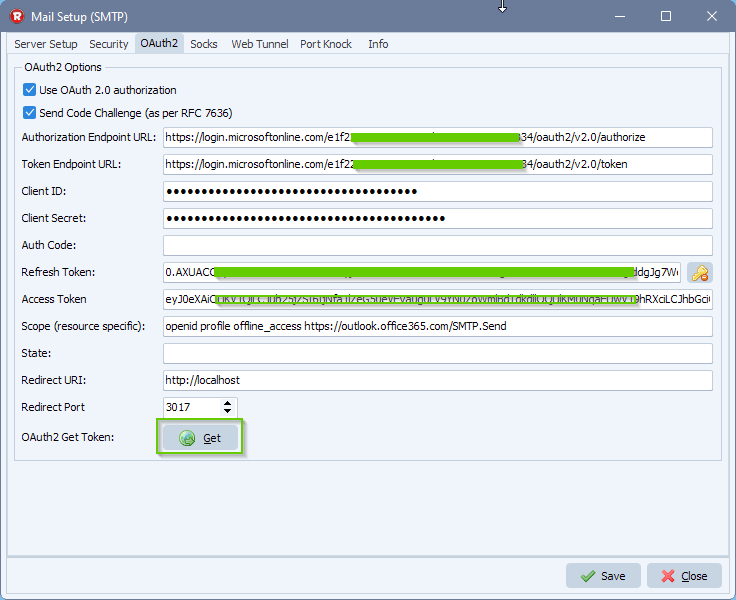
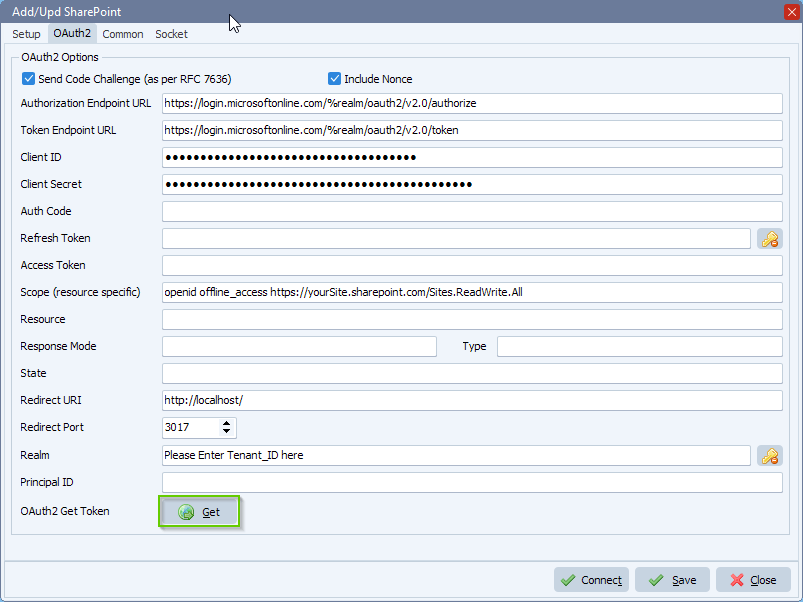
1) Fill in the correct Authorization and Token Url from previous “Azure setup”
2) Enter Application Client ID and Client Secret Value from previous “Azure setup”
3) Adjust your scope to: openid profile offline_access https://outlook.office365.com/SMTP.Send
- Provide a SPACE separated list of scopes.
- Important: The offline_access scope is needed to get a refresh token.
4) Set Redirect URI to: http://localhost:3017/
5) Set Redirect Port to 3017
- This should be the port in the localhost callback URL for your app.
- The callback URL would look like “http://localhost:3017/”, if the port number is 3017.
- The redirect must go to http://localhost
- It must be localhost and it cannot be “https”.
Next, click on the <GET> button.
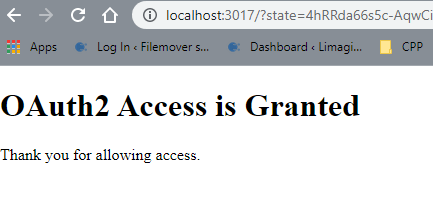
Should ‘Windows Defender’ popup, please <Allow access>.

Your browser will open and ask you for ‘Confirmation’.
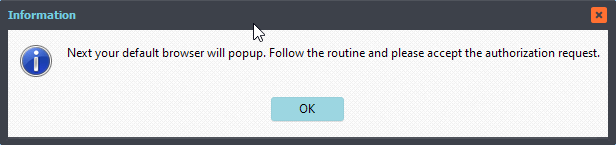
Follow the routine in your browser and accept the authorization request.
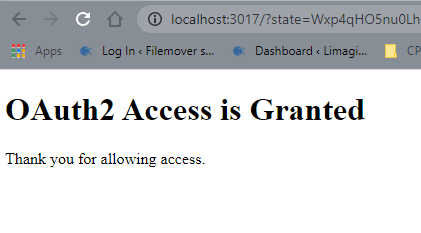
Now you can close the browser. The ‘Refresh’ and ‘Access’ Token in the OAuth2 Setup should contain values. Click <Save>.
- Office 365 email setup
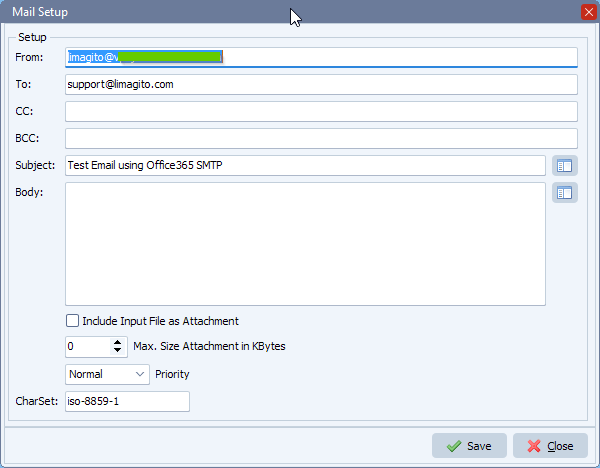
- Try your setup using the test button
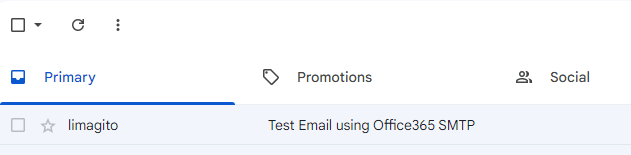
- Email result
Some extra information: ‘Explaining OAuth2 Authentication’.
The OAuth2 Get Token button does a couple of things:
- It starts the OAuth2 Authentication process.
- Returns a URL that should be displayed in a browser.
- Starts a background thread to receive the redirect callback from the browser.
The flow of control is like this:
- The browser (popped up and displayed by our file mover) automatically navigates to the URL provided by Start Authentication.
- The user interactively authorizes the access. In doing so, the response sent back to the browser is a redirect to http://localhost:<someport>/
- The browser receives the response, and redirects to the http://localhost:<someport>/
- The background thread (= temporary HTTP server using <someport>) is the thing that is listening at and receives the response, and then your OAuth2 is completed.
The redirect must go to http://localhost:<someport>/. It must be localhost, and it cannot be “https”. If you defined your application’s redirect URL to a web address such as “https://yourdomain.com/something…”, then the background thread is just sitting there waiting for the callback, which never happens (because it went to your web server).
#office365 #mft #Filetransfer #smtp
If you need any info about this “Office 365 SMTP”, please let us know.
Best regards,
Limagito Team