How to use 7z compression in Pascal Script
In version v2024.3.20.0 we added two new Pascal Script functions which allows you to use 7z compression.
- Function ps7zCompress(Source: String; Destination: String; Password: String; Options: TStringList): Boolean;
- Function ps7zCompressEx(Source: String; SourceFiles: TStringList; Destination: String; Password: String; Options: TStringList): Boolean;
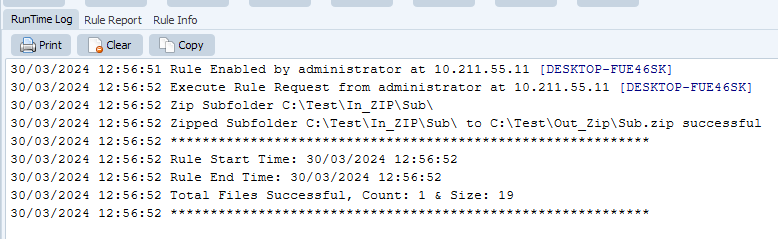
We added an example where we’ll be looking for a certain file called ‘trigger.txt’ within subfolders. If this trigger file is found we’ll compress the complete subfolder. The goal is to create a compressed backup of the complete subfolder content.
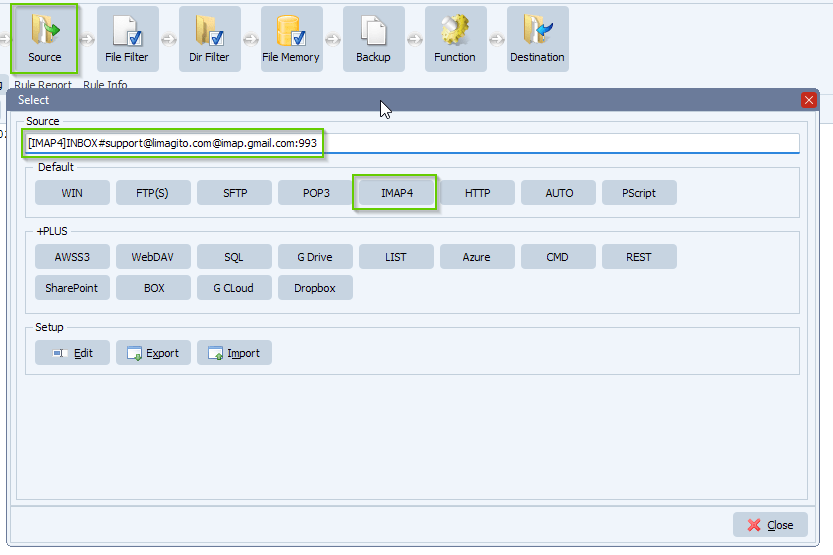
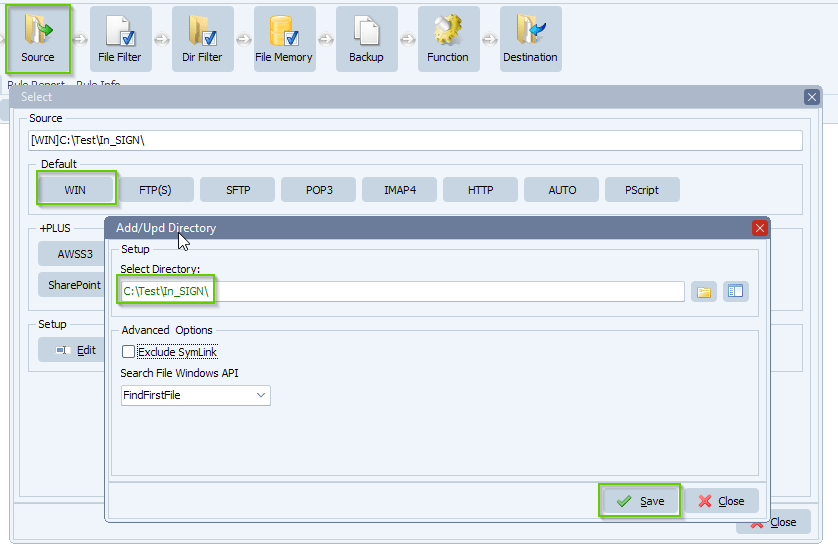
- As Source we used a Windows Folder:

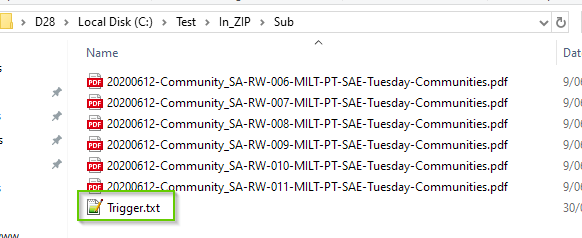
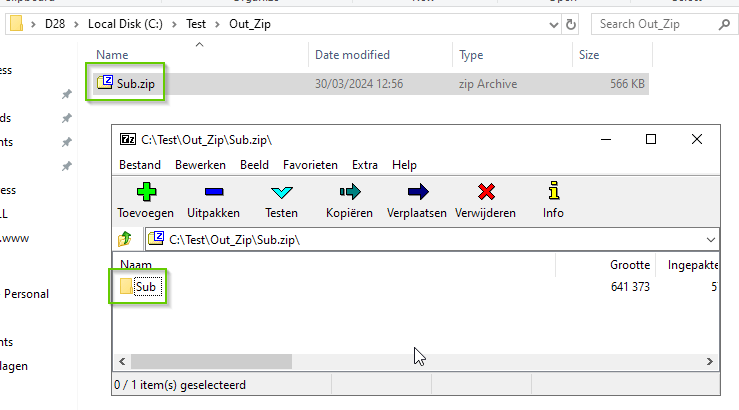
- The content of subfolder ‘Sub’ looks like the following screenshot. It contains the ‘trigger.txt’ file which we’ll use to start the compressing mechanism.
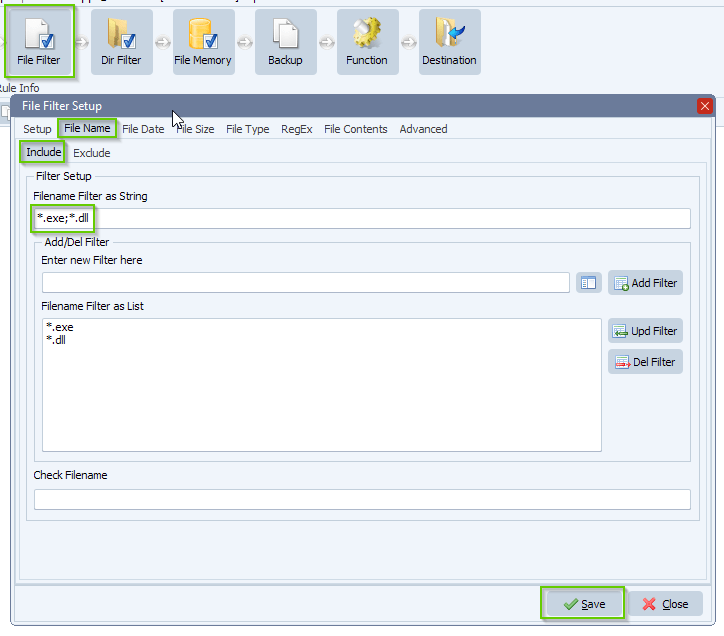
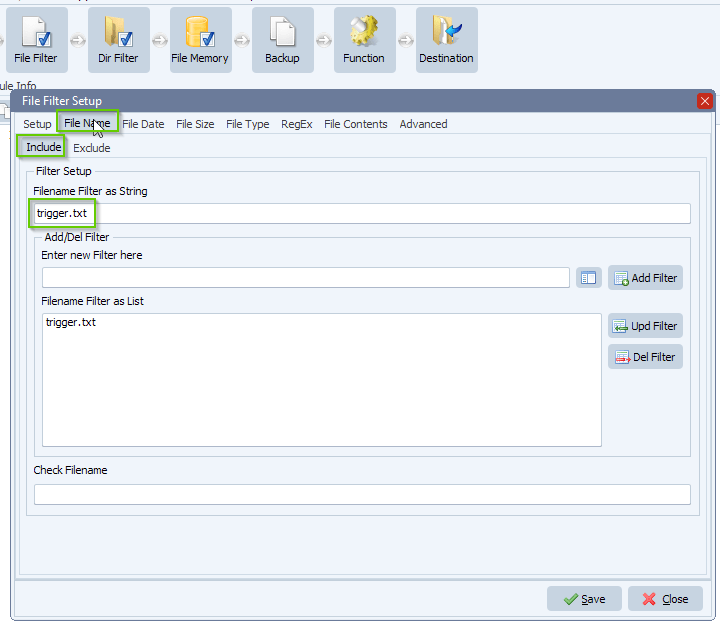
- We added the following include filename filter, because we are searching for the ‘trigger.txt’ only. This file will determine which subfolder we need to compress.
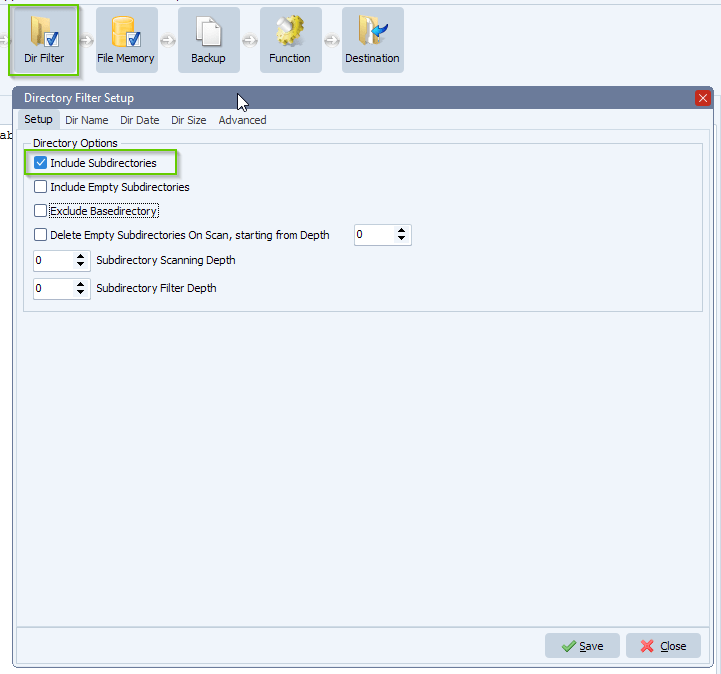
- Enable ‘Include Subdirectories’ within the Dir Filter’ setup:
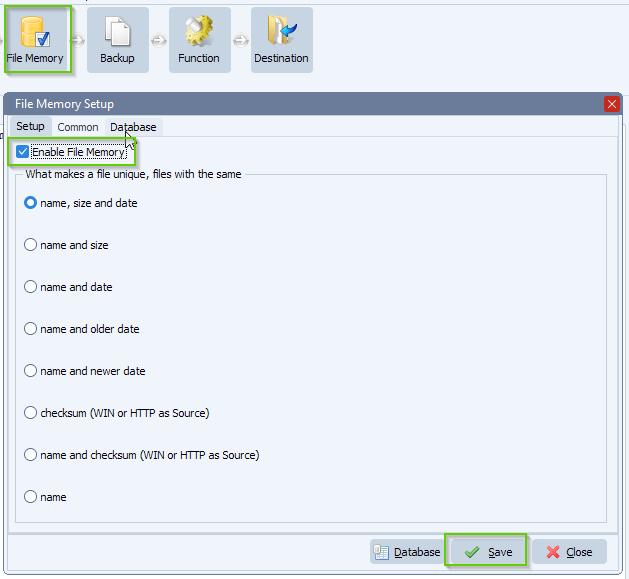
- We enable our ‘File Memory’ option because we only want to compress its subfolder once. If the trigger.txt is changed, then we’ll compress the subfolder again.
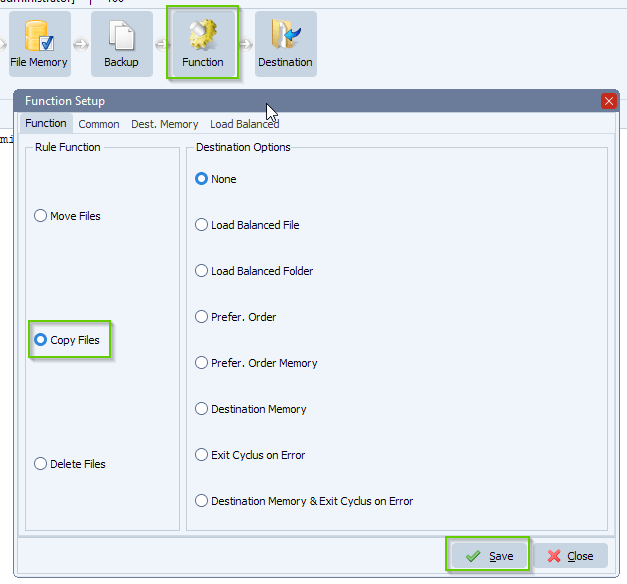
– Function is set to ‘Copy’ because we want to keep the source files.
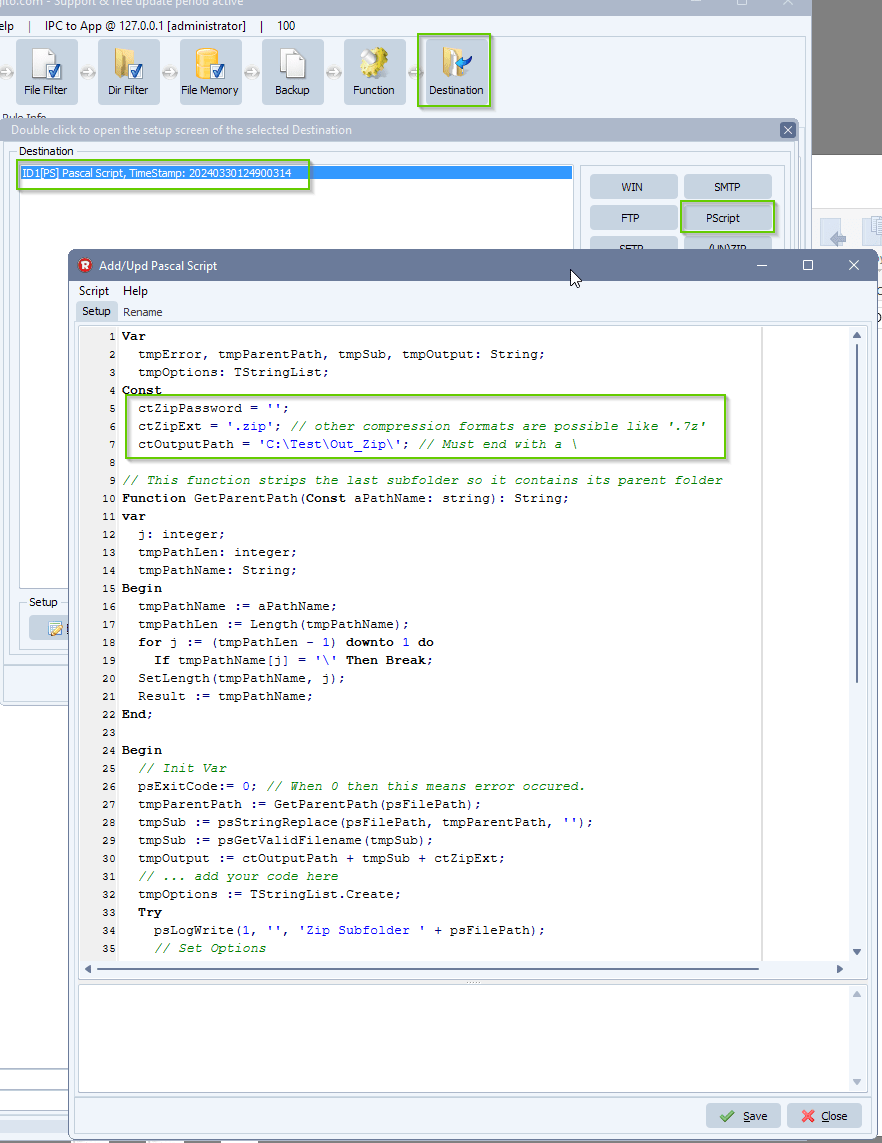
- Now add our ‘Pascal Script’ as Destination:
- Please add the following script: link
- Please adjust the following Const if needed:
- ctZipPassword
- ctZipExt
- ctOutputPath
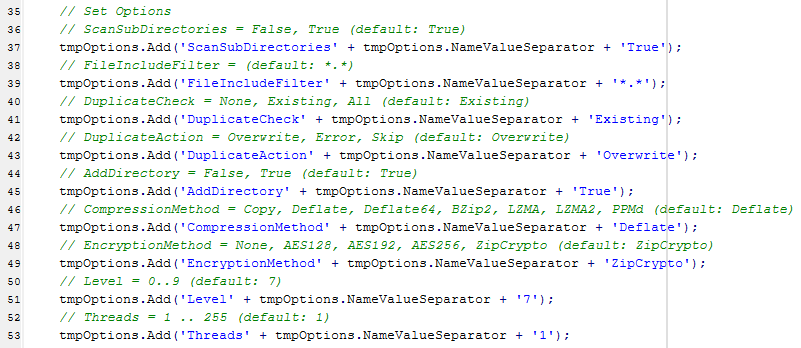
- The new ps7zCompress function has quite some options available which you can adjust if needed:
- AddDirectory = False, True (default: True)
- CompressionMethod = Copy, Deflate, Deflate64, BZip2, LZMA, LZMA2, PPMd (default: Deflate)
- DuplicateCheck = None, Existing, All (default: Existing)
- DuplicateAction = Overwrite, Error, Skip (default: Overwrite)
- EncryptionMethod = None, AES128, AES192, AES256, ZipCrypto (default: ZipCrypto)
- FileIncludeFilter = (default: *.*)
- ScanSubDirectories = False, True (default: True)
- Level = 0..9 (default: 7)
- Threads = 1 .. 255 (default: 1)
- Error = ‘Error Description if compression fails’
If you need any help with our new ‘7z compression in Pascal Script’ feature, please let us know.
Best Regards,
Limagito Team
#7z #pascalscript #managedfiletransfer #FileManagement #filetransfer