How to create a certificate using powershell
In a previous blog article we used a self signed certificate to authenticate against Azure. We used PowerShell to achieve this.
We used the following PowerShell script:
- We used “C:\ProgramData\LimagitoX\Certificates\Sharepoint” as output path for the certificate files
- We used Test123! as password
- Our certificate is valid for two years > -NotAfter (Get-Date).AddYears(2)
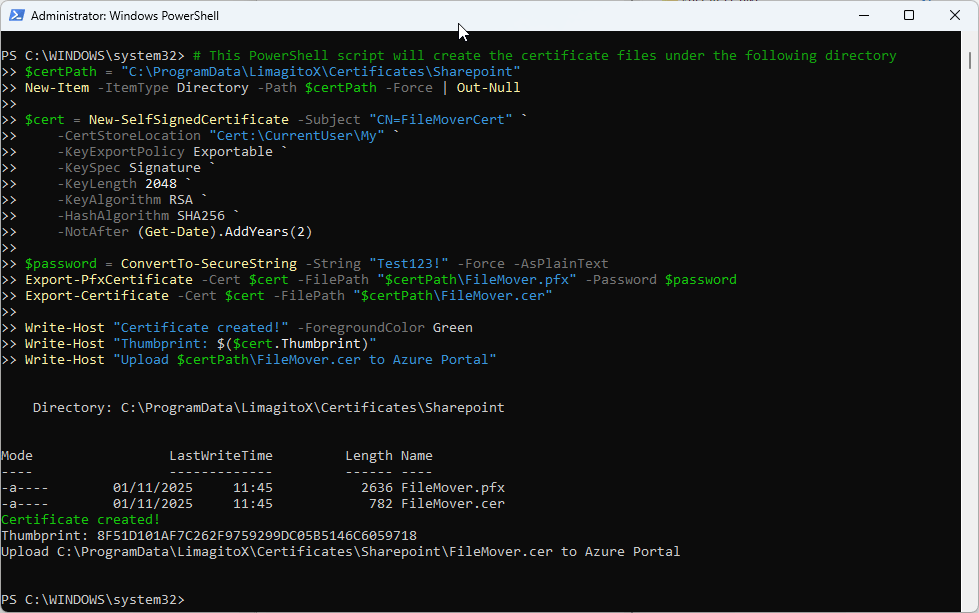
# This PowerShell script will create the certificate files under the following directory
$certPath = "C:\ProgramData\LimagitoX\Certificates\Sharepoint"
New-Item -ItemType Directory -Path $certPath -Force | Out-Null

$cert = New-SelfSignedCertificate -Subject "CN=FileMoverCert" `
    -CertStoreLocation "Cert:\CurrentUser\My" `
    -KeyExportPolicy Exportable `
    -KeySpec Signature `
    -KeyLength 2048 `
    -KeyAlgorithm RSA `
    -HashAlgorithm SHA256 `
    -NotAfter (Get-Date).AddYears(2)

$password = ConvertTo-SecureString -String "Test123!" -Force -AsPlainText
Export-PfxCertificate -Cert $cert -FilePath "$certPath\FileMover.pfx" -Password $password
Export-Certificate -Cert $cert -FilePath "$certPath\FileMover.cer"

Write-Host "Certificate created!" -ForegroundColor Green
Write-Host "Thumbprint: $($cert.Thumbprint)"
Write-Host "Upload $certPath\FileMover.cer to Azure Portal"
Open PowerShell as Administrator (Run as Admin ..) and paste the script + <Enter>
If you need any help about this ‘create a certificate’ article, please let us know.
Best Regards,
Limagito Team
#certificate #managedfiletransfer #filetransfer #filemanagement