Using Microsoft Graph API with SharePoint
On request we added support for Microsoft Graph as API method in version v2026.4.11.0. So, from this version on we support:
- Sharepoint REST API (legacy)
- Microsoft Graph API
Limagito FileMover Setup
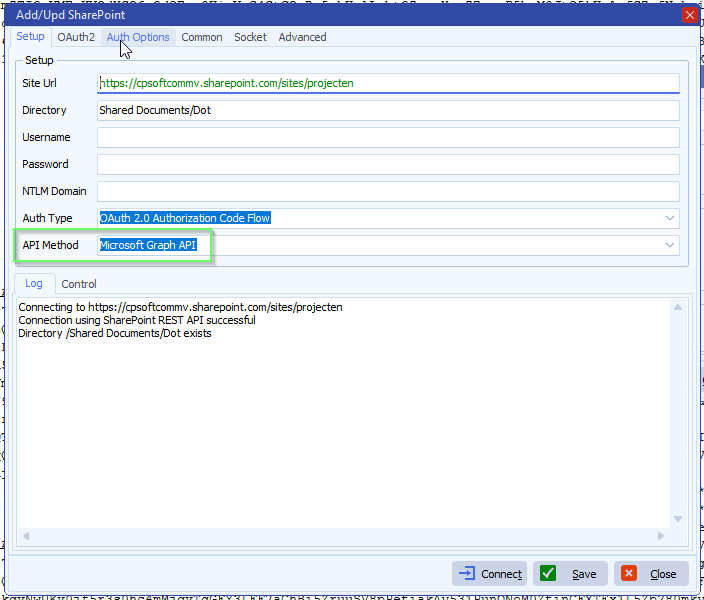
- Setup
- Set Site Url and Directory
- Select the Auth Type you will be using, check the previous blog articles:
- Online Authentication (SPOIDCRL) > deprecated by Microsoft (fully disabled on May 1, 2026)
- Classic Authentication (NTLM) > deprecated by Microsoft
- Online Authentication using Client Credentials without User Dialog
- Online Authentication using OAuth2 > deprecated by Microsoft
- OAuth 2.0 authorization code flow

- Set “Microsoft Graph API’ as API Method
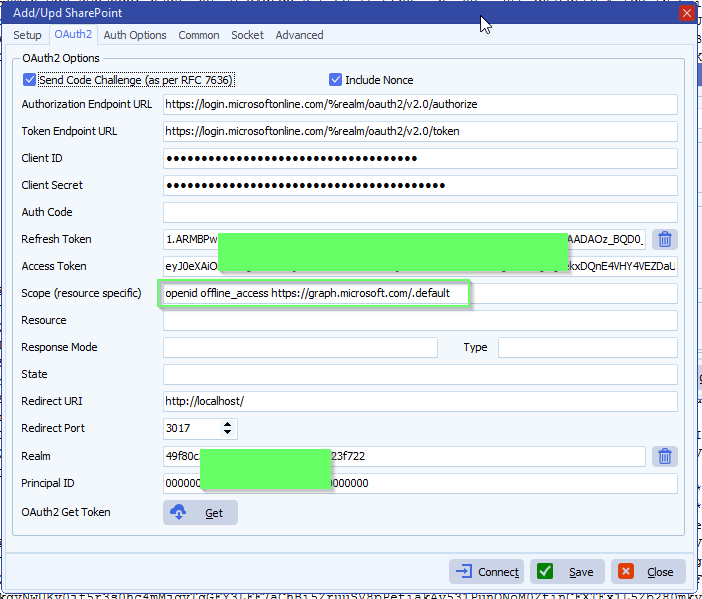
- OAuth2 setup:
- Enable ‘Code Challenge’
- Enable ‘Include Nonce’
- Set ‘Authorization Endpoint URL’
- https://login.microsoftonline.com/%realm/oauth2/v2.0/authorize
- %realm will be replaced by the Realm value = Directory (tenant) ID. You can also enter the full URL including the Tenant.
- Set ‘Token Endpoint URL’
- https://login.microsoftonline.com/%realm/oauth2/v2.0/token
- %realm will be replaced by the Realm value = Directory (tenant) ID. You can also enter the full URL including the Tenant.
- Enter your Client ID and Client Secret
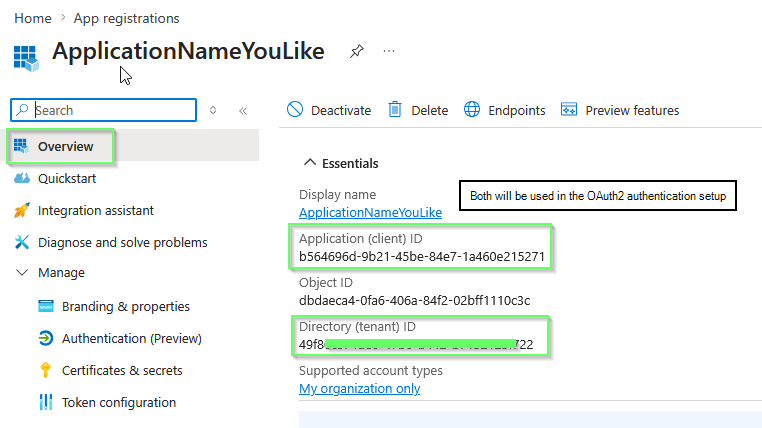
- Azure > App Registrations > Select the App you created > Use ‘Application (client) ID’ as Client ID in Limagito SharePoint OAuth2 setup
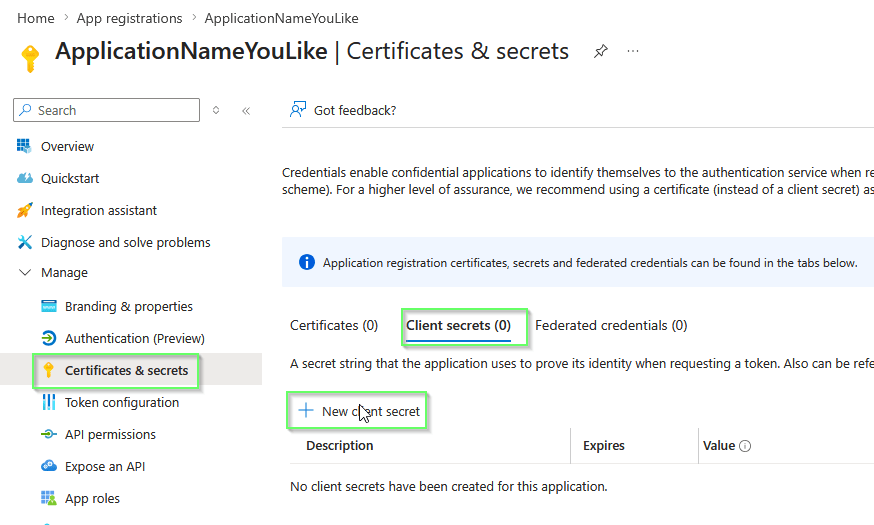
- Azure > Certificates & Secrets > Client secrets > Use ‘Value’ field as Client Secret in Limagito SharePoint OAuth2 setup
- Set ‘Scope’ to: openid offline_access https://graph.microsoft.com/.default
- Don’t forget to add “Sites.ReadWrite.All” to the Permissions in your Azure setup.
- Permissions Type must be Delegated with “OAuth 2.0 authorization code flow”
- Permissions Type must be Application with “Online Authentication using Client Credentials without User Dialog”
- FYI: Delegated permissions, also called scopes, allow the application to act on behalf of the signed-in user.
- An alternative could be: openid offline_access https://graph.microsoft.com/Sites.ReadWrite.All
- Don’t forget to add “Sites.ReadWrite.All” to the Permissions in your Azure setup.
- Leave Resource empty
- Leave Response Mode empty to omit the default response_mode “query” param.
- Leave Response Type empty, this way the default value “code” will be used.
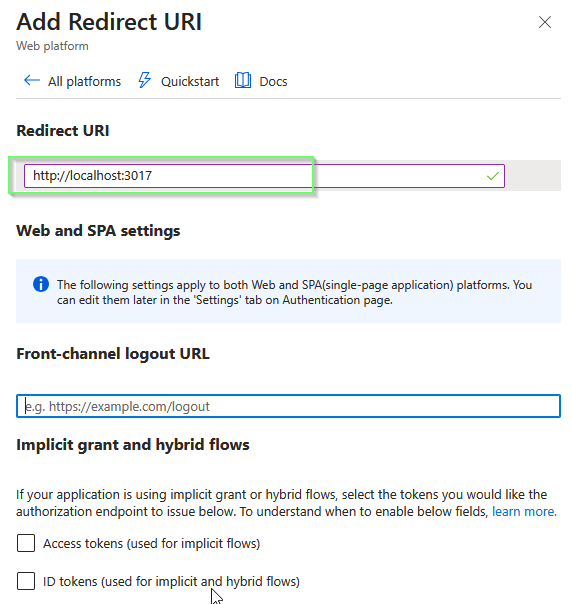
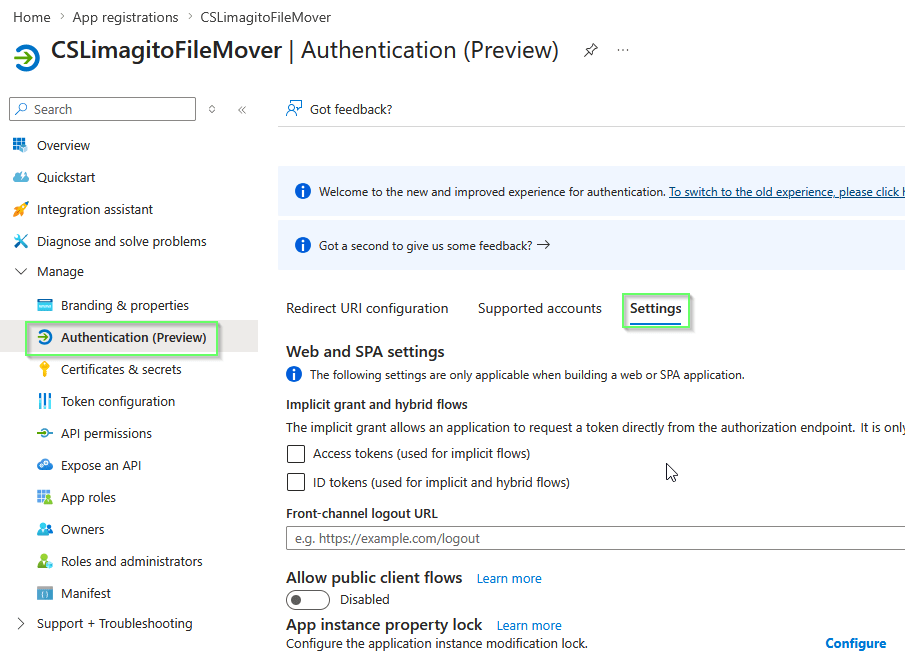
- The Redirect URI should be http://localhost/ (and not https://localhost/)
- Be sure to add the redirect URI in Azure too, combined with the Redirect Port in the example it would be: http://localhost:3017
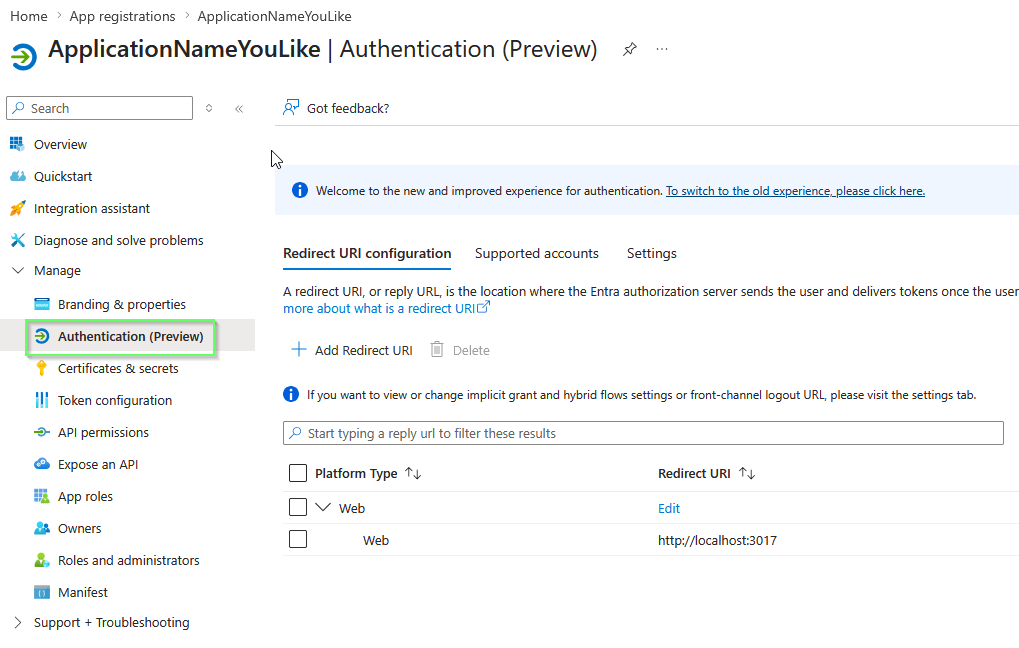
- Check if you selected “Web” as Redirect URI Type in Azure (do not use mobile & desktop or SPA)
- RedirectPort, we used 3017
- When using %realm in the ‘Authorization or Token Endpoint URL’
- Please set ‘Realm’ to your Tenant of Tenant_ID
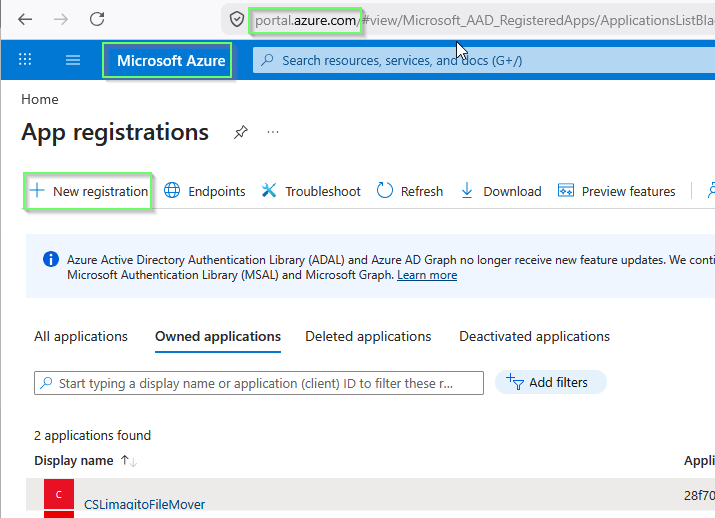
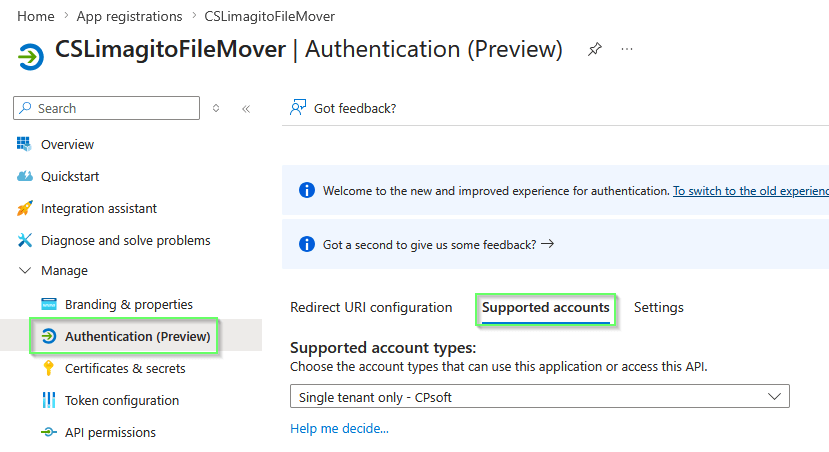
Azure App Registrations
- Register an application > + New registration
- Set Name, Single tenant and Web as Redirect URI
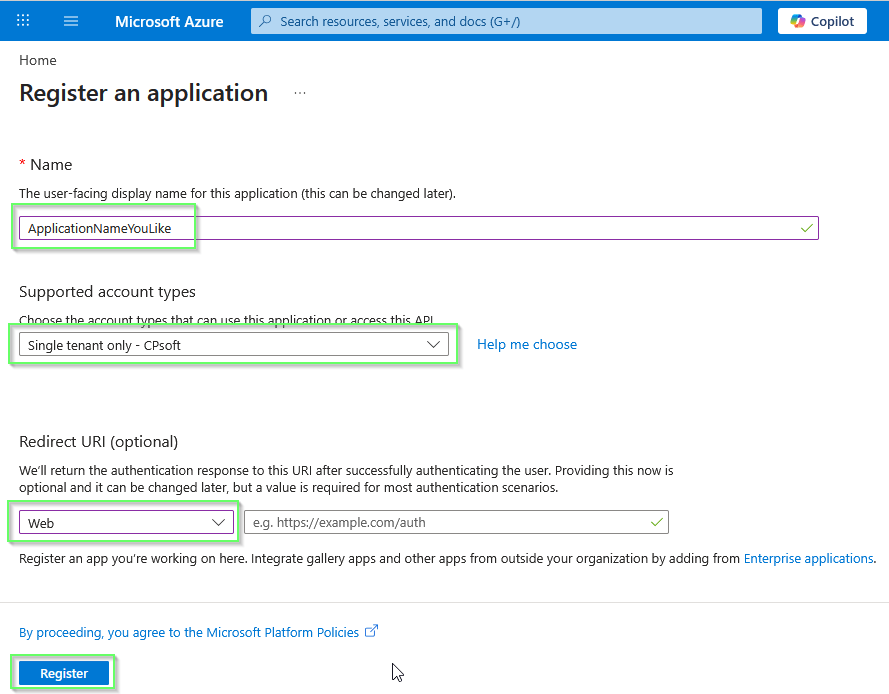
- You’ll need the Application (Client) ID in the OAuth2 setup of Limagito File Mover. Also Directory (Tenant) ID will be used.
- Depending on the ‘Authentication Type’ in Limagito File Mover, you’ll need a Redirect URI.
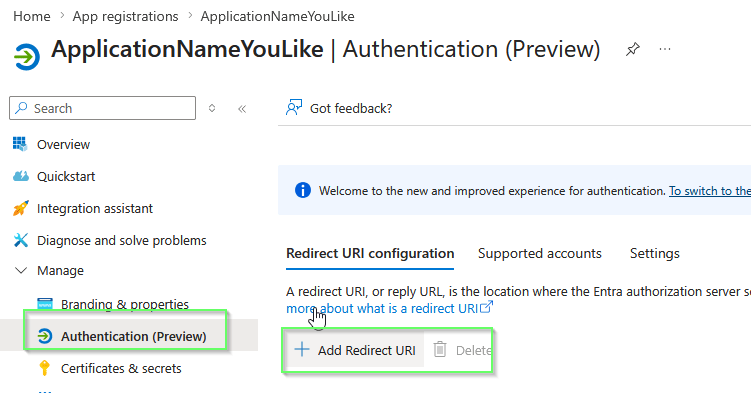
- It is http://localhost:3017 and NOT https://
- Summary:
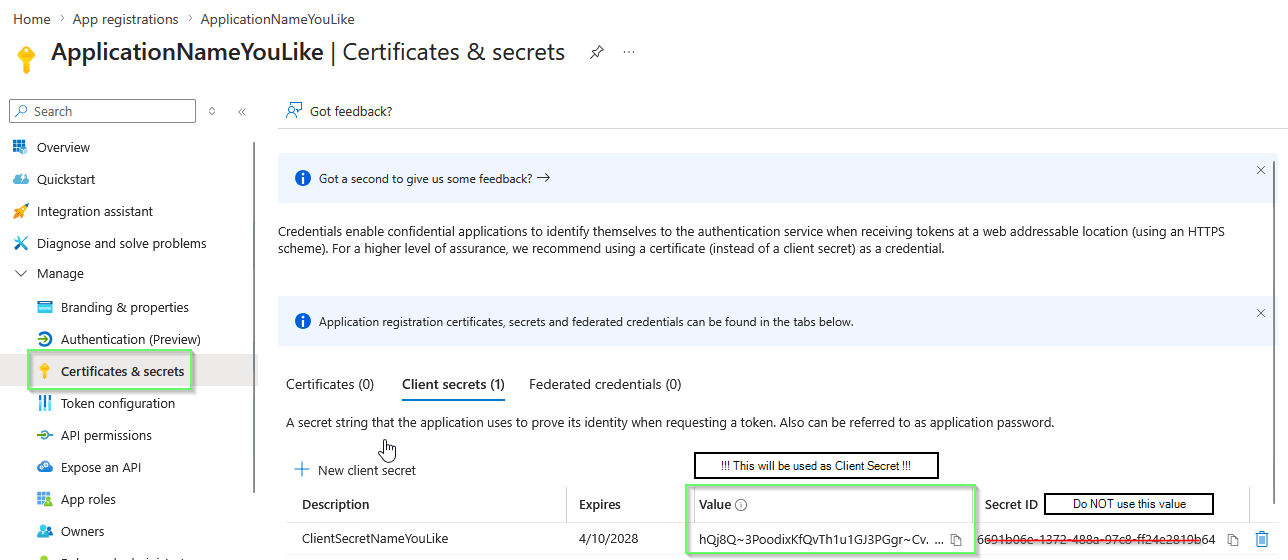
- Add a new client secret:
- Set Client secret description and expire period:
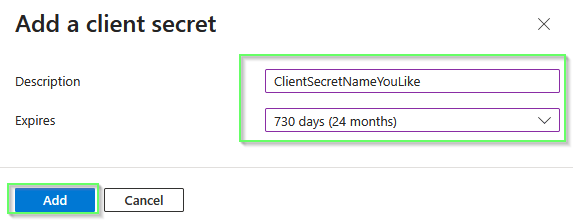
- IMPORTANT: we’ll need the Value as Client Secret in the OAuth2 setup of Limagito File Mover. The Secret ID is NOT needed.
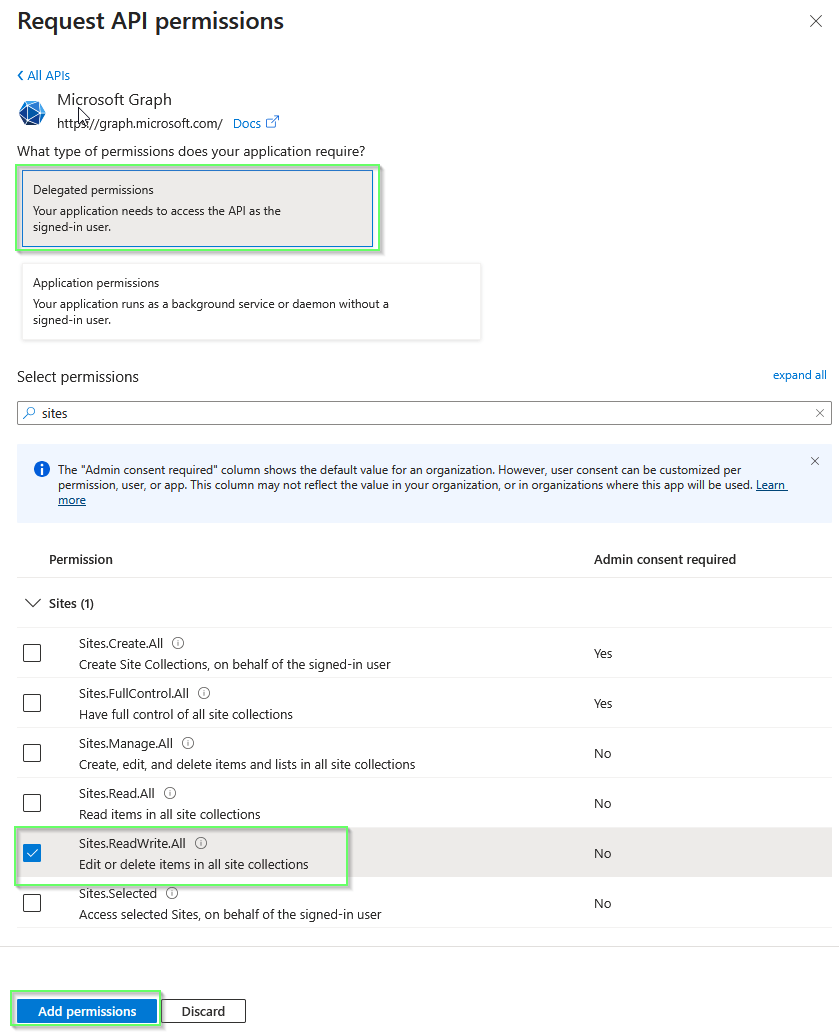
- Add API Permissions, two types of permissions:
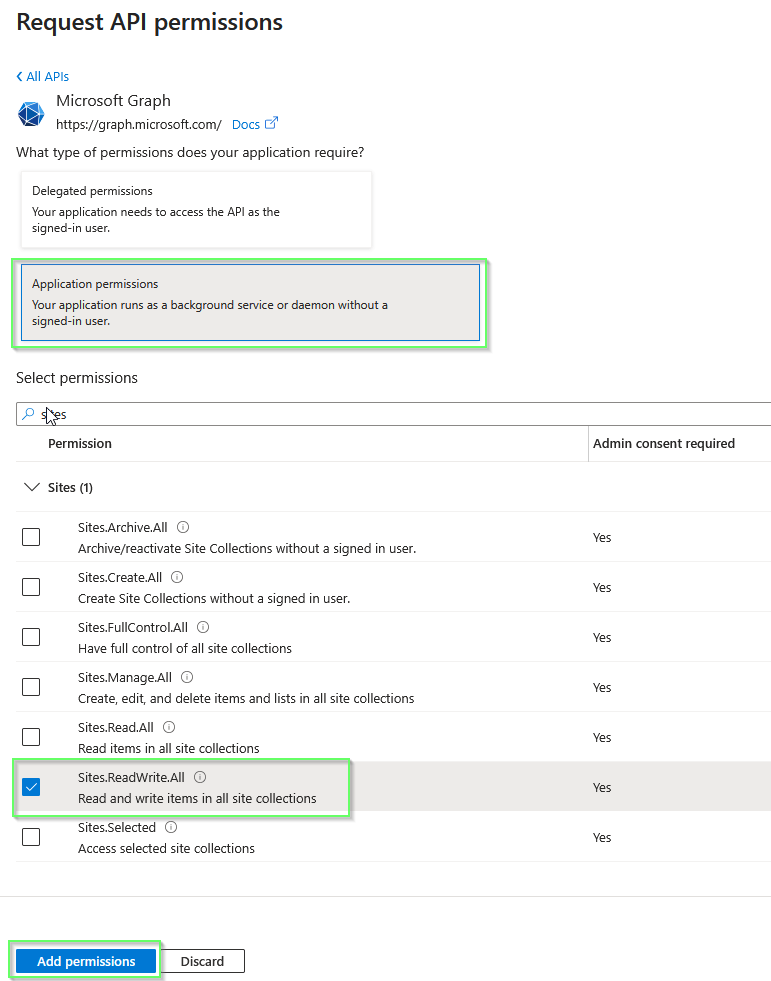
- Application permissions allow the app to access data on its own, without a signed-in user. The app acts as itself using its own identity. This is used with client credentials authentication (client ID + secret or certificate). The app has access to all resources that the permission grants — for example,
Sites.ReadWrite.Allas an application permission gives access to all SharePoint sites in the tenant. - Delegated permissions allow the app to act on behalf of a signed-in user. The app can only access what the user themselves can access. This is used with the OAuth 2.0 authorization code flow where a user signs in through a browser dialog. For example,
Sites.ReadWrite.Allas a delegated permission gives the app access only to the SharePoint sites that the signed-in user has permission to use. - In short: application = the app acts as itself (no user), delegated = the app acts as the user (user must sign in once during OAuth2 setup).
- Application permissions allow the app to access data on its own, without a signed-in user. The app acts as itself using its own identity. This is used with client credentials authentication (client ID + secret or certificate). The app has access to all resources that the permission grants — for example,
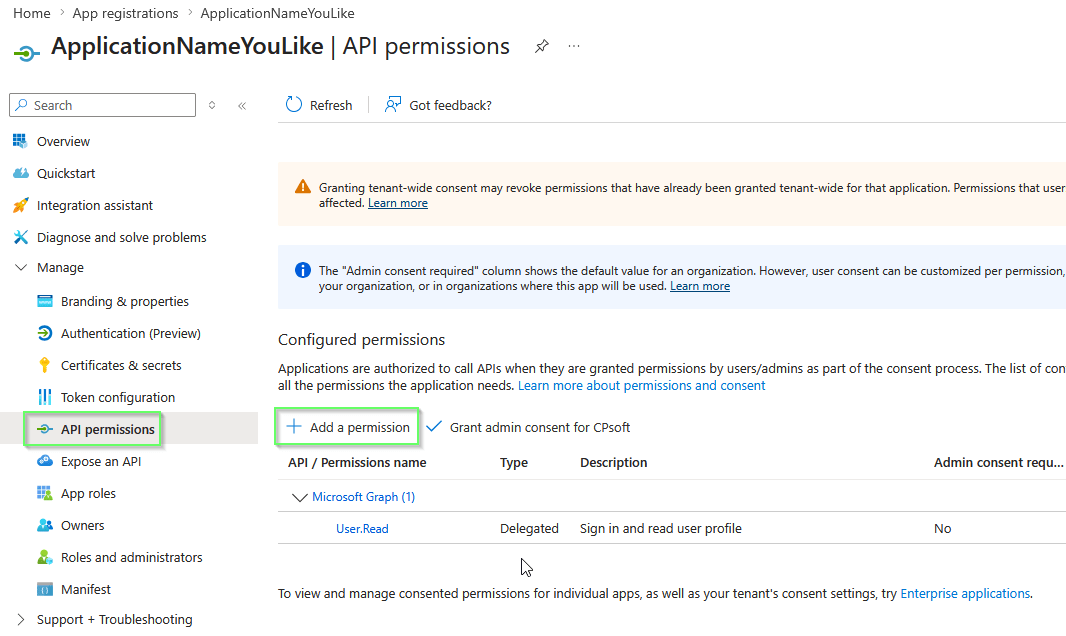
- Select Microsoft Graph:
- First option is it to use Application permissions: we added Sites.ReadWriteAll
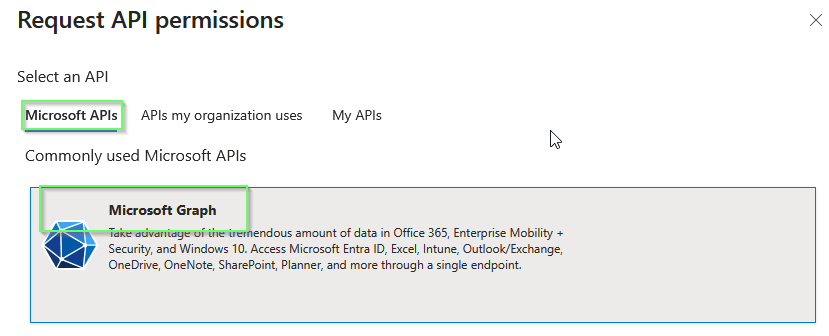
- Select Microsoft Graph:
- Second option is it to use Delegated permissions: again we added Sites.ReadWriteAll
- Grant admin consent for the choosen Application permissions:
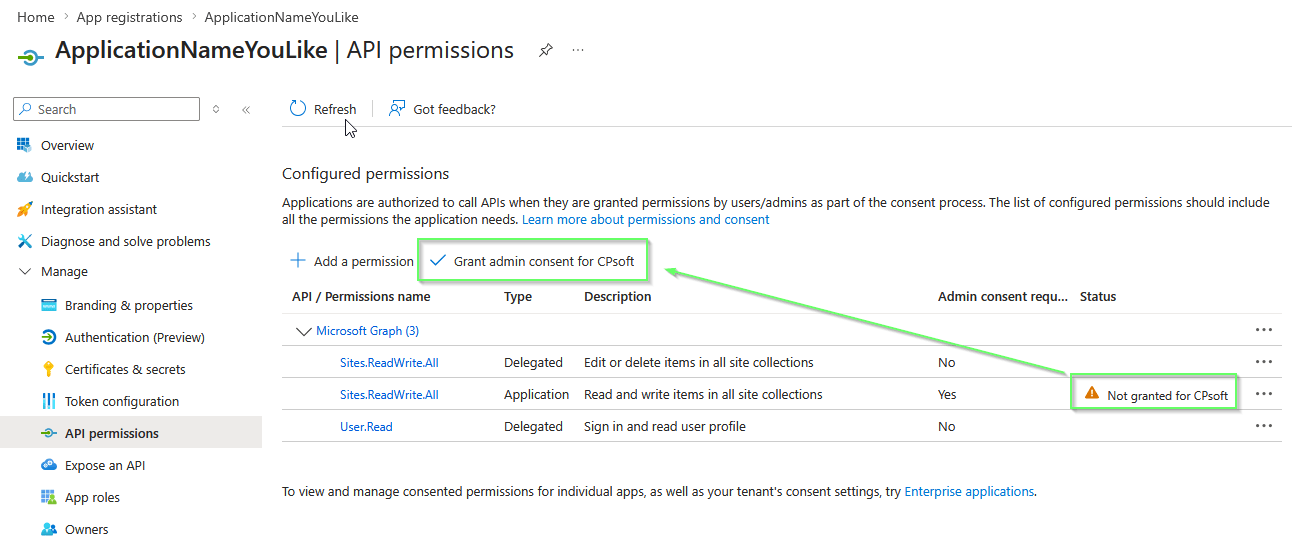
- Confirm

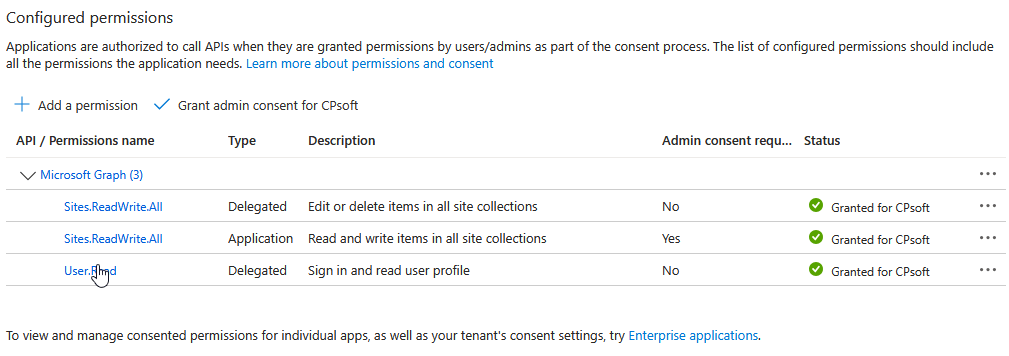
- Permissions result:
If you need any help about this ‘microsoft Graph API with SharePoint’ option, please let us know.
Best Regards,
Limagito Team
# sharepoint #managedfiletransfer #filetransfer #filemanagement #limagito