Sign PDF with Timestamp from Timestamp Server Authority (TSA) with Limagito File Mover version 2023
In this example we are going to a sign a PDF that is both long-term validation (LTV) enabled and includes a validating timestamp from a Timestamp Server Authority (TSA).
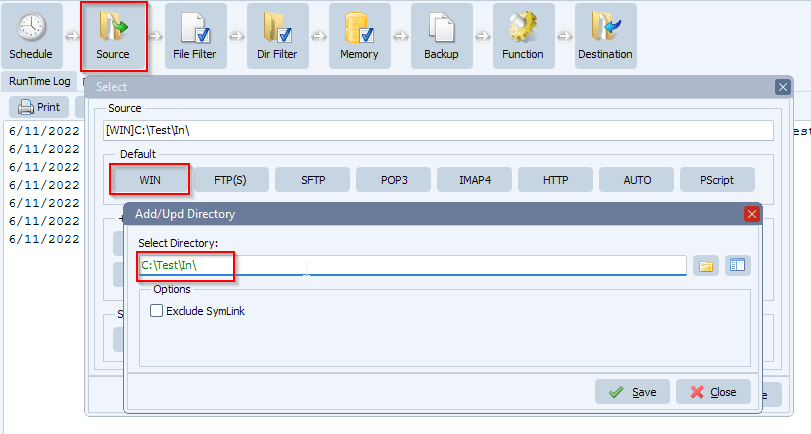
- As source we are going to use a Windows folder [WIN]:
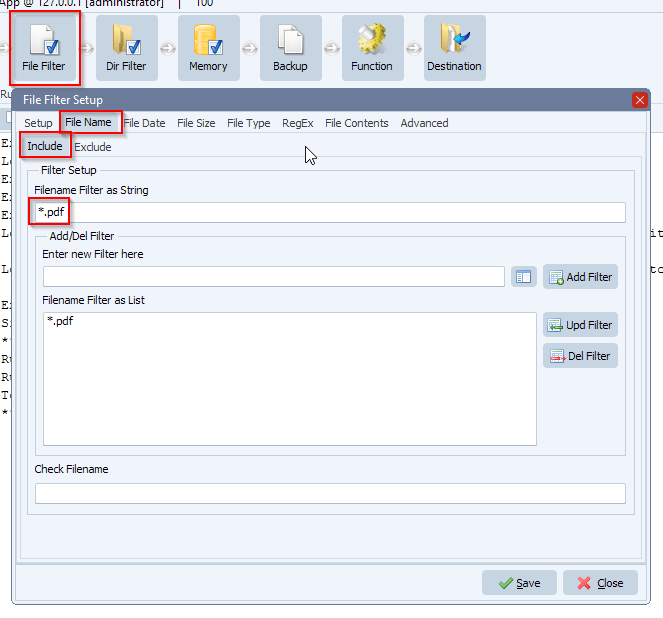
- Be sure to only allow .pdf files. Please set the Include Filename Filter:
- Add ‘SIGN’ as Destination
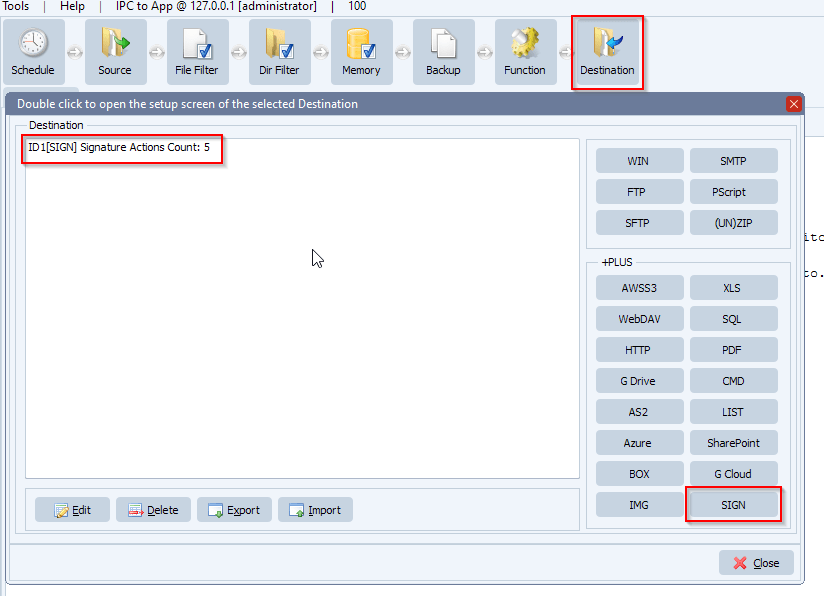
- Setup ‘SIGN’ as Destination. The default setup has 5 ‘actions’:
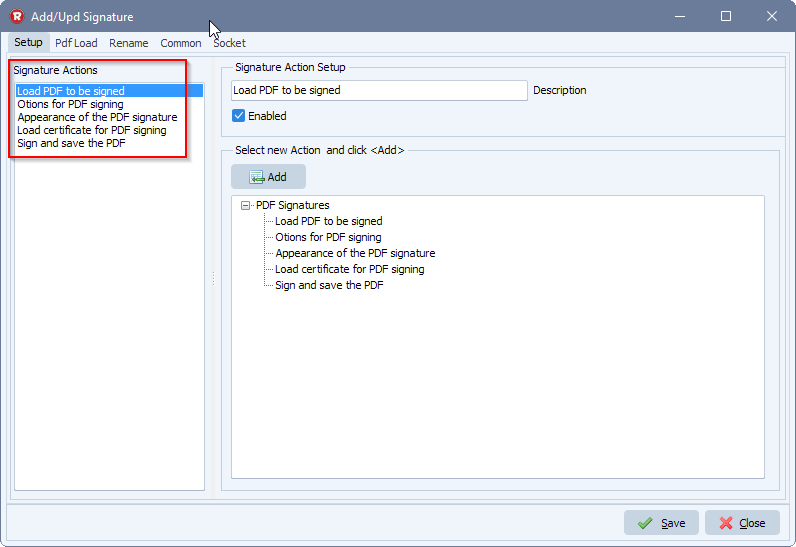
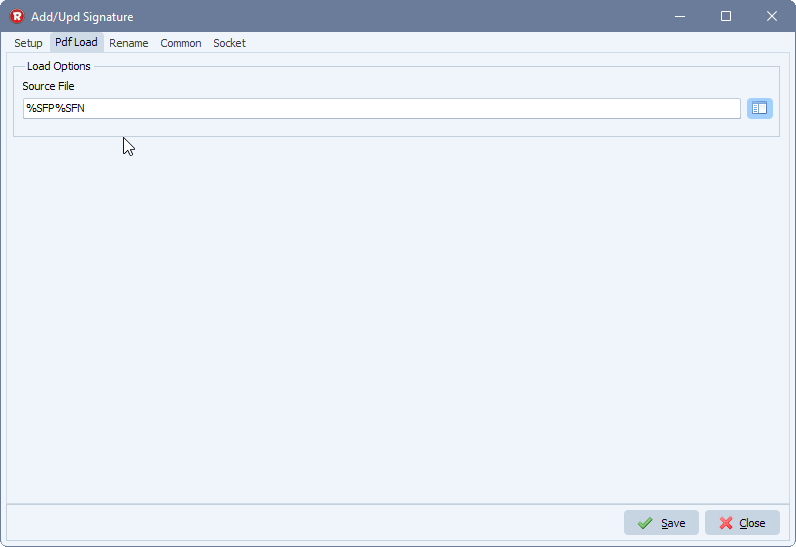
- Select the first Action ‘Load PDF to be signed’ and an extra tab will appear in the top menu bar. Select this ‘Pdf Load’ tab.
The default setup here is %SFP%SFN which translates to Source File Path and Source File Name. So in most cases you don’t need to change this.
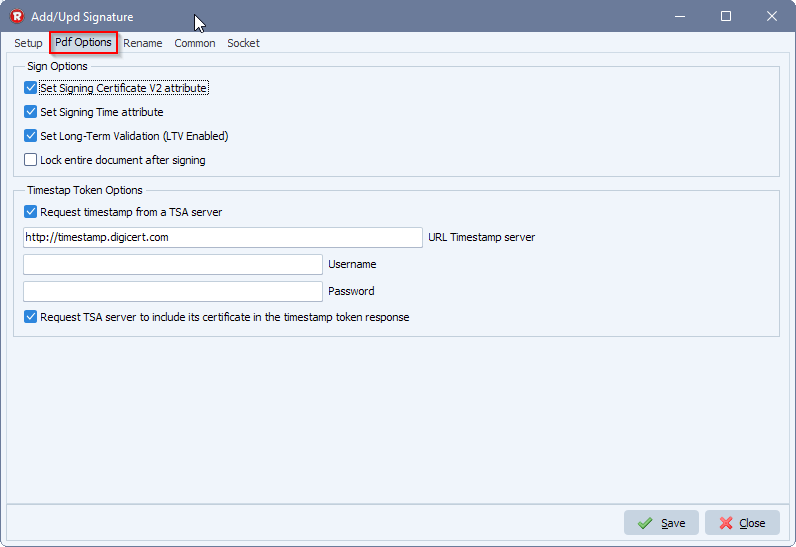
- Back to the ‘Setup’ tab and select ‘Options for PDF signing’ in the Action list and next ‘Pdf Options’ Tab.
- Enable ‘Set Signing Certifcate V2 attribute’ (is enabled by default)
- Enable ‘Set Signing Time attribute’ (is enabled by default)
- Enable ‘Set Long-Term Validation (LTV Enabled)’
- Enable ‘Request timestamp froma TSA server’ (Timestamp Server Authority)
- Set the URL of the Timestamp server. We used: http://timestamp.digicert.com
- Enable ‘Request TSA server to include its certificate in the timestamp response’
- Ask the timestamp server to include its certificate in the timestamp token
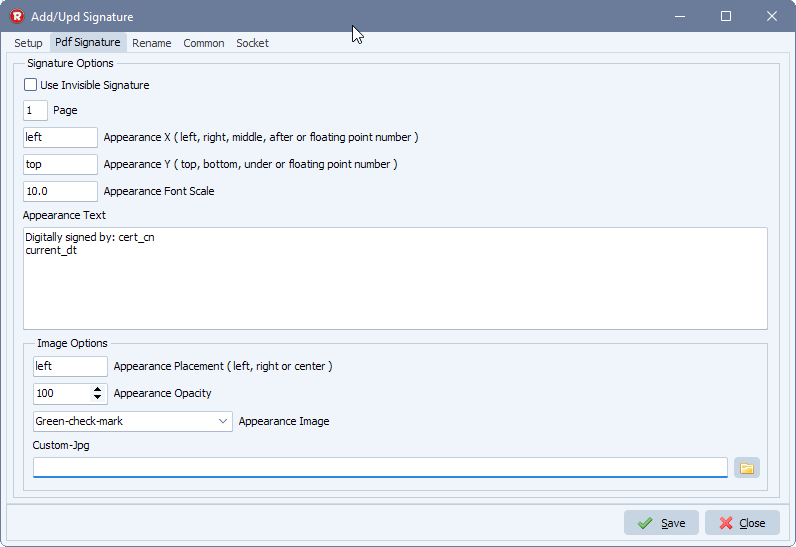
- Back to the ‘Setup’ tab and select ‘Appearance of the PDF signature’ in the Action list and ‘Pdf Signature’ Tab.
We used the ‘Image options’ to add a green check mark at the left side of the signature. We have a couple of built-in graphics available but also a custom JPG is possible.
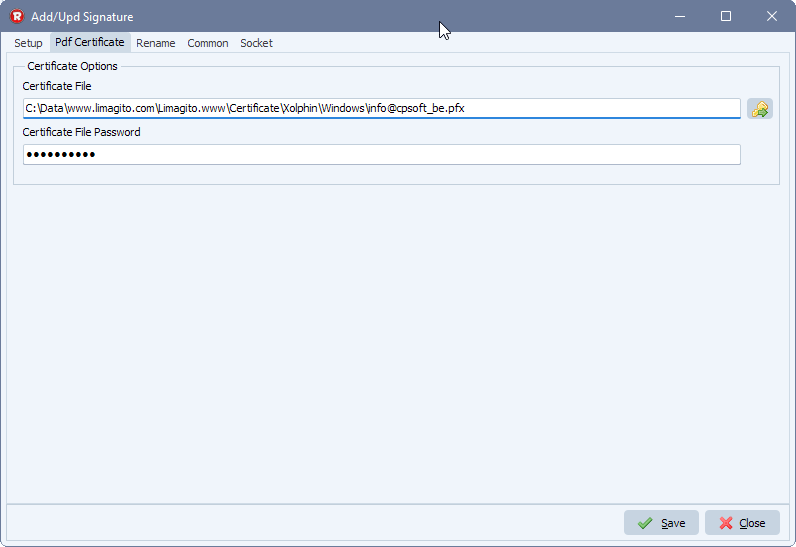
- Back to the ‘Setup’ tab and select ‘Load certificate for PDF signing’ in the Action list and ‘Pdf Certificate’ Tab.
We are using a .pfx file which is a combined certificate and private key file type.
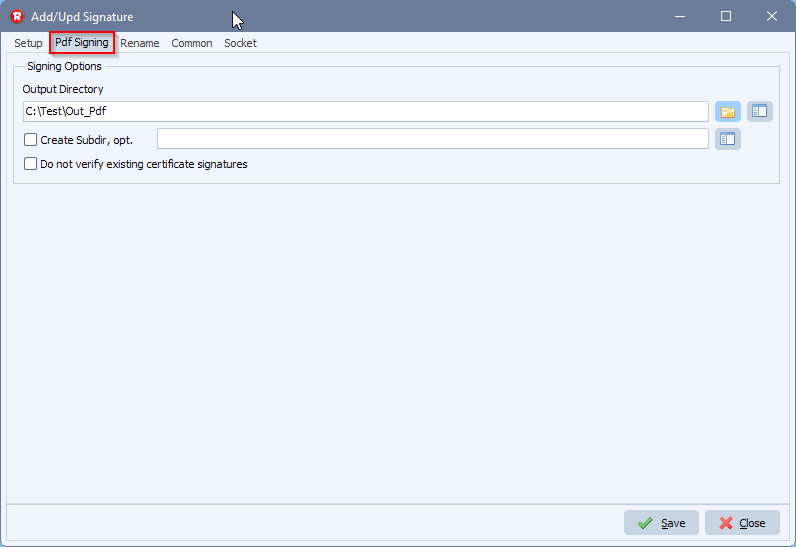
- Back to the ‘Setup’ tab and select ‘Sign and save the PDF’ in the Action list and ‘Pdf Signing’ Tab.
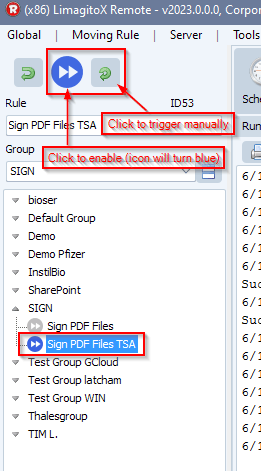
- Next we enabled the Rule and triggered it manually:
- Result of the RunTime Log:

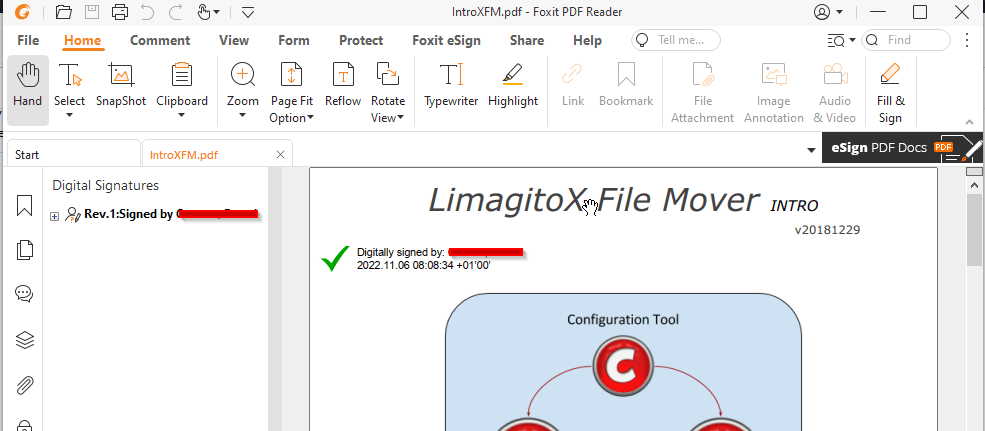
- Signed PDF result:
We have added quite some options already but we are open to new ideas. Please let us know if you need any help.
#FileTransfer #pdf
Best regards,
Limagito Team