• 26 Jul

    Why Change Notify Isn’t Picking Up All Files

    Q: Change Notify Isn’t Picking Up all files. When using Change Notify we are running into an issue where 1 file is not being moved until other files are added.  Here is example:
    1.  10 files are added to a folder within 1 second
    2.  9 files are moved to the correct destination but 1 file doesn’t move
    3.  20 minutes pass and the same file still remain in the folder
    4.  21 minutes pass we get 10 more files placed in the folder
    5.  The 1 file that didn’t move prior will now move to correct folder along with 9 of the 10 new files added, leaving 1 file again
    Pattern repeats like this always leaving 1 file in the source folder that will not move until another batch of files arrive.
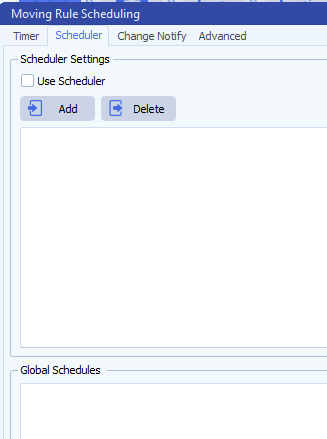
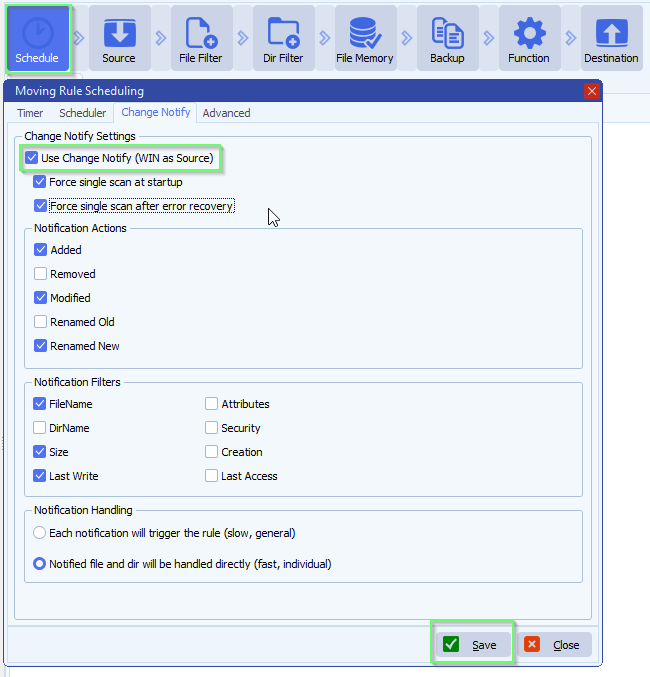
    Here is our Schedule/notify settings:
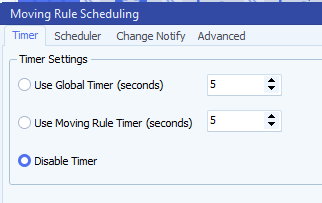
    limagito filemover scan timer setup
    limagito file mover schedule setup
    Limagito filemover Change Notify Isn't Picking Up
    Are we setting something wrong?
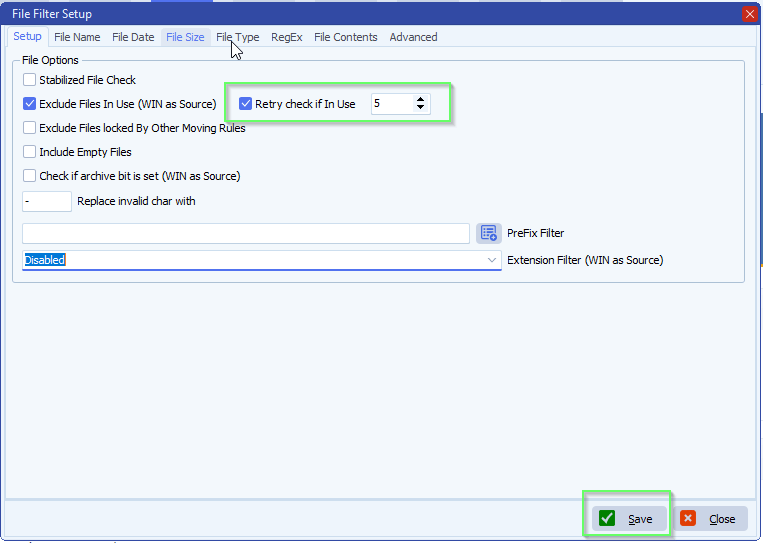
    A: Probably not, it seems the last file you are adding to the Source folder was not fully there and we tried to move it. Because ‘Exclude Files In Use’ was enabled we didn’t touch this file. In version v2026.7.26.0 we added an extra option: ‘Retry Check if In Use’. Enabling this extra option should fix your issue when ‘Exclude Files In Use’ is enabled together with Change Notify as trigger.
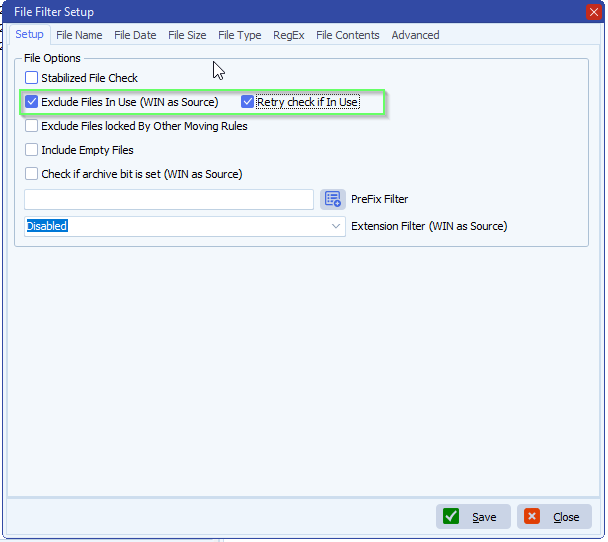
    limagito file mover file filter setup
    If you need any help about this ‘Change Notify Isn’t Picking Up’ question, please let us know.

    Best Regards,

    Limagito Team

    #changenotify #managedfiletransfer #filetransfer #filemanagement #limagito
    By Limagito-Team Change Notify
  • 05 Jul

    How to configure Amazon S3 in Limagito file mover

    Configure Amazon S3

    Steps in AWS Console

    1. Log in to the AWS Management Console (console.aws.amazon.com)
    2. Go to IAM (Identity and Access Management) — search for it in the search bar at the top
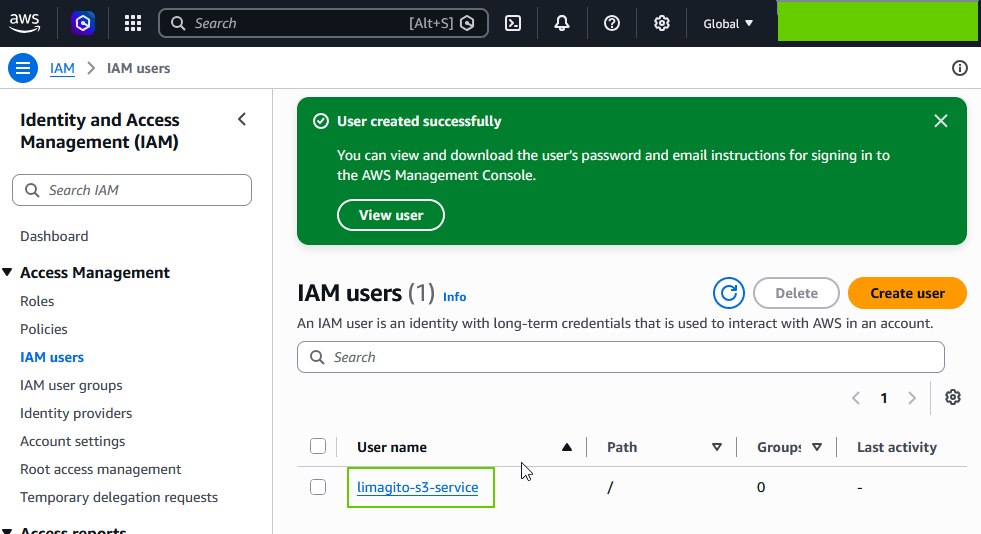
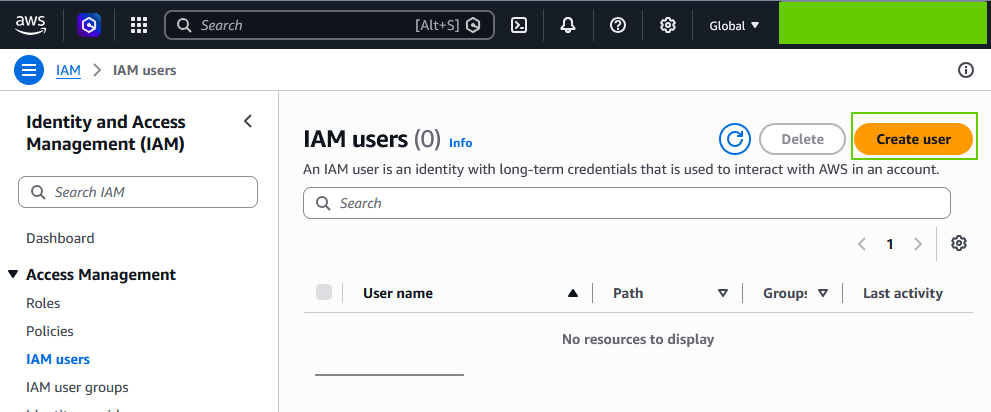
    3. Click on IAM users on the left
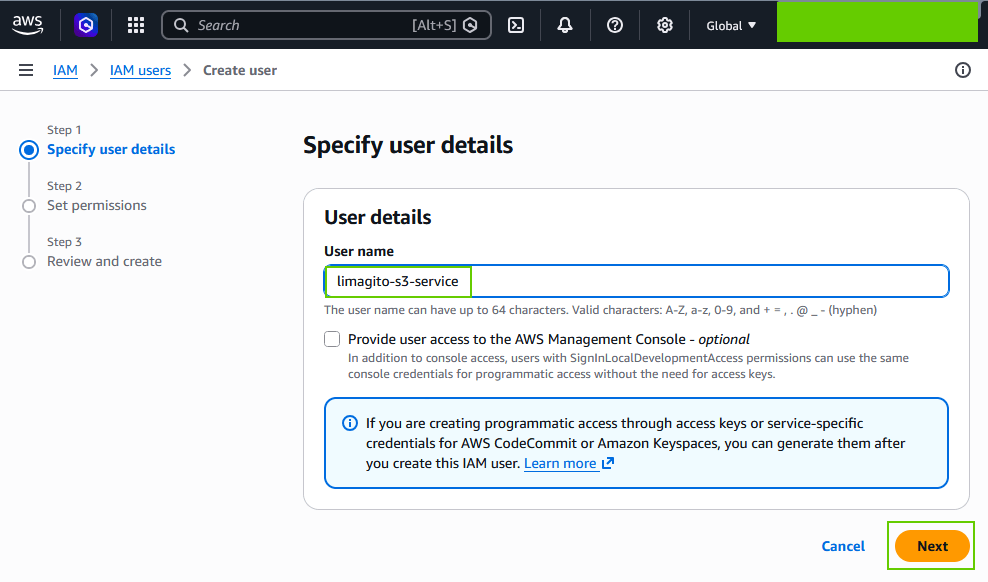
    4. Choose an existing user, or create a new one (Add users) specifically for your filemover tool
      • Give it a clear name, e.g. limagito-s3-service
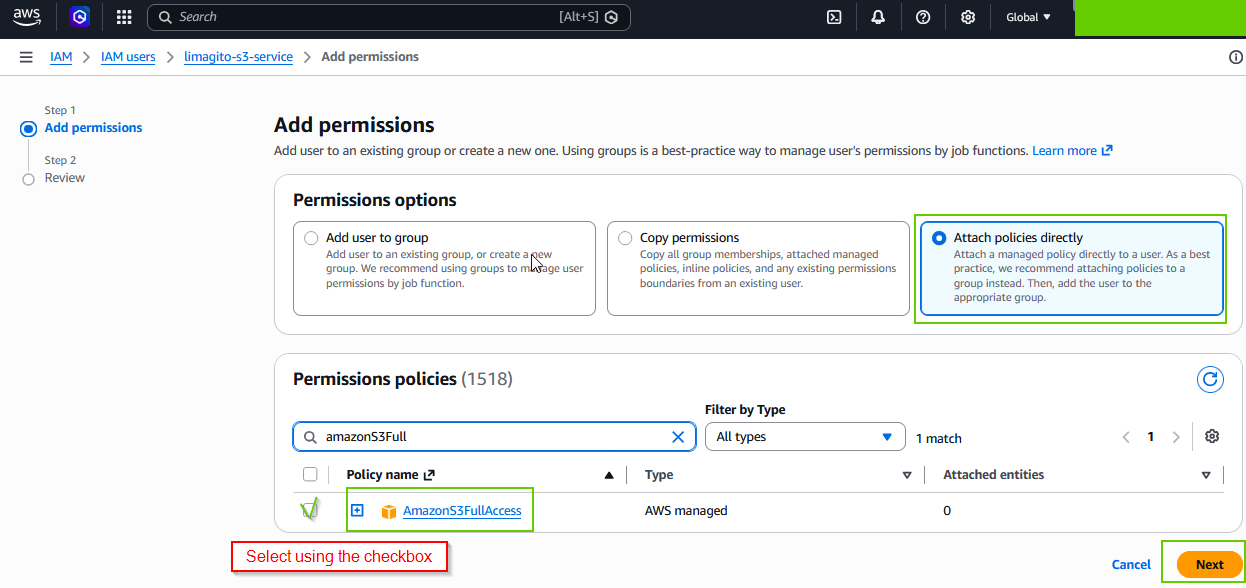
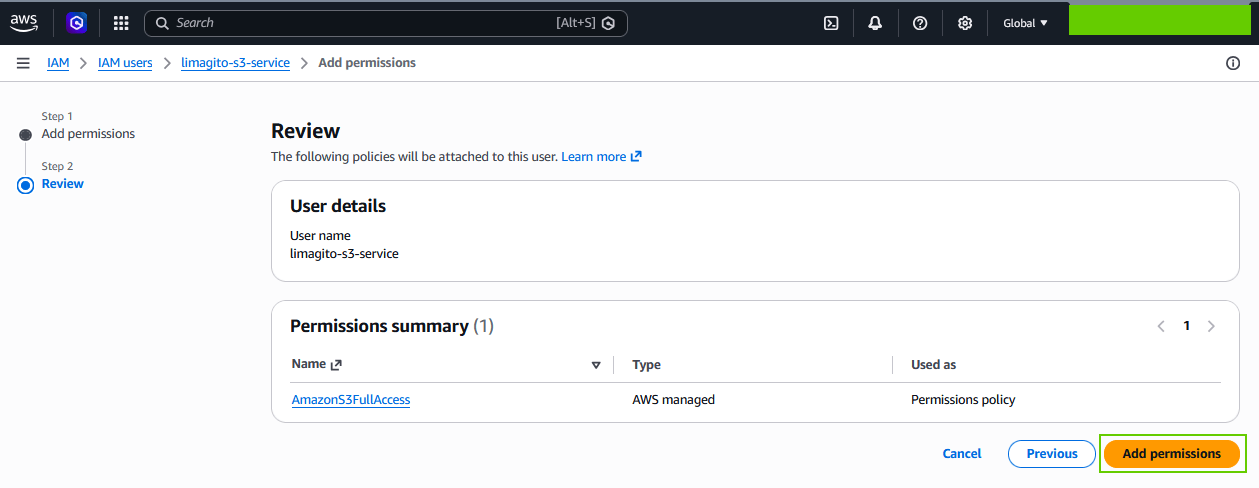
      • Under “Set permissions” we used AmazonS3FullAccess during our tests, or better yet a custom policy that only grants access to the specific bucket you need (safer, principle of least privilege)
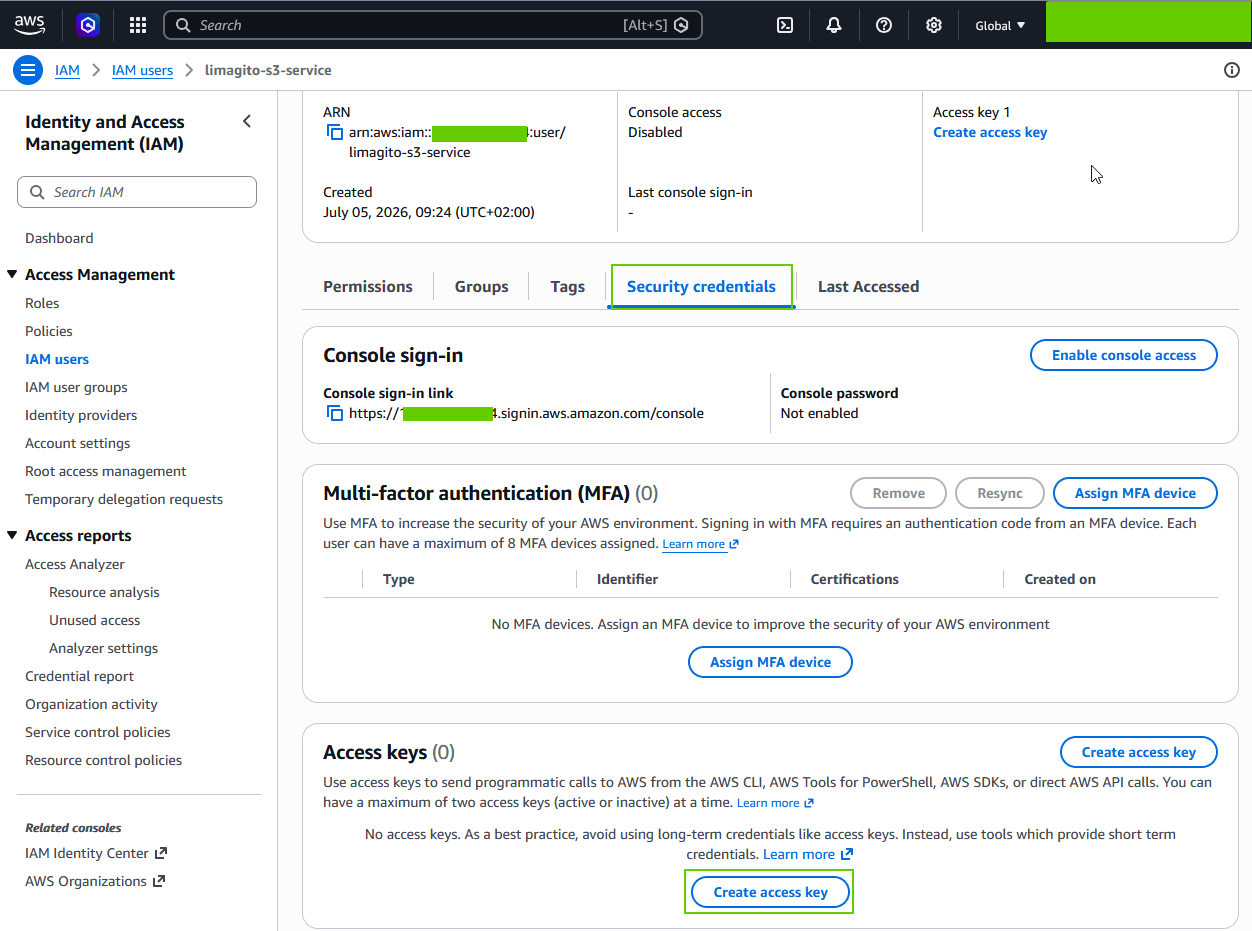
    5. Go to the Security credentials tab of that user
    6. Scroll to Access keys → click Create access key
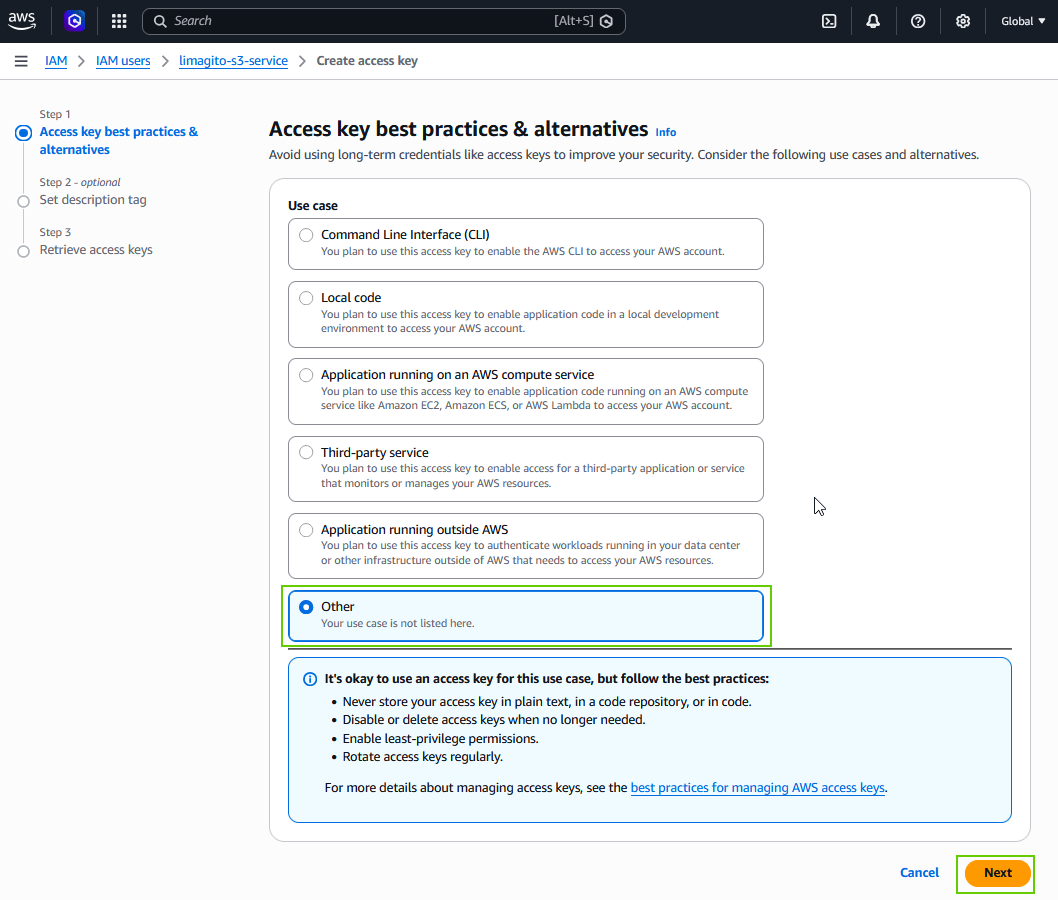
    7. Choose “Other” as the use case
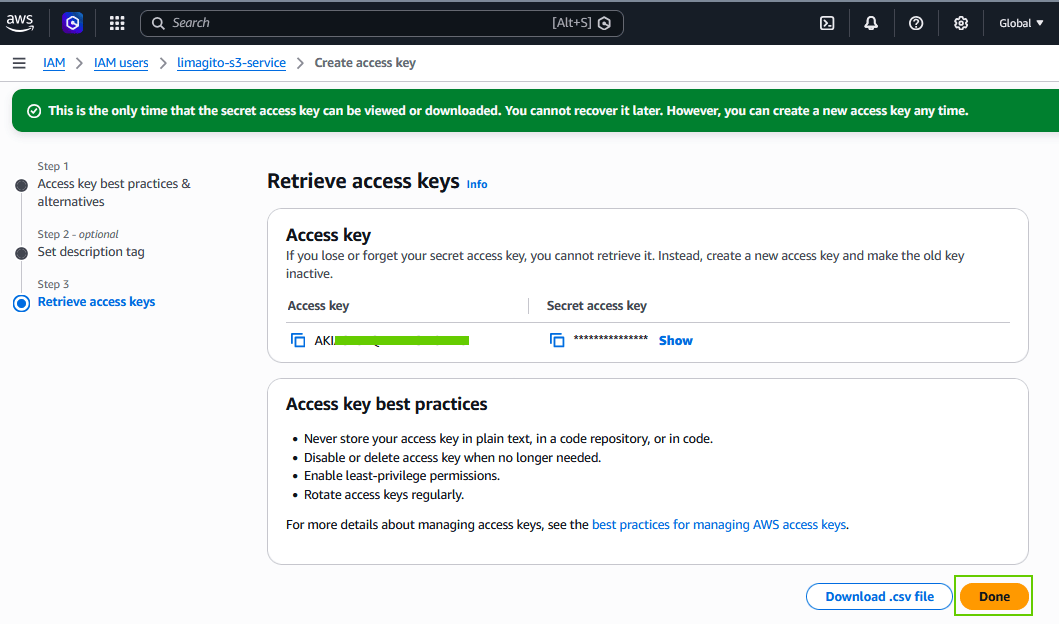
    8. AWS will then show you:
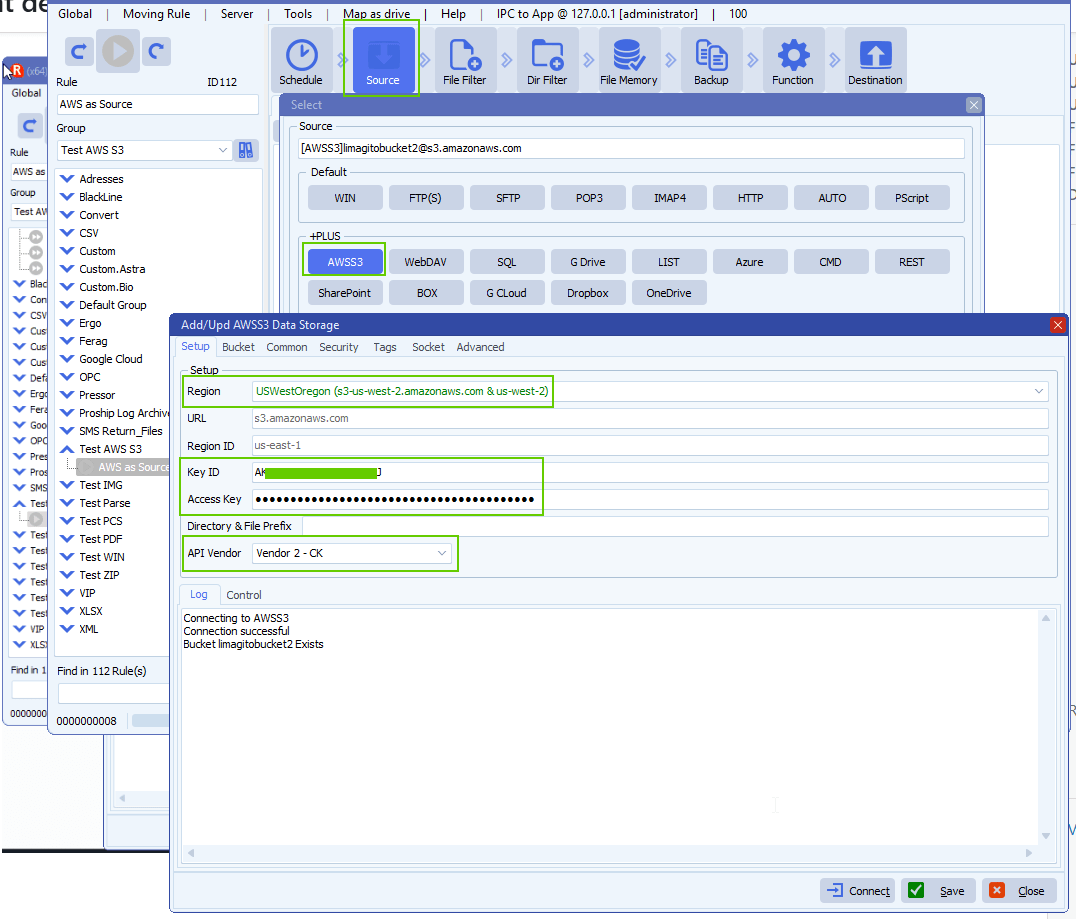
      • Access Key ID → enter this in Key ID in your tool
      • Secret Access Key → enter this in Access Key in your tool ⚠️ Important: the Secret Access Key is only shown once. Copy it immediately, or download the .csv file AWS offers. If you lose it, you’ll need to create a new key.

    Some screenshots form our test setup:

    limagito filemover amazon S3 IAM user setup

    limagito filemover amazon s3 IAM users setup


    • We used AmazonS3FullAccess during our tests, or better yet a custom policy that only grants access to the specific bucket you need (safer, principle of least privilege)

    limagito filemover IAM users permissions setup

    limagito filemover amazon s3 iam users permissions setup

    • User created successfuly

    limagito filemover amazon s3 IAM users setup

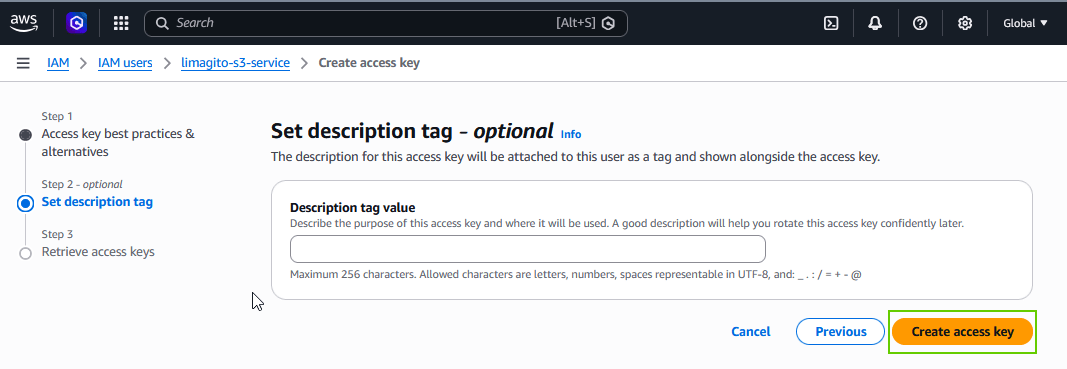
    • Create Access Key within “Security Credentials” setup:

    limagito filemover amazon s3 IAM users security credentials setup

    limagito filemover amazon s3 IAM users security credentials setup

    limagito filemover amazon s3 IAM users security credentials setup

    • Done

    limagito filemover amazon s3 IAM users security credentials setup

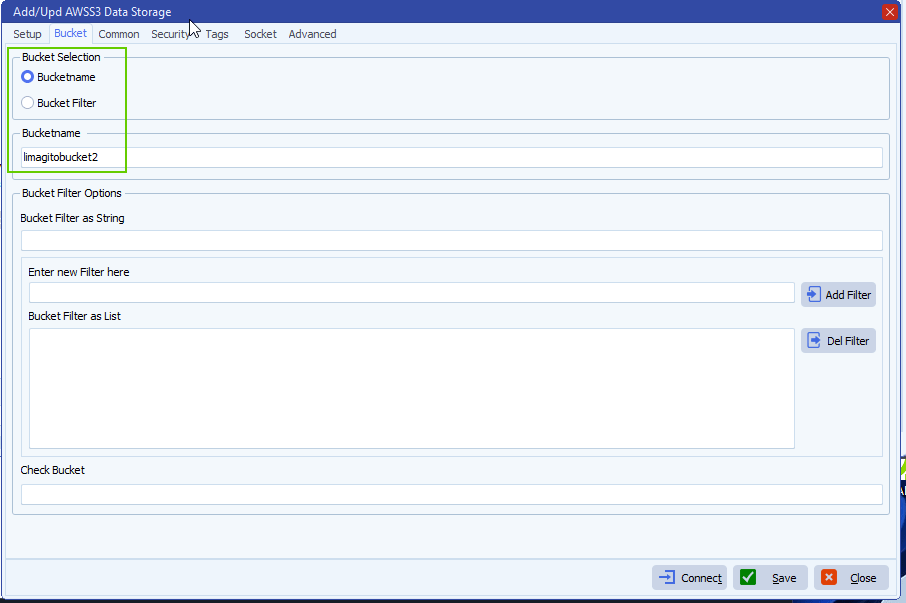
    • Limagito Filemover AWSS3 setup:

    limagito filemover amazon S3 configuration setup

    limagito filemover configure Amazon S3

    If you need any help about this ‘configure Amazon S3’ how-to, please let us know.

    Best Regards,

    Limagito Team

    #amazons3 #awss3 #managedfiletransfer #filetransfer #filemanagement #limagito
    By Limagito-Team AWS S3 , ,
SEARCH