Q: Connecting to Office 365 email using IMAP and OAuth2 authentication.
Wir versuchen gerade mit Limagito eine Verbindung zu einem MS Office 365 Email Postfach herzustellen und scheitern an der OAuth2 Authntifizierung. Wir wissen nicht genau was alles in die Felder muss.
A: Best to use a more recent version since we did quite some code changes for IMAP4 as Source and OAuth2 authentication in version v2021.8.5.0 to make it easier to connect to MS Office 365.
Important: Setup your App Registration in Azure beforehand. Here are the steps:
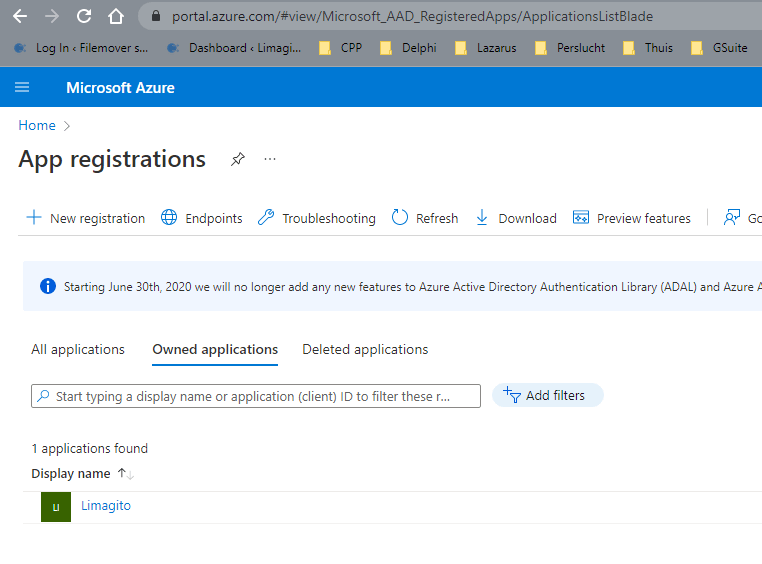
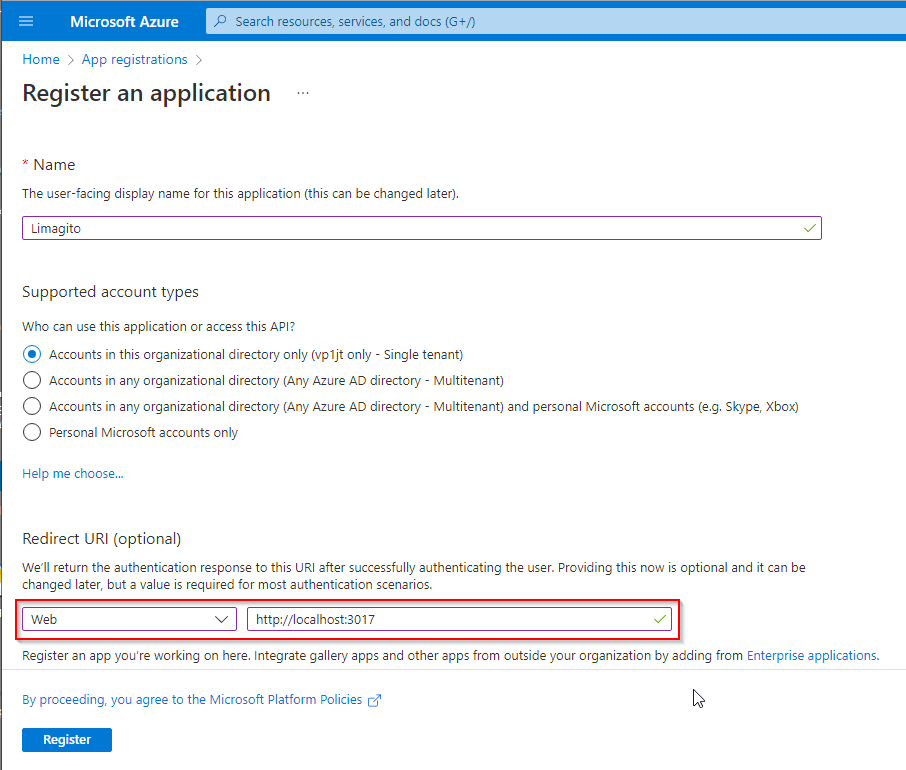
1) In the Azure portal, go to Azure Active Directory. In “App registrations” create a “+ New registration”.
2) Register the app with Redirect URI = “http://localhost:3017”.
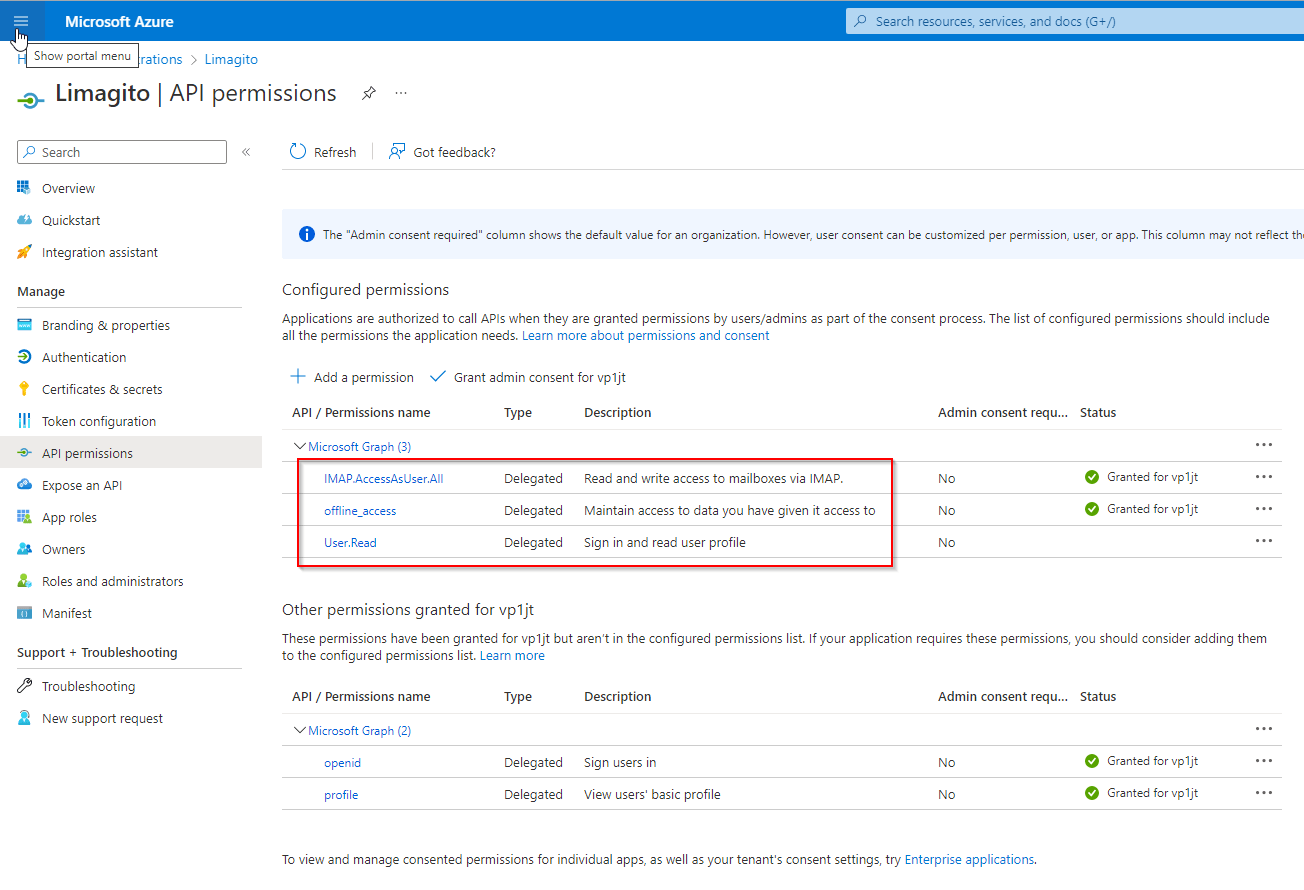
3) Goto “API permissions” to add permissions. For this OAuth2 authorization flow, we’ll add “Delegated permissions”.
4) Add IMAP.AccessAsUser.All and offline_access permissions.
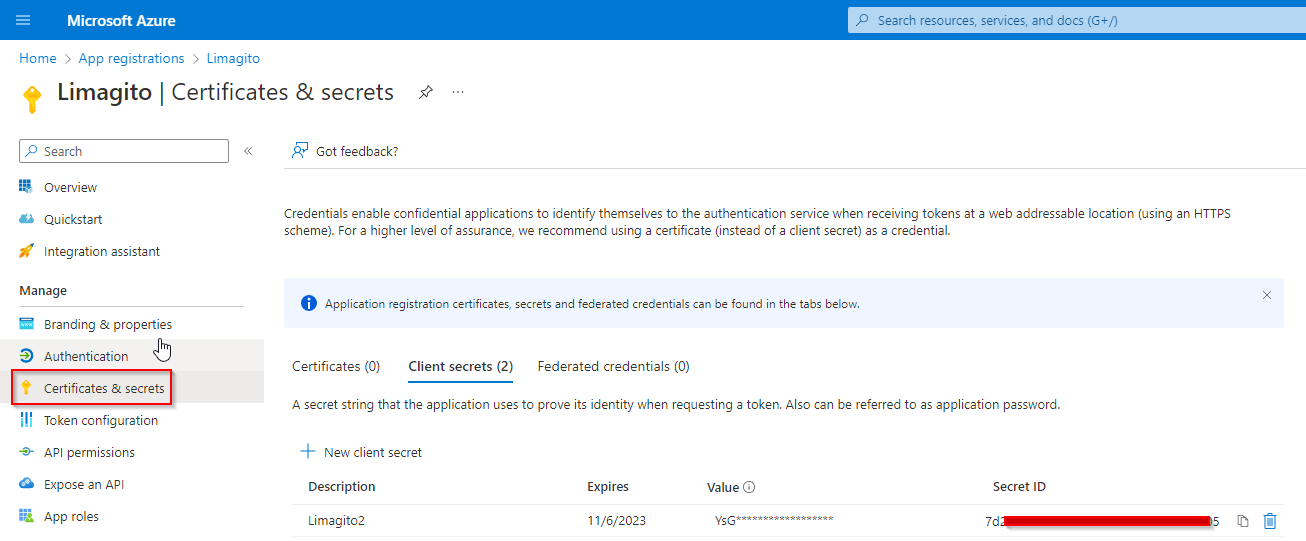
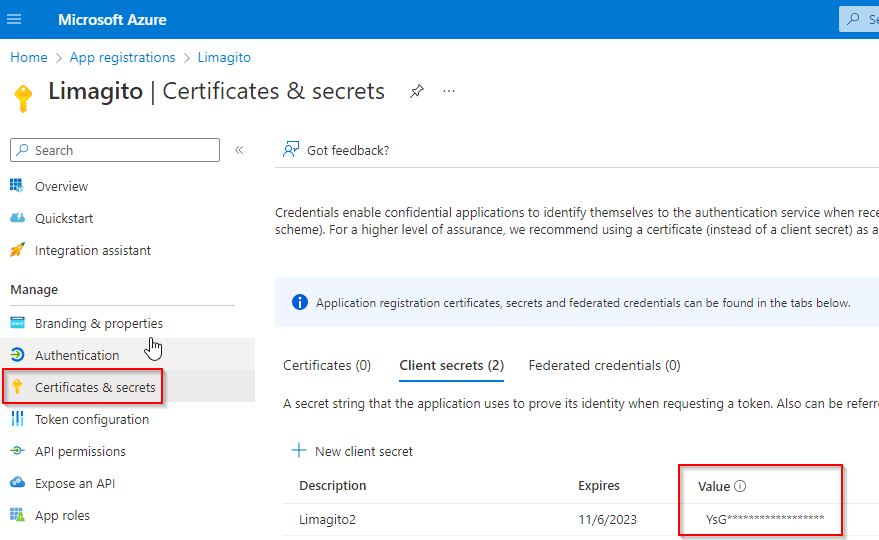
5) Go to “Certificates & secrets” and add a new client secret.
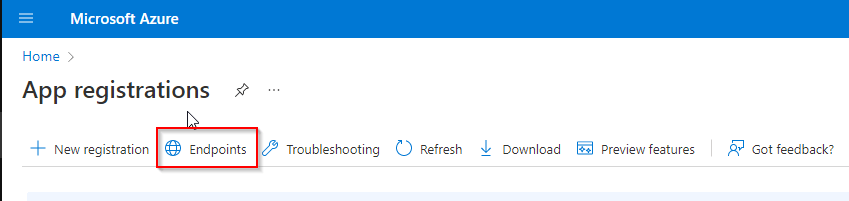
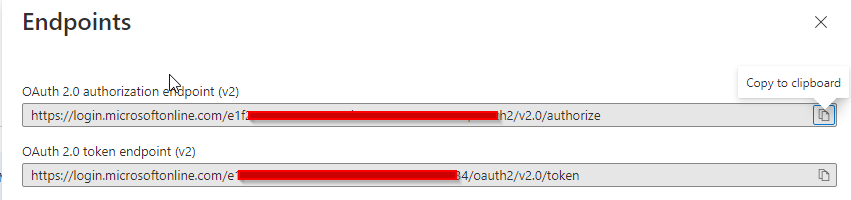
6) In “App registrations”, go to “Endpoints” (located to the right of the “+ New registration” link. Note your endpoints for “OAuth 2.0 authorization endpoint (v2)” and “OAuth 2.0 token endpoint (v2)
7) Also, just in case, go to your Microsoft 365 admin center (this is not Azure). Go to your Active users. Click on a user to find the “Manage email apps” link. See Microsoft 365 Manage Email Apps
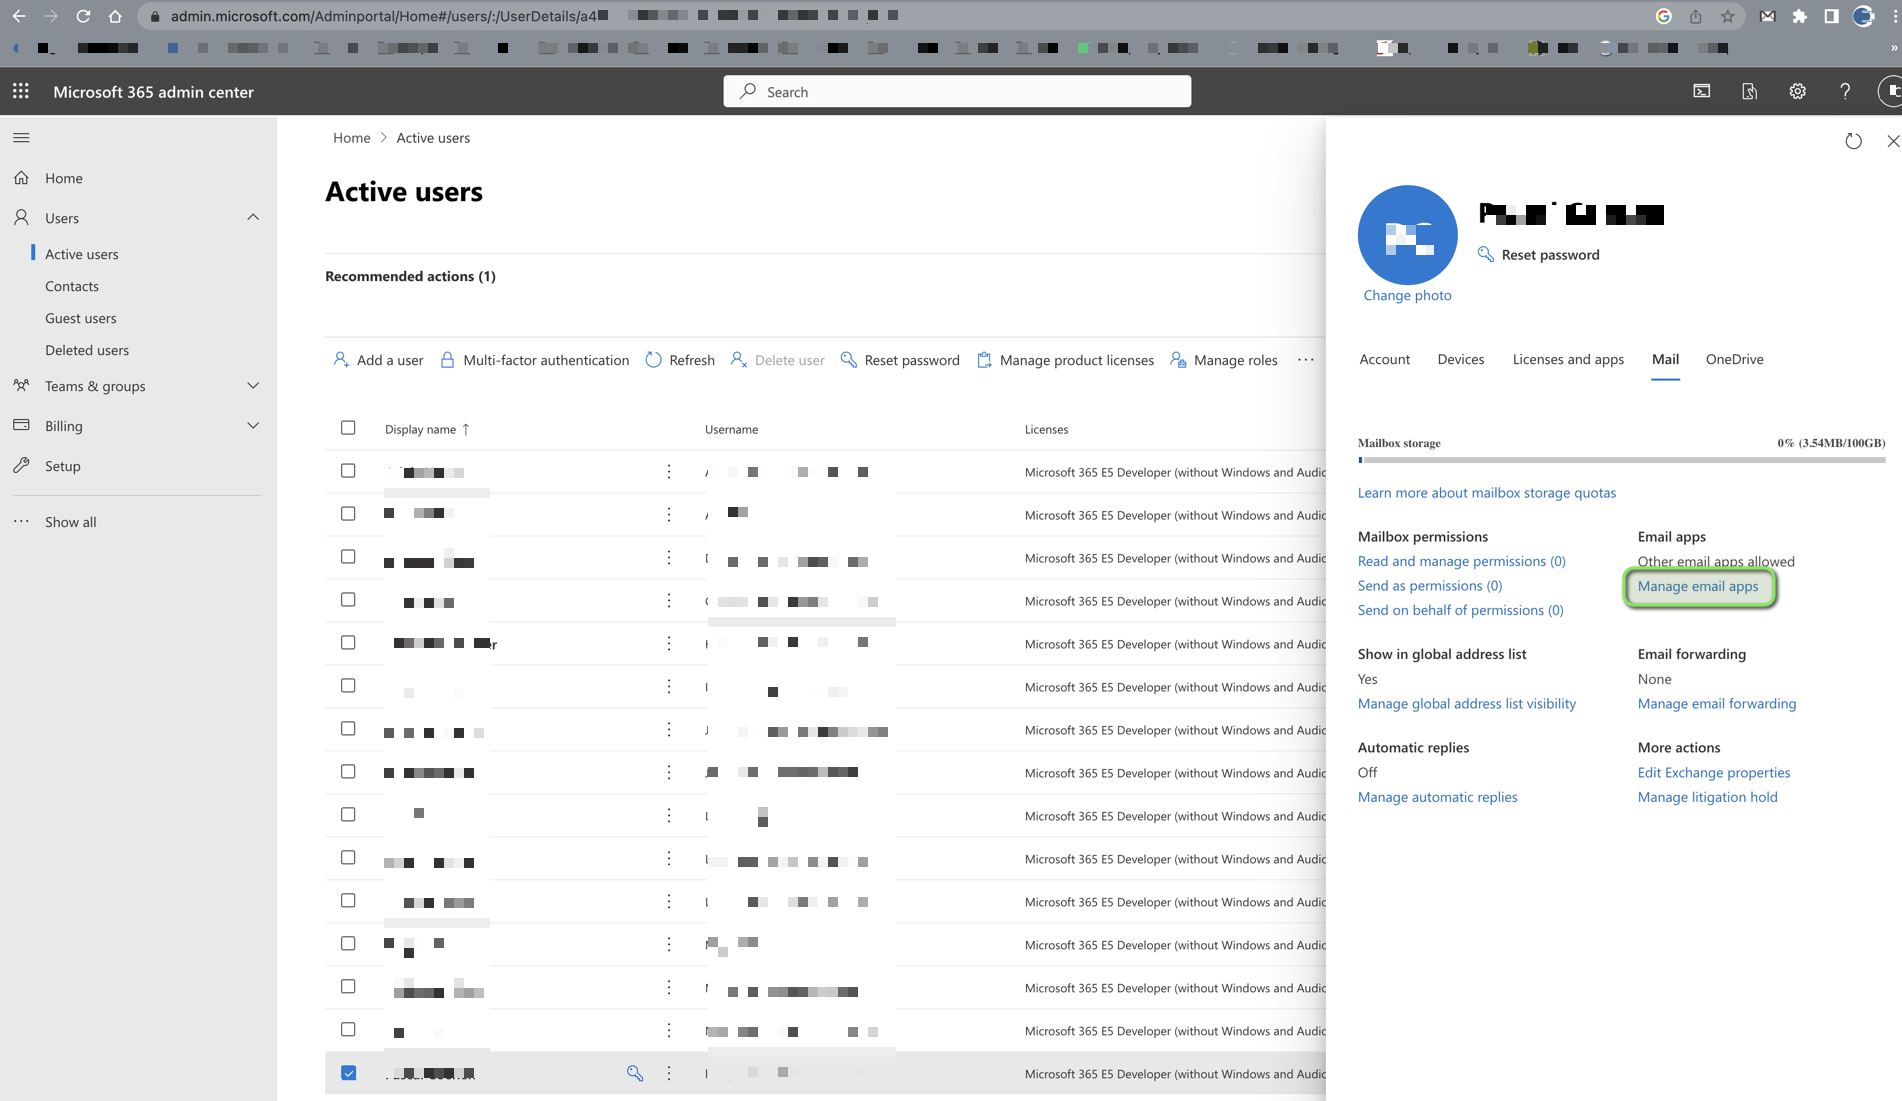
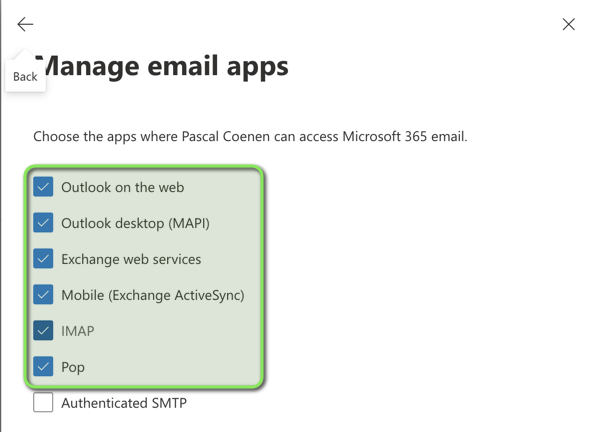
8) Click on “Manage email apps”. Then make sure the “IMAP” checkbox is checked.
Next, configuration of our File Mover:
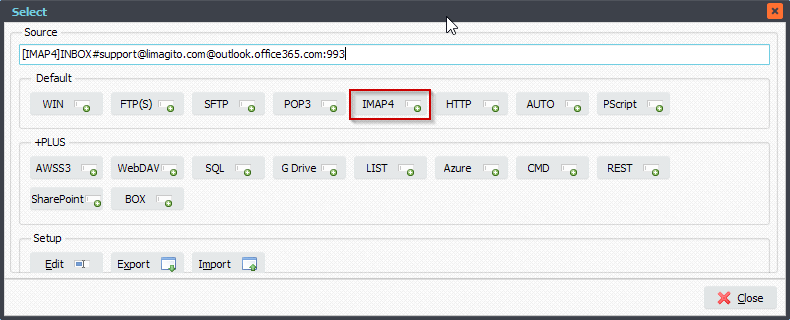
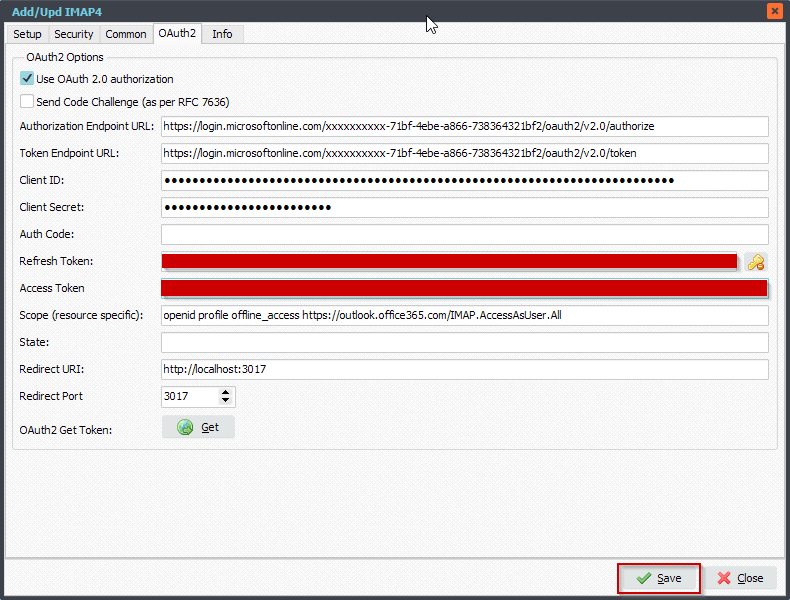
- IMAP4 Setup. Be sure to select our second API Vendor: ‘Vendor 2 – CK’.
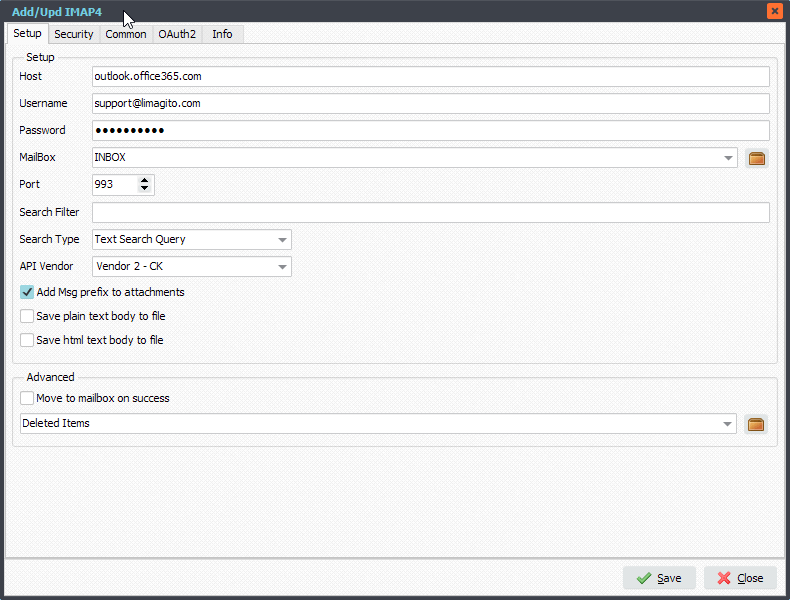
- IMAP4 Security Setup (please use version v2021.8.5.0 or higher).
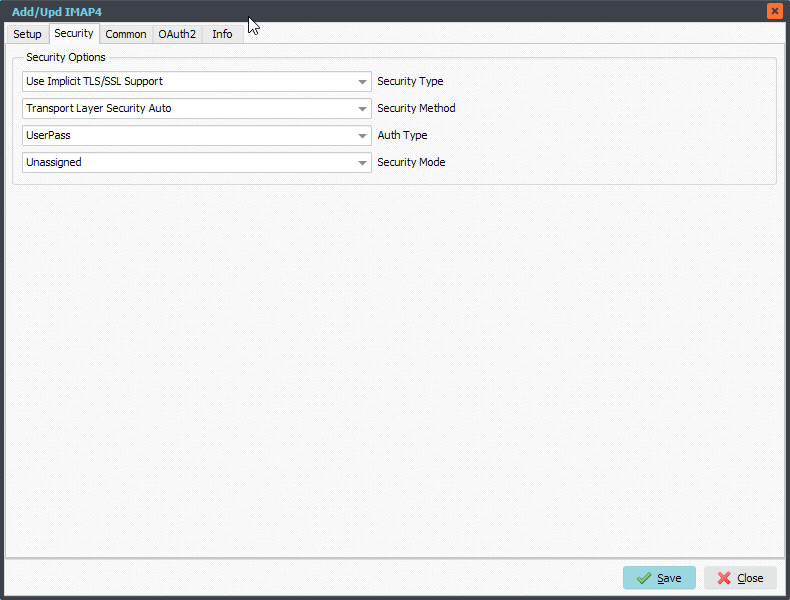

1) Fill in the correct Authorization and Token Url
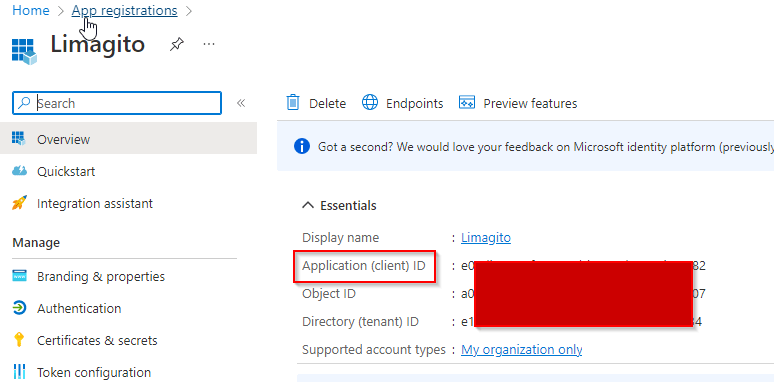
2)Enter Application Client ID and Client Secret Value
3) Adjust your scope to: openid profile offline_access https://outlook.office365.com/IMAP.AccessAsUser.All
- Provide a SPACE separated list of scopes.
- Important: The offline_access scope is needed to get a refresh token.
4) Set Redirect URI to: http://localhost:3017/
5) Set Redirect Port to 3017
- This should be the port in the localhost callback URL for your app.
- The callback URL would look like “http://localhost:3017/”, if the port number is 3017.
- The redirect must go to http://localhost:/. It must be localhost, and it cannot be “https”.
Next, click on the <GET> button.
Should ‘Windows Defender’ popup, please <Allow access>.

Your browser will open and ask you for ‘Confirmation’.
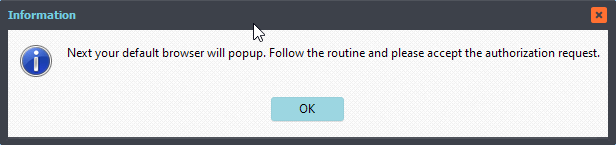
Follow the routine in your browser and accept the authorization request.
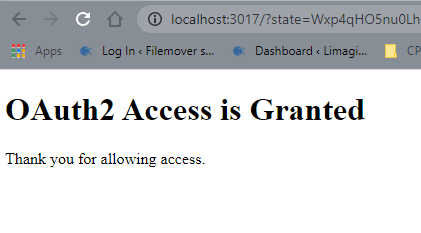
Now you can close the browser. The ‘Refresh’ and ‘Access’ Token in the IMAP4 OAuth2 Setup should contain values. Click <Save>.
The IMAP as Source configuration is finished. Just add a Destination and you are ready to go.
If you need any help with this ‘Office 365 email using IMAP’ request, please let us know.
Some extra information: ‘Explaining OAuth2 Authentication’.
The OAuth2 Get Token button does a couple of things:
- It starts the OAuth2 Authentication process.
- Returns a URL that should be displayed in a browser.
- Starts a background thread to receive the redirect callback from the browser.
The flow of control is like this:
- The browser (popped up and displayed by our file mover) automatically navigates to the URL provided by Start Authentication.
- The user interactively authorizes the access. In doing so, the response sent back to the browser is a redirect to http://localhost:<someport>/
- The browser receives the response, and redirects to the http://localhost:<someport>/
- The background thread (= temporary HTTP server using <someport>) is the thing that is listening at and receives the response, and then your OAuth2 is completed.
The redirect must go to http://localhost:<someport>/. It must be localhost, and it cannot be “https”. If you defined your application’s redirect URL to a web address such as “https://yourdomain.com/something…”, then the background thread is just sitting there waiting for the callback, which never happens (because it went to your web server).
Note 1: For Microsoft API’s such as for OneDrive, make sure that your App on Microsoft Developer Dashboard, inside Authentication, Redirect URIs, set the app type to Web (not public client). Your desktop app is acting as a web server when receiving the single redirect request.
Note 2: We used the Scope needed for IMAP. Other examples are:
- openid profile offline_access https://outlook.office365.com/SMTP.Send
- openid profile offline_access https://outlook.office365.com/POP.AccessAsUser.All
#FileTransfer
Best Regards,
Limagito Team