pfx

  • 30 Sep

    How to send signed emails using PFX File

    In version v2023.9.30.0 we added an option to send signed emails.

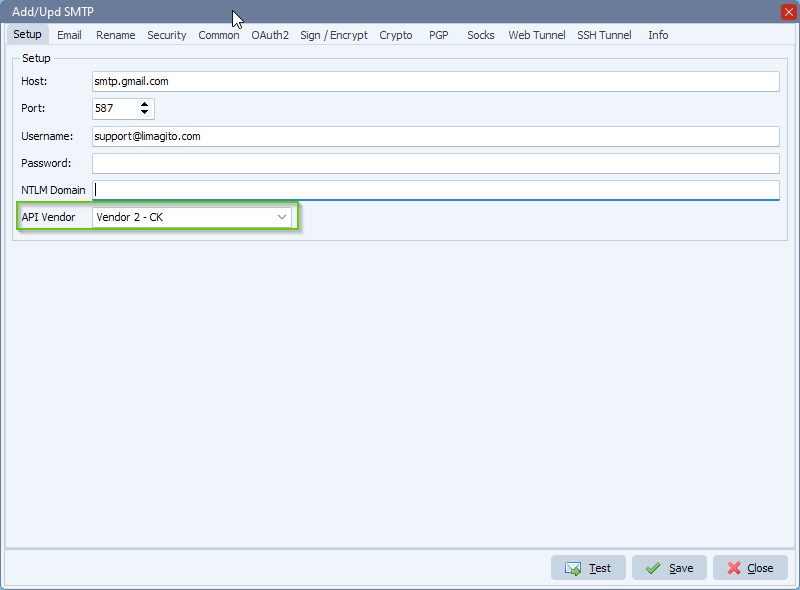
    • Open the SMTP as Destination option. The “Sign / Encrypt” tab is only available when our second API vendor CK is selected.  This option is also available in the Rule Events Email option.

    limagito file mover smtp as destination

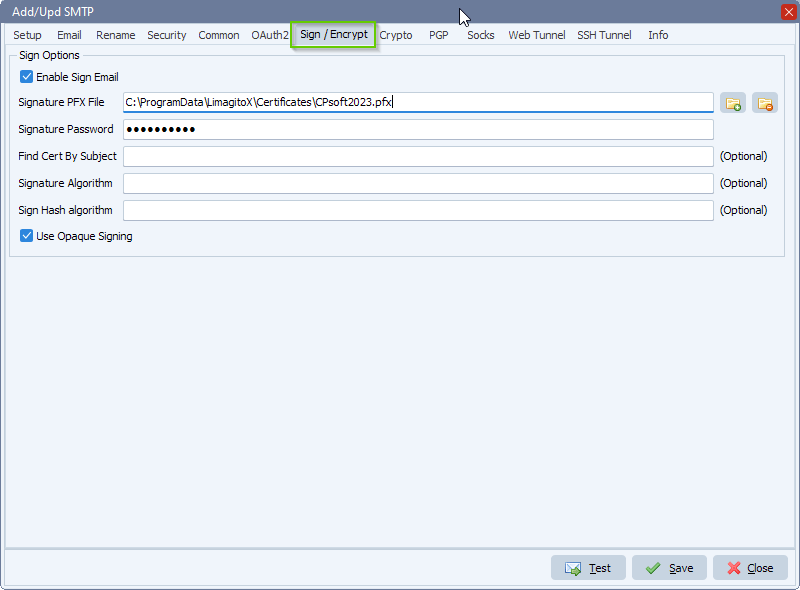
    • Select “Sign / Encrypt” tab:
      • Signature PFX File: The PFX file to be used as source for locating the certificate and private key required for signing.
      • Signature Password: The PFX file’s password
      • Find Cert By Subject (optional): Finds a certificate where one of the Subject properties (SubjectCN, SubjectE, SubjectO, SubjectOU, SubjectL, SubjectST, SubjectC) matches exactly (but case insensitive) with the passed string. A match in SubjectCN will be tried first, followed by SubjectE, and SubjectO. After that, the first match found in SubjectOU, SubjectL, SubjectST, or SubjectC, but in no guaranteed order, is returned. All matches are case insensitive.
      • Signature Algorithm (optional): Selects the signature algorithm to be used when sending signed (PKCS7) email. The default value is  PKCS1-v1_5  . This can be set to  RSASSA-PSS  (or simply  pss  ) to use the RSASSA-PSS signature scheme. Note: This property only applies when signing with an RSA private key. It does not apply for ECC or DSA private keys.
      • Sign Hash Algorithm (optional): Selects the underlying hash algorithm used when sending signed (PKCS7) email. Possible values are  sha1  ,  sha256  ,  sha384  ,  sha512  ,  md5  , and  md2  .
      • Use Opaque Signing:  When enabled, a signed email is generated as signed-data. When disabled, a signed email is generated as multipart/signed. A multipart/signed email is such that the signature is contained in a separate MIME body part and the original content of the email is not encapsulated within the signature. A signed-data email is such that it’s non-multipart MIME (content type is “application/pkcs7-signature”) and the original email is encapsulated within the signature.

    limagito file mover send signed email

    If you need any info about this ‘send signed emails’ option, please let us know.

    #email #smtp #filetransfer #filemanagement

    Best regards,

    Limagito Team


    By Limagito-Team Email SMTP ,
  • 27 May

    Web Remote Client SSL option

    Dear Users,

    We’ve added SSL (HTTPS) to our Web Remote Server.  To enable SSL you need to provide 3 certificate files:

    • (Public) Certificate File: This file contains the certificate public key part.
      So everything between and including these two statements:
      —–BEGIN CERTIFICATE—–
      —–END CERTIFICATE—–
    • (Private) Key File: This file contains the private key part.
      So everything between and including these two statements:
      —–BEGIN PRIVATE KEY—–
      —–END PRIVATE KEY—–
    • (Public) Root Certificate File: The final file that SSL requires is the Certificate Authority certificate file.
      You can obtain this from the Internet Explorer in Trusted Root Certificate Authority dialog.
      Select the Authority that issued your certificate and export it in Base64 (cer) format.
      This format is also the same as PEM format so after export simply rename the file to root.pem

    The type of certificates we need are .pem files.  The PEM extension is used for Base-64 encoded X.509 certificates. They contain ASCII armored data between “—– BEGIN …”  and “—–END …” lines. Sometimes the certificates come in a single pem file. In this case, you need to open it with a text editor and save the individual certificates in separate pem files.

    Certificates can be obtained from a trusted certificate authority. You can also generate your own but the browser will not trust this and will display a warning.

    If you have a certificate in .pfx format, you’ll have to convert it first. In this case we need a utility called openssl.exe.  First, download and install the OpenSSL Windows binaries from here (at you own risk). 

    • Start a command prompt with administrative privileges
    • At command prompt issue the following command:
      • openssl.exe pkcs12 –in <your file>.pfx –out <your file>.pem

    Openssl.exe will ask you for the password of the pfx file. Leave it blank if you did not specify one. It will also ask you for a new password for the .pem file (= optional). The certificates are converted to single pem file. You need to open the converted pem file with a text editor and save the individual certificates in separate pem files.

    Also online certificate conversions are available:

    Web Remote Setup is available in our LimagitoX Config Tool.

    Regards,

    Limagito Team

    By Limagito-Team Remote Tool , , ,
SEARCH